The Mobile and Web platform allows you to create a rich and interactive communication platform for your audience. This guide provides directions on how to set up your Korbyt Anywhere Mobile, Web, and Email service and start communicating with your audience. This article covers many of the common steps to set up your system, and is not meant to be exhaustive to everything Korbyt can do.
Guide Agenda
Click on a Section or Scroll Down Through the Steps
.
Logging In
- To log into the Korbyt Anywhere Content Management System (CMS) navigate to Korbyt.com/login
- Chrome or Edge web browser are required for full functionality
- Enter your email address and password
- Or use the SSO service configured for your tenant
- When you login you will be viewing the dashboard for your service
- Navigation in the system is done through icons at the top of the screen
Navigating the Mega Menu
![]()
- The Hamburger ICON in the upper left opens the Mega Menu
- Giving access to all the features and services in the account
- The Gear Icon in the upper right opens the settings menu
- Letting administrators set system wide controls like Branding and Interaction Options
- Hovering over the profile picture outline in the upper right corner will open the User Profile and the CMS User Management options
- Letting individuals set a profile picture
- Letting Administrator Manage and Add other CMS Users who can manage the system
If you need to add other CMS Users to the system the article How to Manage CMS Users will take you through those steps
.

Setting Logos, Icons, and a Color Scheme
- You can customize the Korbyt Anywhere platform to match and promote your company’s branding through the Content Management System
- This will affect the Mobile and Web experience your audience will see, not the appearance of the CMS itself
- To Set the branding for your interface Navigate to the CMS Settings by clicking the gear icon in the upper right.
- The General tab is selected by default and contains settings for branding your tenant.
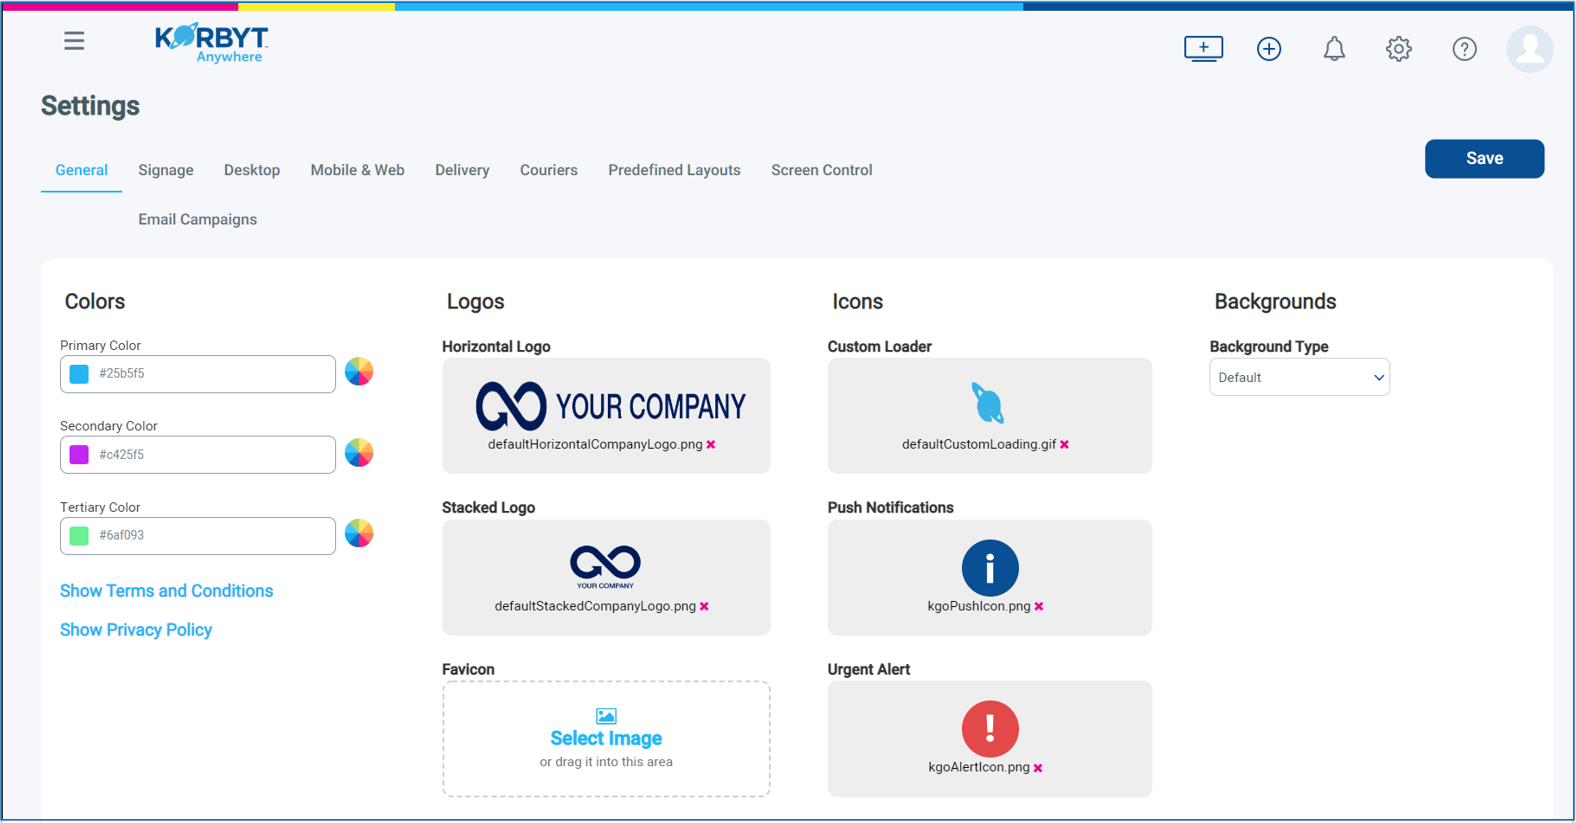
- You should set the following at a minimum to ensure that the audience understands that this is your service
- Colors: Set primary, secondary, and tertiary colors to match your brand standards or preferences
- These will be used throughout the Mobile and Web experience
- Horizontal & Stacked Logo which appears in both the Mobile and Web login screen and header
- Should be a PNG sized 120px x 60px
- More details on branding settings can be found in the following Knowledge base Articles
- Colors: Set primary, secondary, and tertiary colors to match your brand standards or preferences
Establishing User Generated Content Preferences
The Mobile, and Web system is designed with interactivity in mind, that’s why it is a best practice to enable features such as User Generated Posts and other features that will allow you audience to feel involved.
- To Set Global settings for the end user interaction Navigate to the CMS Settings by clicking the gear icon in the upper right, then select Mobile & Web
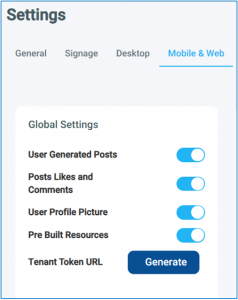
- After they have been enabled system wide they can be controlled in more detail within specific categories and posts.
- For example, Comments can be allowed in general but if a post from the HR department should not allow comments they can be disabled on that specific post
.

Adding End Users
- End Users are those who will be logging into and viewing the Mobile and Web experience. These users can be added manually one at a time, or imported using a CSV file
- End Users are different than CMS Users who log into the Content Management System
- If you are interested in having the system group users together into different audiences based on selected criteria you should first review the option User Attributes section of this guide
- To add End Users, Open the Mega Menu by clicking the hamburger icon in the upper left, then Select Users under the Users & Audiences heading
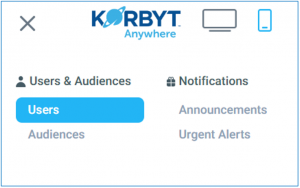
- On the Users screen you can use the Add Users dropdown to start adding users

- Adding a Single User (one at time) will require setting each users information
- Required are First Name, Last Name, and either an Email or a Username that the users will use to log into the service

- Adding users through either a One-Time Import or Scheduled Import will involved using a CSV file to fill in users information
- When you select either One-Time Import or Scheduled Import a dialog box will open which will allow you to download a template that will have columns identified for where specific information is filled in
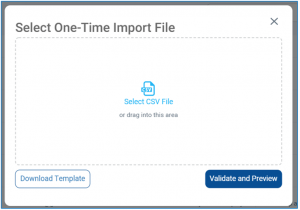
- You can then upload your completed CSV File, Validate and Preview, and then Import your Users
- For more detailed information please visit these Knowledge Base Articles
- If you are interested in defining your users into separate Audiences you should look at the Optional Steps in this guide for Creating User Attributes and Creating Audiences
Creating Categories (Optional in general, but required to allow User Generated Content)
- Categories group posts together based on the type of post they are
- For example, a Sales Enablement Category that groups together sales tips and strategies
- Categories is where End Users Generated Content can be allowed to post to
- Continuing our previous example, allowing End Users to submit their own sales tips
- This User Generated Content can be set require an audit and approval before being posted, or automatically post to the category
- End Users can only create posts that go to specific allowed Categories
- The Knowledge Base Article – Creating Categories – will take you through the steps of creating a category
.

Composing a Post
- CMS Users can create Newsfeed posts with more control than an end user can submitting content through their Mobile or Web experience
- To create a Post through the CMS Start by click the Plus sign in the upper right, this is a short cut to the Add Post options
![]()
- This will take you to the Add Post options where you can compose the item
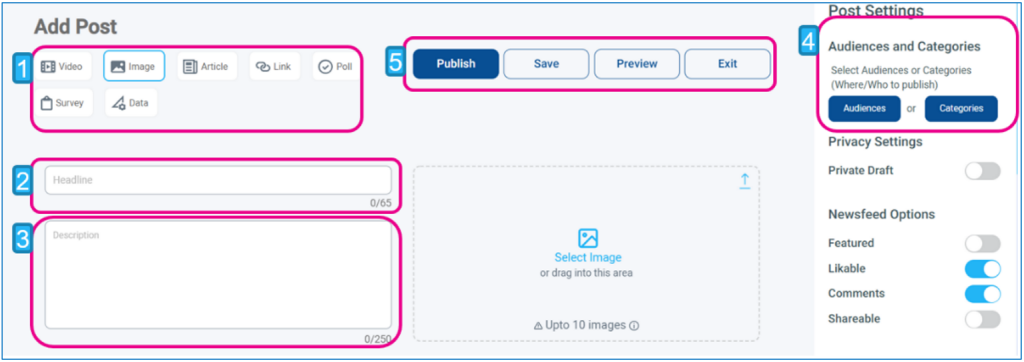
- 1 – Select your Post Type (required)
- Depending on the post type you select there will be different fields that become available
- 2 – Create the Post Headline (required)
- All Post types need a Headline or Title
- 3 – Create a post description (optional)
- All Post types have an optional description section that will be viewable in the Newsfeed along with the title
- 4 – Select and Audience or Category for the Post to publish into (required)
- If you have not taken the step to create Categories you will be posting to the Global Audiences
- Click the Audiences button
- Then check the Global Audience box

- If you have created Categories you will be able to publish the Post to those specific areas instead of to the Global Audience
- If you have not taken the step to create Categories you will be posting to the Global Audiences
- 5 – Publish / Save / Preview / Exit
- At anytime you can save the Post as a draft and return later
- Before you click Publish you may want to examine your Publishing Options
Publishing Options
In the Post Settings, below setting the Audience/Category there are several other options that can define how the post is published
| Setting | Description |
|---|---|
| Private Draft | Saves the post as a private draft. CMS users won’t be able to see it. The post will only be visible to you until you choose to disable private draft or publish the post. |
| Featured | Displays the post in the featured section with the Korbyt Anywhere mobile app and web interface. In the Korbyt Anywhere mobile app, users will see all featured posts that are targeted to them and any posts that are in a subscribed category. In the Korbyt Anywhere web interface, users will see the four most recently featured posts that are being targeted to them and any posts that are in a subscribed category. |
| Likable | Displays a heart icon |
| Comments | Displays a comment icon |
| Shareable | Displays a share icon |
| Translatable | Gives users the ability to translate the post to other languages. |
| Author Selection | Gives users the ability to designate an author for a particular post. This may not be the person who initially created the post. |
| Label Option | Draws more attention to a post. |
| Schedule | Specifies a start and end date for the post based on a specific timezone. |
| Tags | Allows you to organize your content for future analysis. Keep in mind these are not post tags so they will not carry through to the end user experience for the Korbyt Anywhere mobile app or web interface. |
| Promote | Allows you to send an email or push notification to users when you publish new posts. |
- These Knowledge Base articles provide more detail on create a post
.

- Once you have set up your Mobile and Web service and you are ready to have your end users start using the platform the following articles will help them understand how to log into and interact with the service
- If you have enabled User Generated Content, you users can submit post following these steps
.

Creating User Attributes (Optional)
- Creating User Attributes in the settings allows you to apply those attributes to your end users when they are loaded into the system, and you can then create an audience of users based on that attribute rather than manual selection
- This step is optional, but will mean that creating different audiences will be done through manual selection of members
- If you are going to use Attributes, they should be created in the system before End Users are added
- To set User Attributes Navigate to the CMS Settings by clicking the gear icon in the upper right, then select Mobile & Web
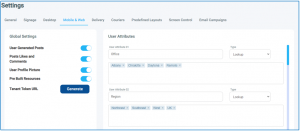
- You can then Name your Attribute
- For example, “Job Title” or “Role” or “Location”
- What ever the name of the attribute is that will separate your users into groups
- Select the Type
- This will define the space this information is entered
- We recommend Lookup as a type with multiple predefined options, you can then define those options that will be available
- For example, a list of Job Roles, or Locations
- Boolean as an option when the selection either “Yes or No”
- For example, If the Employee is a remote worker
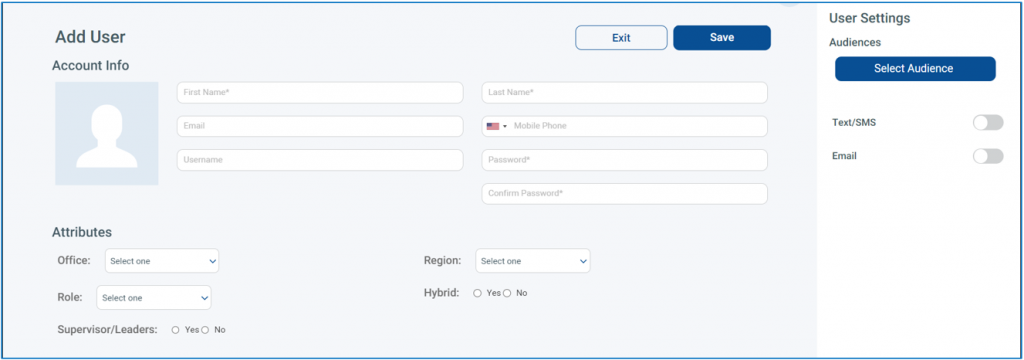
- Defining these attributes in settings will make them available to assign to end users both individually and through CSV file import
- You can then Name your Attribute
Creating Audiences (Optional)
- Audiences can be created in the Mobile, Web, and Email system to create targeted posts, email messages, and experiences for different users
- For example, a Newsfeed Post that specifically applies to Sales team members can be published specifically to a Sales Audience, if that audience has been created and defined
- This step is optional, but suggested
- Taking the time to create Audiences and publish posts that are specific to an audience creates a stronger connection with your End Users because posts that they see are of interest to them
- The Knowledge Base Article – Creating Audiences can take you through the steps of creating an audience


