
Our Knowledge Base Has Moved
The New Page landing page for the Knowledge Base is https://product.korbyt.com/help
The new version of this specific article can be found at: https://product.korbyt.com/help/articles/3697464-managing-end-users-for-desktopinview-mobileandweb
Please update any of your bookmarks to the new Knowledge Base
For assistance on using the new Knowledge Base, we have a Welcome to the New Korbyt Knowledge Base guide
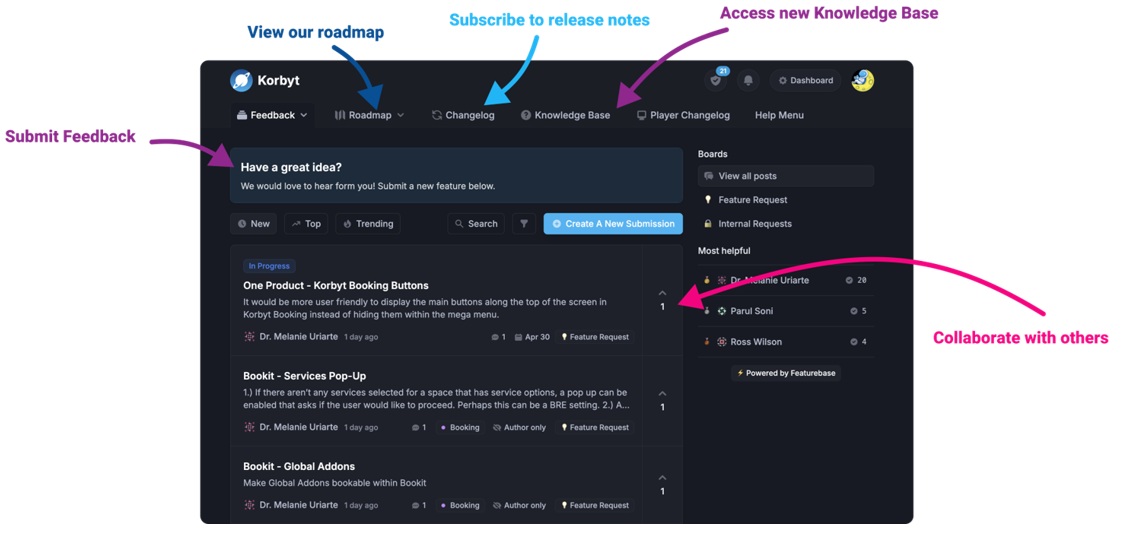
The new Korbyt Product Page also has sections for submitting feedback on system improvements, a view of our Roadmap of upcoming enhancements, and a change log of all updates.
You can import new users or update existing user data in the Korbyt Anywhere platform using a CSV import file, which must include the following information:
- first_name: Must contain a value.
- last_name: Must contain a value.
- email: Must be a unique value. You can leave this field blank. However, we recommend that you include an email address to ensure the highest degree of reach.
- username: Must be a unique value. You can leave this field blank
- phone_mobile: Must be a unique value. If you are loading email address, you can leave this field blank. If you are using username only, mobile number is required.
- international_code: This is the country code for mobile phone numbers such as 1 for US numbers. If you load mobile number, this field is required. Otherwise, you can leave this field blank.
![]() If you include any user attributes in your CSV import file that are not defined in your Korbyt Anywhere settings such as Department and Location, your file will still load but those attributes will be ignored.
If you include any user attributes in your CSV import file that are not defined in your Korbyt Anywhere settings such as Department and Location, your file will still load but those attributes will be ignored.
To import users into the Korbyt Anywhere platform:
- Create a CSV import file and include all the required columns.
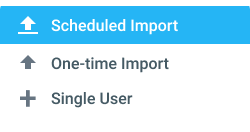
You can download our template by clicking Add Users and selecting one of the following options:- Scheduled Import
- One-Time Import
- Click the hamburger menu and navigate to:
- Desktop > Users (from the Korbyt Anywhere web interface)
- Users & Audiences > Users (from the Korbyt Anywhere mobile app)
- Click Add Users and select one of the following options:
- Scheduled Import: Select a file from the Media Manager within the Korbyt Anywhere platform. This will be a recurring file.
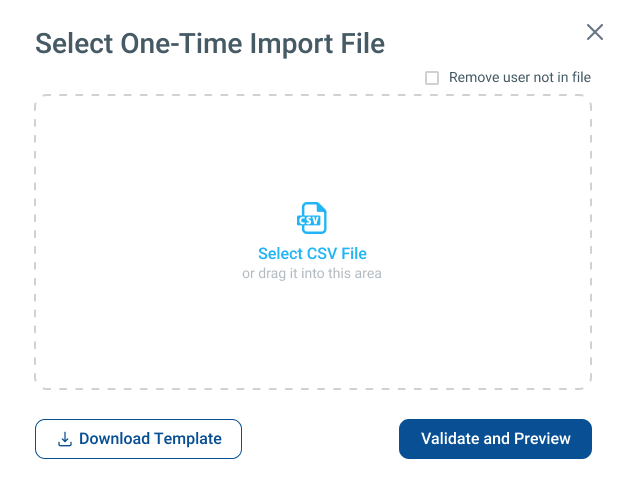
- One-Time Import: Select a file from your local drive.
- Click Validate and Preview.
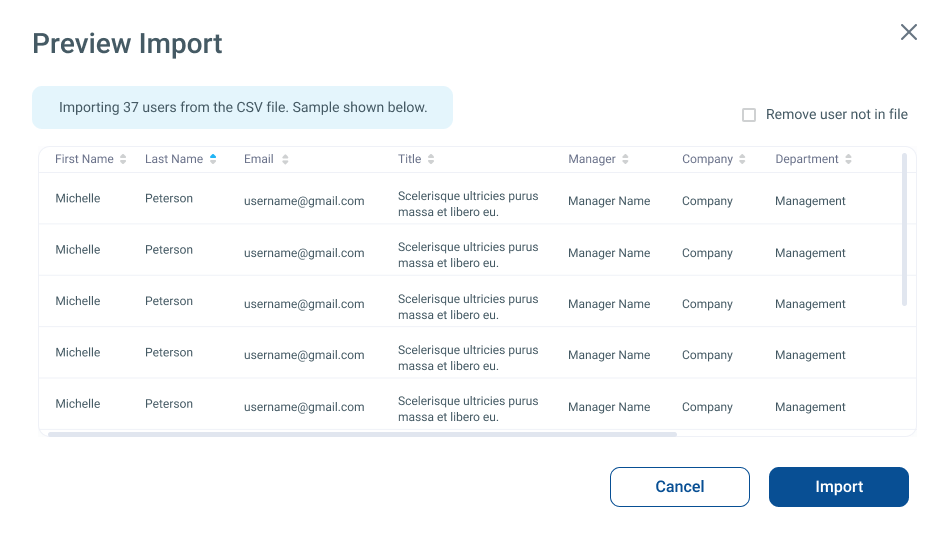
The Preview Import window will display the first 10 lines within your file. After reviewing and confirming the preview for accuracy, click Import. If there are any errors, you will be notified right away. If not, you’ll get confirmation that the file has successfully loaded.
New users will appear on the Users screen with an Active status. You can archive imported users by clicking the Safe icon in the Actions column within the Users Dashboard for each user that needs to be archived.
For more detailed information please visit these Knowledge Base Article How to Manage End Users of Desktop(InView) or Mobile, Web, & Email