Our Knowledge Base Has Moved
The New Page landing page for the Knowledge Base is https://product.korbyt.com/help
The new version of this specific article can be found at: https://product.korbyt.com/help/articles/0988967-how-to-manage-cms-users-and-user-groups
Please update any of your bookmarks to the new Knowledge Base
For assistance on using the new Knowledge Base, we have a Welcome to the New Korbyt Knowledge Base guide
The new Korbyt Product Page also has sections for submitting feedback on system improvements, a view of our Roadmap of upcoming enhancements, and a change log of all updates.
This article describes the steps to Add, and Manage Individual CMS Users and CMS User Groups (Users who can log into the Content Management System directly).
If you are trying to add Users who only use the Desktop(InView) application, or Users who login to and use the Mobile, & Web Experience please view Managing Users
To access CMS Users Management you need to have Tenant Administrator or Administrator permission in your tenant
Contents of this Article
- Accessing CMS Users
- Adding New CMS Users
- Managing Existing CMS Users
- CMS User Groups
- Azure AD Integration
Accessing CMS Users
- Login to the tenant
- Hover your mouse over the User Profile Outline (or your Profile Picture) in the Upper Right Corner

- From the menu that appear, select “Manage Users”.
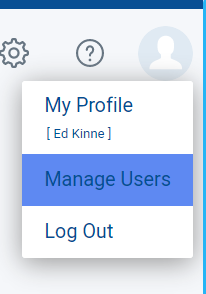
- On the Manage Users window there are two buttons “Add User” or “Manage User groups” or you can search for an existing user.

- Add User = Create a New CMS Users
- Search = Find and existing CSM users
- Manage User Groups = A different screen for CMS Users Groups (used to control access)
The Sections below review through the Steps on how to Add Users, Manage an Existing CMS Users, and Manage CMS User Groups
To Add a New Users
- Click on the “Add User” button to add a new user.
- The Add New User window will appear. On this window the user information has to be entered and the permissions for Signage, Mobile & Web and Desktop can be selected.
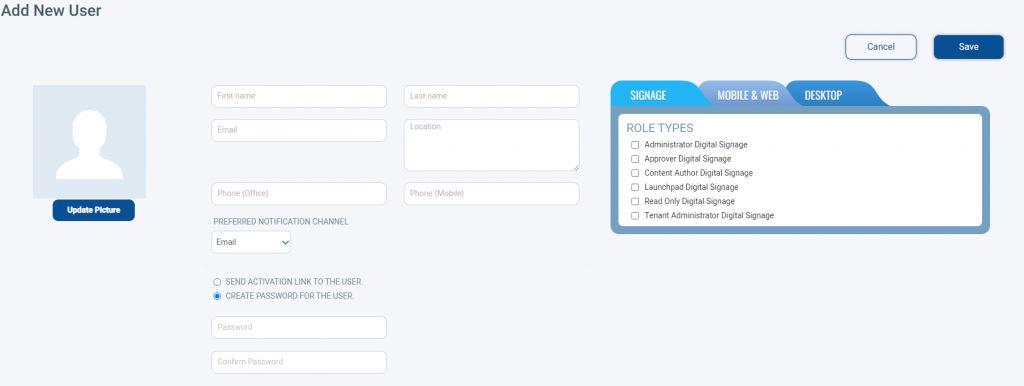
- Enter the CMS Users information (First Name, Last Name, and Email are required)
- Select the Users Role Type. This determines what role and permissions the new user will have within the tenant.

- The User Role Type controls the user’s access to different functions. The general permission for each level is listed here
- Tenant Administrator = Full access to System and Settings. Can create new CMS Users of any level and can Manage CMS User Groups
- Administrator = High Level Access to System and Settings. Can create new CMS Users that are below Administrator Level. Can’t Manage CMS User Groups
- Approver = No Access to Change System Settings or Players, but can view them. Can Create and Publish content , Can Edit Playlists
- Content Author = No Access to Change System Settings, Players, or Playlist but can view them. Can Create content, but have to submit for approval to make it seen
- Read Only = Can Only view content in system, no edit rights
- Launchpad(Signage Only) = Can create and publish, but only through approved launchpad templates. Has no access to other sections of the system
- Please Note: Mobile & Web and Desktop tabs will only be available if your tenant is subscribed to these two features.
- For CMS Users who should have access to more than one system you have to select their Role in each system separately.
For a Detailed Description of the Roles see: Content Manager Roles (User Roles)
- Chose between Sending Activation Link or Create Password for Users
- Click Save
- At this point the user is created.
To Manage an Existing CMS User
- Find the user in the list of current CMS users (you can use the search to find them)
- Once found you can view information about the user (Name, Email, Roles, User Groups, Last Login, Last Update)

- Clicking the Pencil Icon will allow you to Edit the User’s information and role, Clicking the Trashcan will delete

- After Clicking the Pencil you can edit Name, Contact Information, Role
- You can also change the users password, or send the Password reset email to the user
To Manage CMS User Groups
User Groups are used in the CMS to be able to control access to Folders, and Player Groups based on group membership.
An example use might be limiting a group of of Content Authors for a specific location to only be able to access Layouts that are within a specific folder for that location. These steps describe how to create and edit group memberships.
- From the CMS Users Screen, Click on the “Manage User Groups” to navigate to the User Groups screen

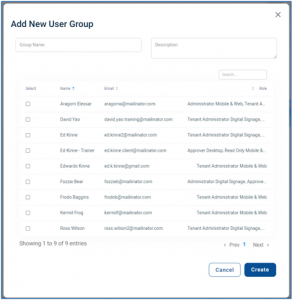
- Click on the “Add Group” button to add a new group. This will open a window to Name the Group, provide an optional Description, and select Group Members
- the Group Name can not contain the words “read only” as this will cause the group to be hidden
- the Group Name can not contain the words “read only” as this will cause the group to be hidden
- After naming your group and selecting members, click Create
- To edit and Existing Group click the Pencil next to it
- This will let you edit the group details (Name, Description) and Add or Remove members
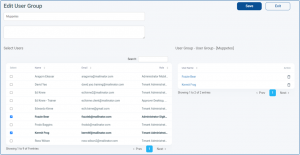
- To add a New Member, check their name on the left
- To remove a member, click the trash can next to the name on the right
- When done click Save
With CMS User Groups in Place you can now
- Manage Folder Permissions to set which Media Manager folders are accessible to which User Groups
- Manage Media Player Permissions to set which User Groups can see and access different Player Groups
Azure AD Integration to Import CMS Users
Korbyt Anywhere provides integration with Azure AD for secure and scalable user management and single sign-on, allowing a customer’s employees to login to the Korbyt Anywhere CMS, their Azure AD credentials.
This process will require configuring both your Korbyt Tenant as well as your Microsoft Azure services. Your IT Department, as well as Korbyt Professional Services will likely be involved in the process.
This document provides high-level insight into the process steps.
There are three main steps in the setup process:
- Granting Access: In your MS Azure service you must grant Korbyt Anywhere access to the desired Azure AD groups
- In Azure – Registering an app on the Azure app registration portal
- In Azure – Confirming permissions for Microsoft Graph on the app
- Microsoft Graph API permissions are required for integration with Azure AD
- This article lists the specific Microsoft Graph API Permissions Required by Korbyt
- In Azure – Obtaining Administrator consent
- In Azure – Generating a Client Secret
- Recording the details from these steps as they will be used in Korbyt to create the connection
- Importing Users: Inside Korbyt Anywhere, setting the information so that Korbyt can automatically create a corresponding CMS user for each employee it detects in the customer’s designated Azure groups
- In Korbyt – Enter User Import Parameters
- Open the Mega Menu, in the Advanced section, select Azure AD
- Click the pink +Add New Azure Users button and enter the details you established in the first steps
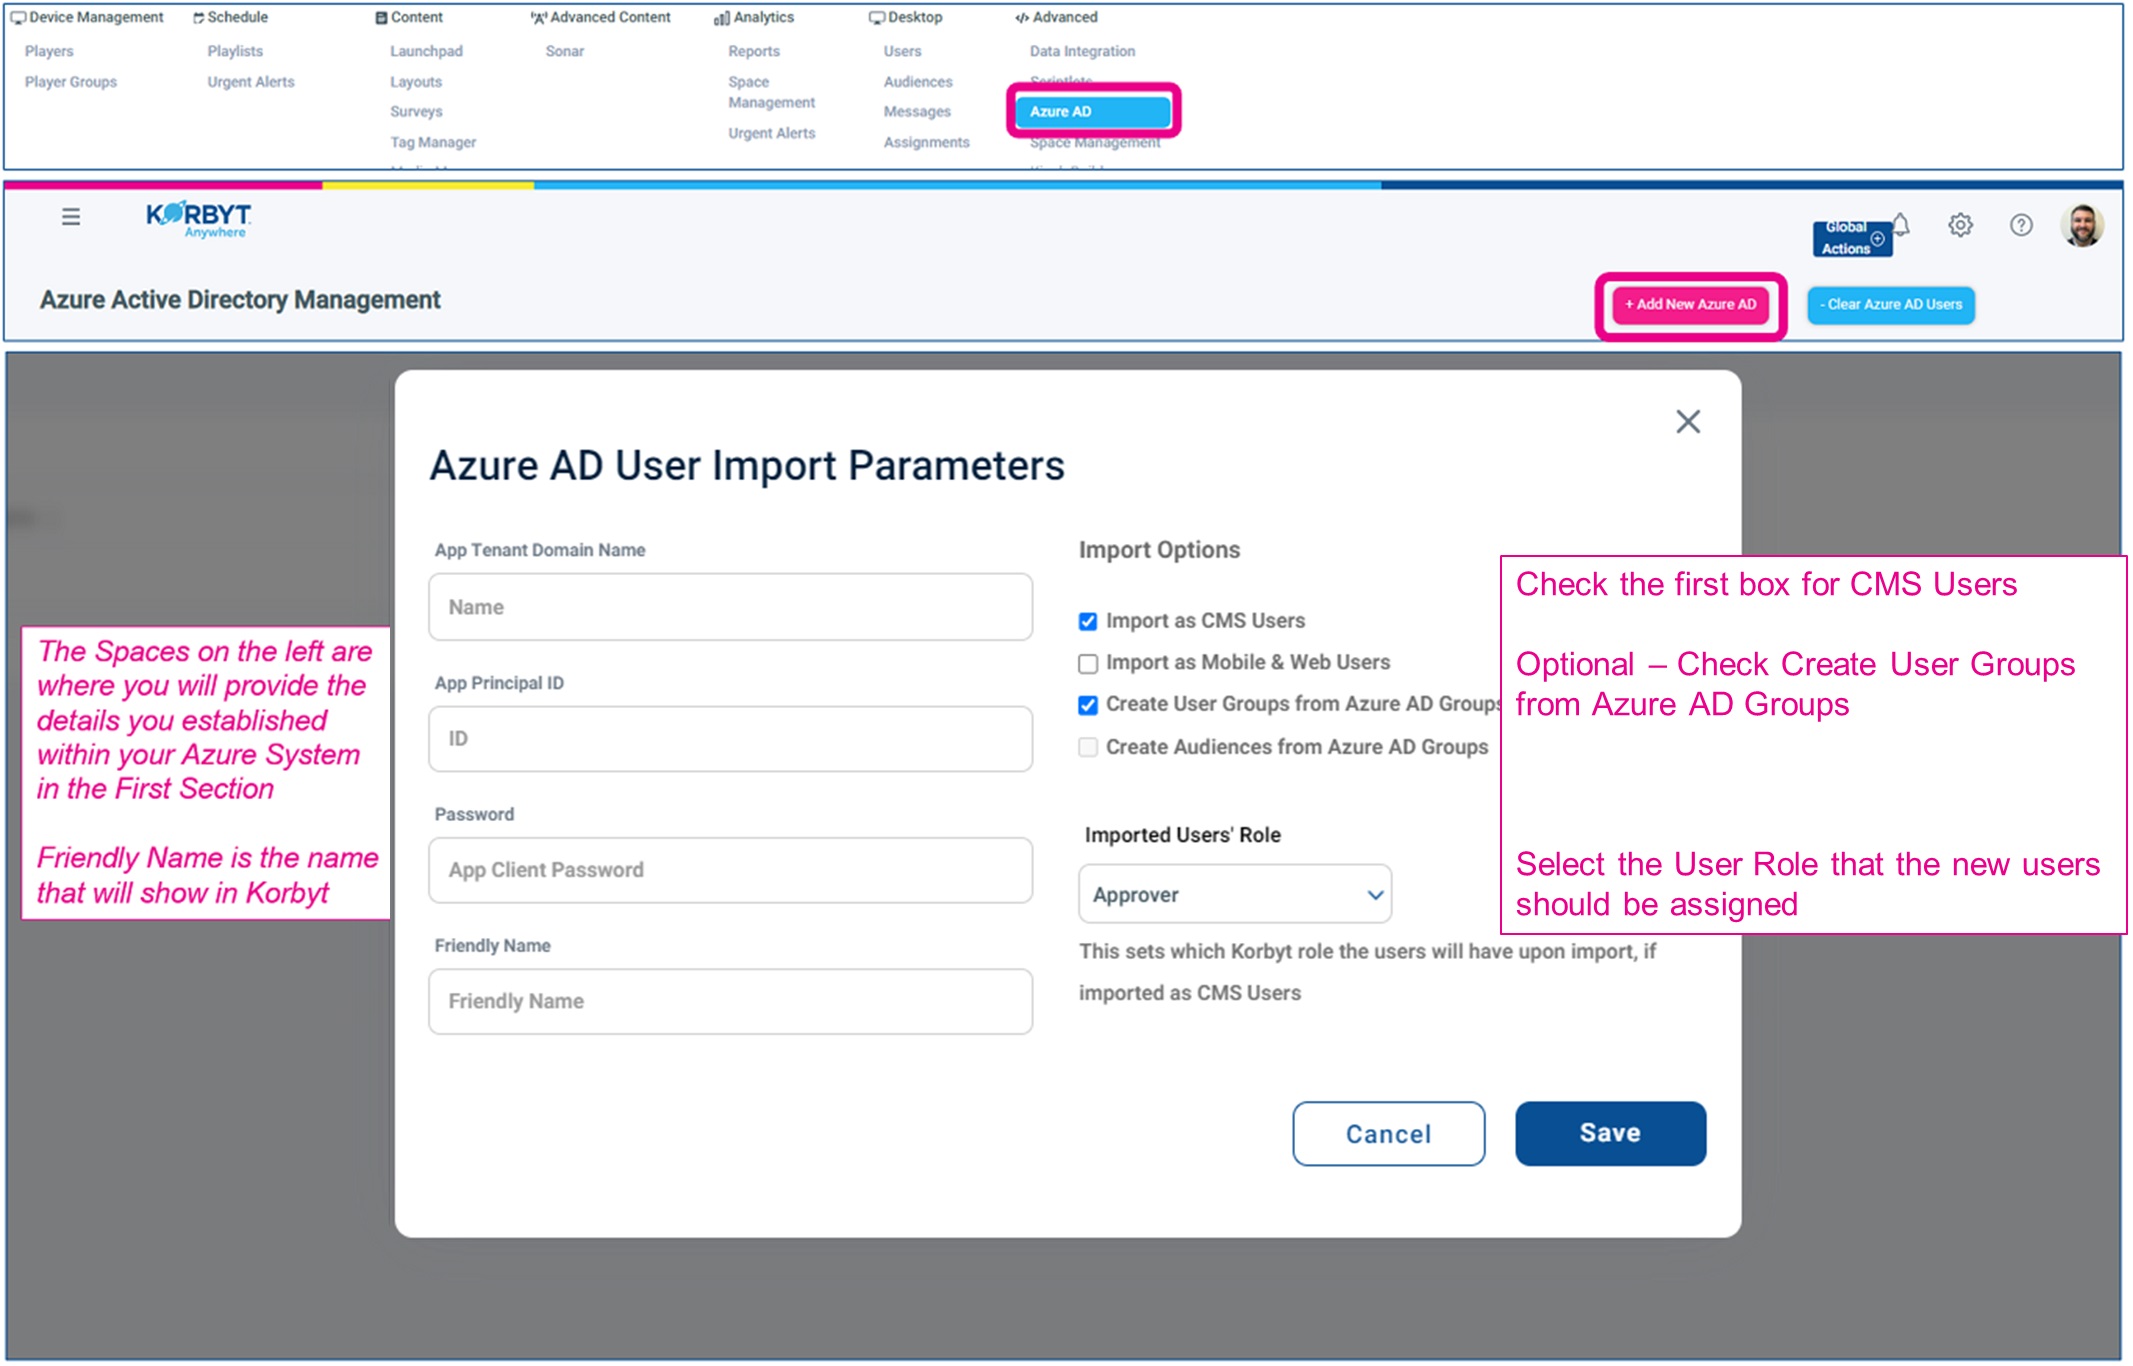
- Click Save
- In Korbyt – Filter By Group
- If specified, the import process will only add users that are members of selected groups. This can be helpful if you have a large number of users and you only wan to import a subset of those uses
- In the Azure Menu, use the Action to select Filter By Group
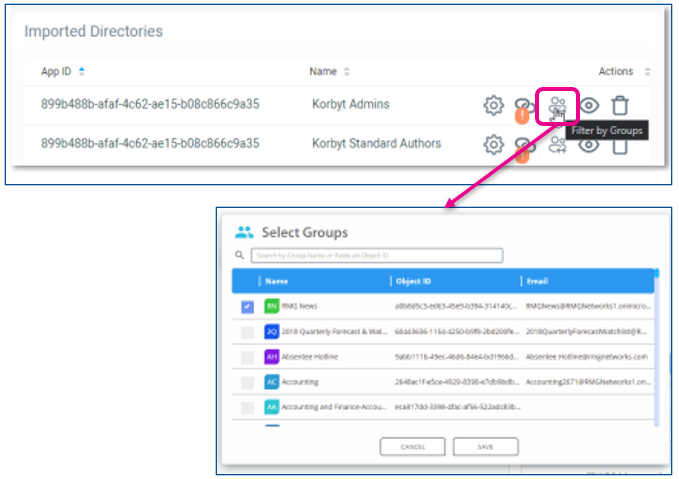
- Now Established the Azure AD and Korbyt will communicate periodically to match the users that should be in Korbyt based on the information in your Azure AD.
- In Korbyt – Enter User Import Parameters
- Employee Login: Once the import is processed and complete, an employee will be able
to log in to Korbyt Anywhere using their Azure credentials

