
You can promote image and video posts as well as distribute newsletters to your users via email. For more information about the various types of email templates that we offer, refer to Types of Email Templates.
To create emails:
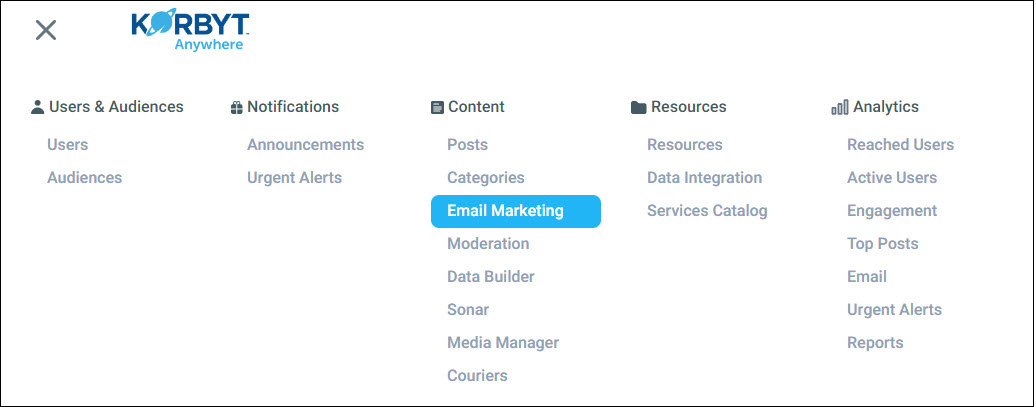
- Click the hamburger menu and navigate to Content > Email Marketing.
![]()
- Click Create Email.

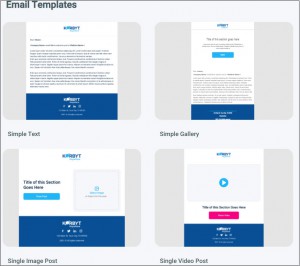
- Select an email template.
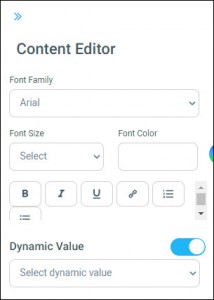
- Update the various sections of the email template by applying the necessary font, button, and dynamic value attributes:
- Hover over the section.
- Click the pencil icon
 .
.
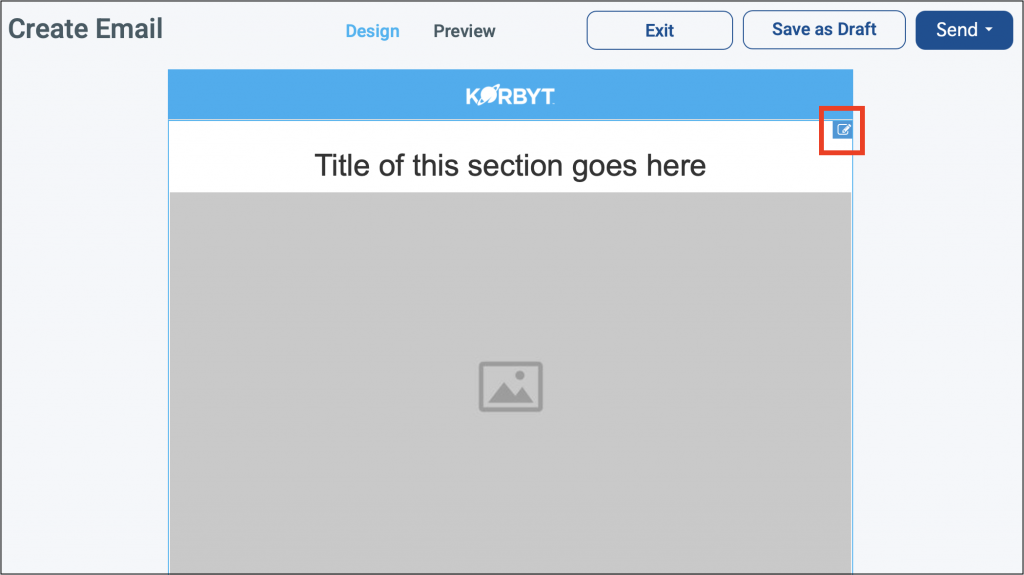
You can select the necessary font, button, and dynamic value attributes from the Content Editor pane.
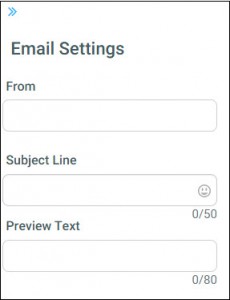
- Enter the following Email Settings:
- Enter the “friendly from” you want to use in the From field.
- Enter a Subject Line.
The character limit for the Subject Line is 50. - Enter a brief description in the Preview Text field.
The character limit for the Preview Text field is 80.
- If you’re not ready to distribute the email, click Save as Draft.
- To see what the email will look like before distributing it, click Send > Send Test.

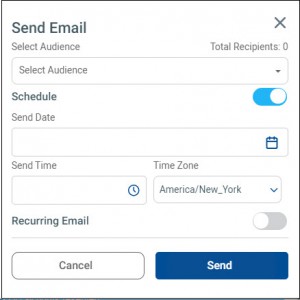
To schedule the email:- Click Send > Send Email.
- From the Send Email dialog, select the appropriate audiences from the Select Audiences drop-down.
- Click the Schedule toggle.
- Provide the following information:
- Send Date
- Send Time
- Time Zone
- If you want to distribute the email on a recurring basis, do the following:
- Click the Recurring Email toggle.
- Select a frequency (Daily, Weekly, or Monthly.
- Click Send.
You can track various analytics for each email that has been sent. For more information, refer to Email Analytics.