The Korbyt Content Management System provides several paths to streamlining content creation and submission with Predefined Layouts
Predefined Layout Templates, Once created, be configured to operate in different ways of accepting content and required approvals before being seen.
- Web Based Submissions from Outside Korbyt CMS
- Templates can receive input to the templatized sections through webforms
- The Korbyt CMS users creates a template and shares it with others through a web address to the template
- This allows individuals who are not Korbyt Users to submit a layout by filling out a web based form
- When someone submits through the form it creates a new layout with their details in Draft status
- A Korbyt CMS users who is a Content Approver or above would then have to publish the design
- Launchpads from within the Korbyt CMS
- Predefined Layout Templates can be programmed to be Launchpads
- This allows Korbyt CMS users to create new Layouts based on the template
- Those new Layouts can be configured to go directly to a screen via a new playlist or configured to control be fed into an existing playlist
- This is how Launchpads can control tickers or other screen areas instead of creating a full screen image
- The Launchpad process does not require approval from higher level users before it is seen on screens
- A template created for Launchpad use can also be shared through the Web Based Submissions process, but then follows those steps for approval
The steps to create a new template are mostly the same for either use case, and differ only in some selections made in the details of the design
This guide will review:
- Creating New Predefined Layouts and Templates
- General Steps for Creating any type of Predefined Layout
- End Users Experience
- How this looks to your end users
- Specific Use Cases and Guides (links take you to specific articles)
Creating New Predefined Layouts and Templates
To create predefined layouts:
- Open the Mega Menu
and then under Content, click on Layouts
- Click the Predefined Layouts
 icon in the upper right (between filter and files).
 - Click Add Predefined Layout.[Add screenshot]

- Configure your Template:
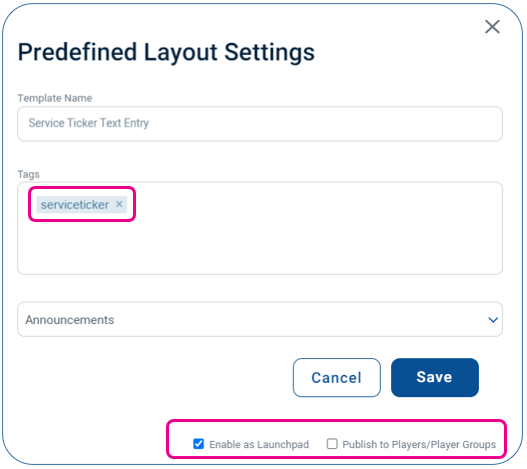
- Provide a unique name
- Optional – Add a Unique Tag, this will be used later in the Playlist to automate the content
- Optional – Category Drop Down for Launchpads, will select a launchpad category
- Configuration Check Boxes
- Enable as Launchpad
- If Checked it will add this template to the Launchpad Area of the CMS
- If Unchecked it will not be available as a Korbyt Launchpad
- Publish to Players/Player Groups – Applies to Launchpads
- If Checked the Launchpad will publish directly to New Playlist directed at selected Players or Player Groups the user has access to and will be shown as Full Screen Content
- If Unchecked, when used as a Launchpad it will only create new content that can then be put onto an existing playlist through automation or manual control
- Enable as Launchpad
- These options can be edited after initial creation of a predefined template by clicking on the edit info icon (lower case i in a circle)
- Click Create.
This will open a new Layout in the Builder Tool
- Use the Layout Builder to add placeholder text, images, and videos:
- Drag the element icon from the Controls dialog on to the canvas.
- Add the necessary content.
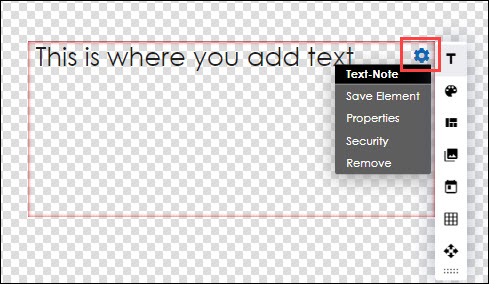
- Click the gear icon in the upper right of the square field and select Properties.
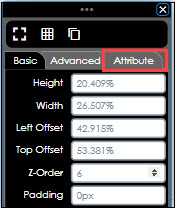
- Click the Attribute tab.
- Add a label.
- Select the Templated checkbox. This will make it a space that a user can enter a value into
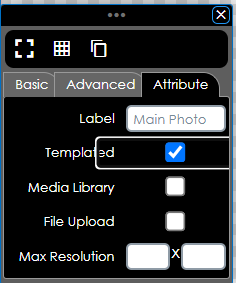
- If it is a Media space (Image or Video) you will have the option to define where the media item has to come from
- Leaving neither checked will allow the user to either Select from the Media Manager
- Checking Media Library will force the user to select an item already uploaded to Korbyt
- Checking File Upload will for the user to upload a new media item from their computer
- After all customizations have been implemented, click one of the following buttons at the bottom of the Controls dialog:
- Save: Allows the layout to be saved on the fly to ensure that no changes are lost.
- Publish: Makes the Template available to others for use based on the settings
- AFTER PUBLISHING click the info
 symbol for the design in the Layout List to make sure that it has save the correct configuration
End Users Experience
Once Created how your Predefined Designs will operate will be based on how you created them and how your end user interacts with them
- For a guide to Web Based submission see Predefined Layouts for Web Based Submission
- The end users experience of Web Based Submission is the person using a webform to submit new content
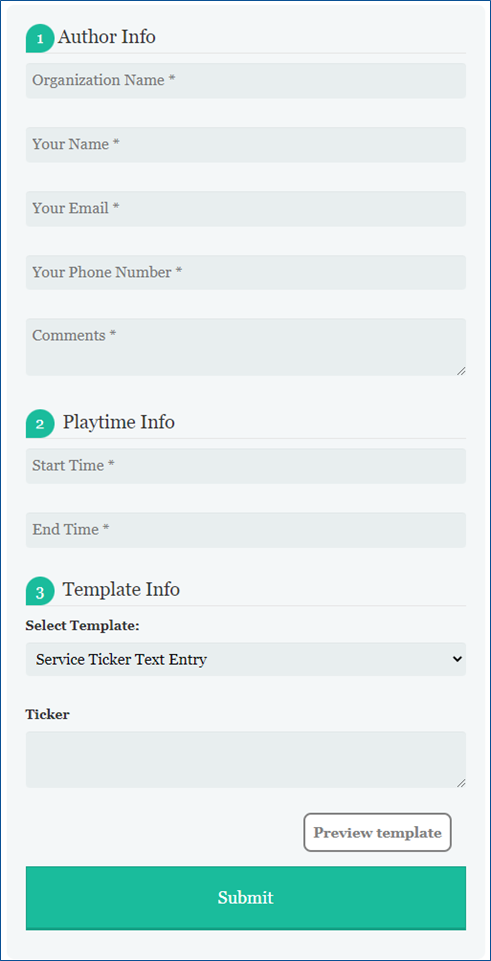
- The end users experience of Web Based Submission is the person using a webform to submit new content
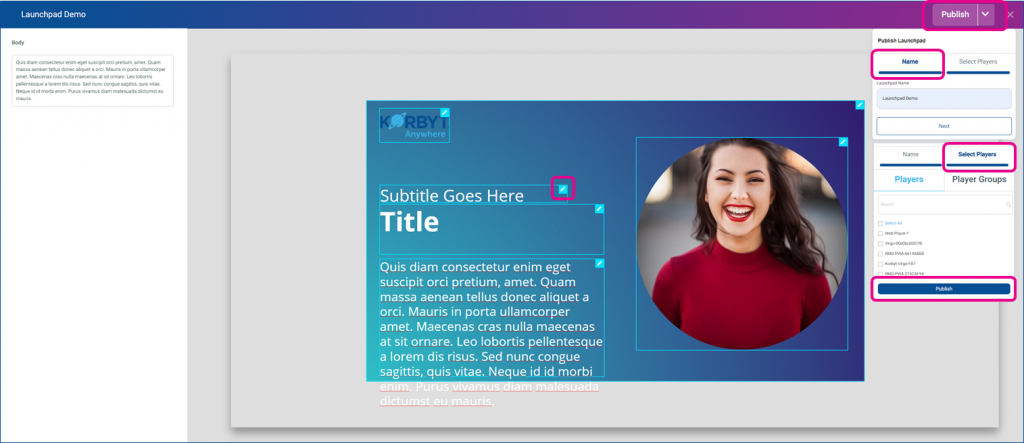
- For a guide to Launchpads for CMS Users to create new content for full screen see Launchpads for Direct to Player Full Screen Content
- For this process the end user has to be a registered Korbyt CMS user with access to launchpads
- The result will be a design that is published and sent to a screen on a new playlist
- Launchpads can also be created and configured to be played in an area of a screen rather than a new playlist, see Launchpads for an Area of a Screen (Tickers)
- In this process you can define a launchpad interface to control something like a ticker on a screen area
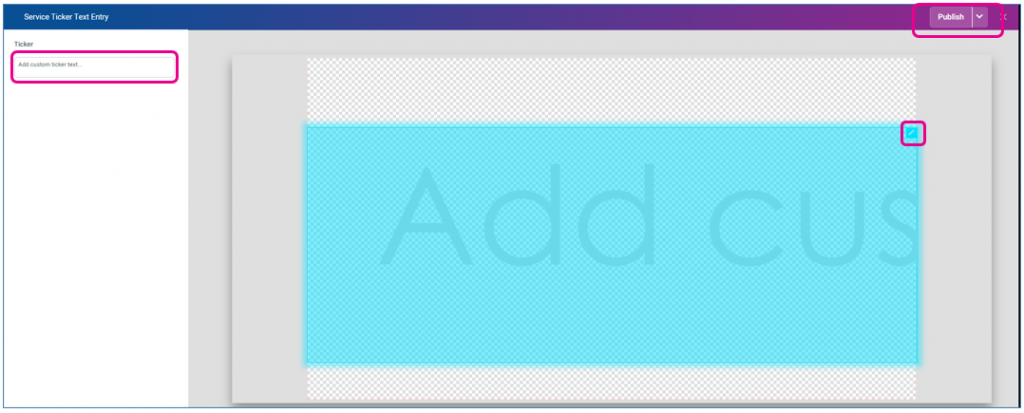
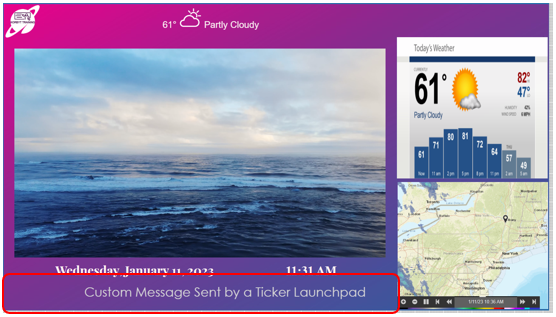
- In this process you can define a launchpad interface to control something like a ticker on a screen area

