With recent updates to the Korbyt Anywhere Platform, Launchpads can now be created to deliver content to sections of a screen rather than being full screen content on their own. Creating a way for Launchpad only users to be able to program content to a section of the Layout or Message without having access to all of the Korbyt System.
Popular use cases include:
- Text Entry into a ticker message
- Adding or sharing images to a subsection of the screen
If you are looking for more general or more specific information on Predefined Layouts in Korbyt please also see:
Guide to Korbyt Launchpads and Predefined Layout Templates
Launchpads for Direct to Player Full Screen Content
Predefined Layouts for Web Based Submission
To enable this you will have to follow these steps
- Create a new custom Launchpad
- When configuring this new launchpads ensure that
- Add a unique Tag, this will be used later in the Playlist to automate the content
- you select Launchpad Enabled, this will create a new Launchpad in the Launchpad section
- you disable Player and Player Group, this will stop the launchpad from being pushed to be full screen
- When configuring this new launchpads ensure that
- Building a Playlist or Playlist Item that pulls in content with the unique Tag set in the settings of the Launchpad
- Build a Layout that used the Playlist Element to show the Playlist that pulls in that tag
- End Users Experience – Creating New Content
- Suggestions, Options, and Best Practices
The Guide below through these steps if needed
Create a New Custom Launchpad
To create predefined layouts:
- Open the Mega Menu
![]() and then under Content, click on Layouts
and then under Content, click on Layouts - Click the Predefined Layouts
 icon in the upper right (between filter and files).
 - Click Add Predefined Layout.[Add screenshot]

- Provide the following information:
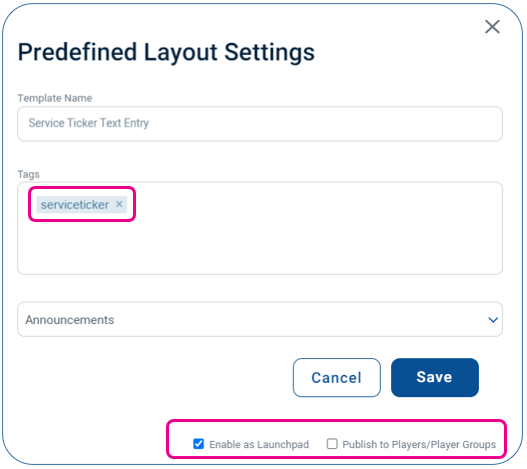
- Create a Unique Name
- Required Add a Unique Tag, this will be used later in the Playlist to automate the content
- This Tag should be specific to this layout and not used on other items you do not want automated in this way
- Category Drop Down – choses which category the new launchpad will reside in
- Select Launchpad Enabled, this will create a new Launchpad in the Launchpad section
- Disable Player and Player Group, this will stop the launchpad from being pushed to be full screen
- Click Create.
- These options can be edited after initial creation of a predefined template by clicking on the edit info icon (lower case i in a circle)
This will open a new Layout in the Builder Tool
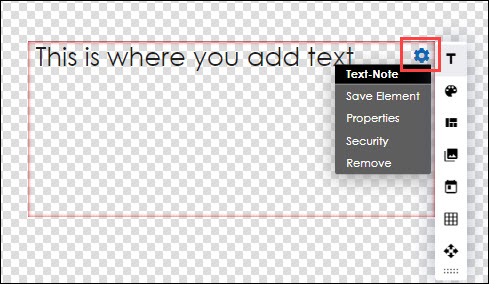
- Use the Layout Builder to add placeholder text, images, and videos:
- Drag the element icon from the Controls dialog on to the canvas.
- Add the necessary content.
- Click the gear icon in the upper right of the square field and select Properties.
- Click the Attribute tab.
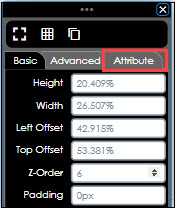
- Add a label.
- Select the Templated checkbox. This will make it a space that a user can enter a value into
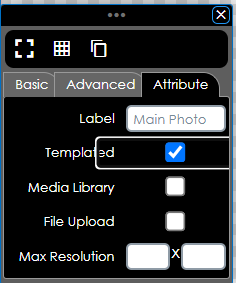
- If it is a Media space (Image or Video) you will have the option to define where the media item has to come from
- Leaving neither checked will allow the user to either Select from the Media Manager
- Checking Media Library will force the user to select an item already uploaded to Korbyt
- Checking File Upload will for the user to upload a new media item from their computer
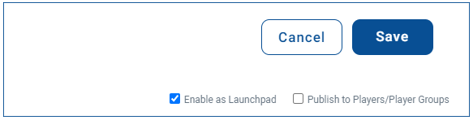
- After all customizations have been implemented, click one of the following buttons at the bottom of the Controls dialog:
- Save: Allows the layout to be saved on the fly to ensure that no changes are lost.
- Publish: Makes the Launchpad Available to others to use through the Launchpad Menu
- AFTER PUBLISHING click the info
 symbol for the design in the Layout List to make sure that it has save the correct configuration
Create a Playlist or Playlist Item that pulls Content with the Tag
In the previous step you added a Tag to the Launchpad Template, now every time a user creates a new item through that Launchpad it will have that Tag attached.
In this step you will build a Playlist that pulls in all content with that Tag
This section describes how to create, name and configure a Clever Playlist. If you already have a Clever Playlist you can click the pencil to edit it.
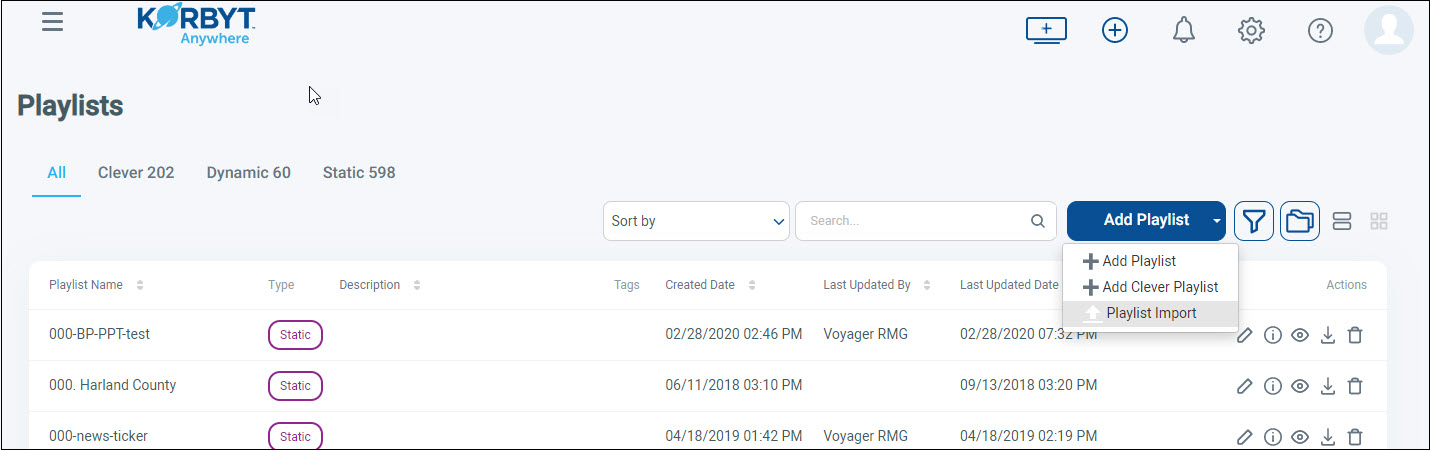
- Click the Mega Menu
![]() icon and navigate to Schedule > Playlists.
icon and navigate to Schedule > Playlists. - Click Add Playlist > Add Clever Playlist.
- You can now Name the playlist by typing in the upper left or you can click Playlist Settings (next to Exit and Save Playlist buttons) and provide the following information:
Adding Tag based Content to a Playlist
Content that is brought into the playlist based on a rule created to trigger it’s inclusion
- Click on the Rocket Ship icon on the bottom right of the content box to add your Clever content.
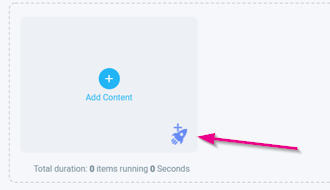
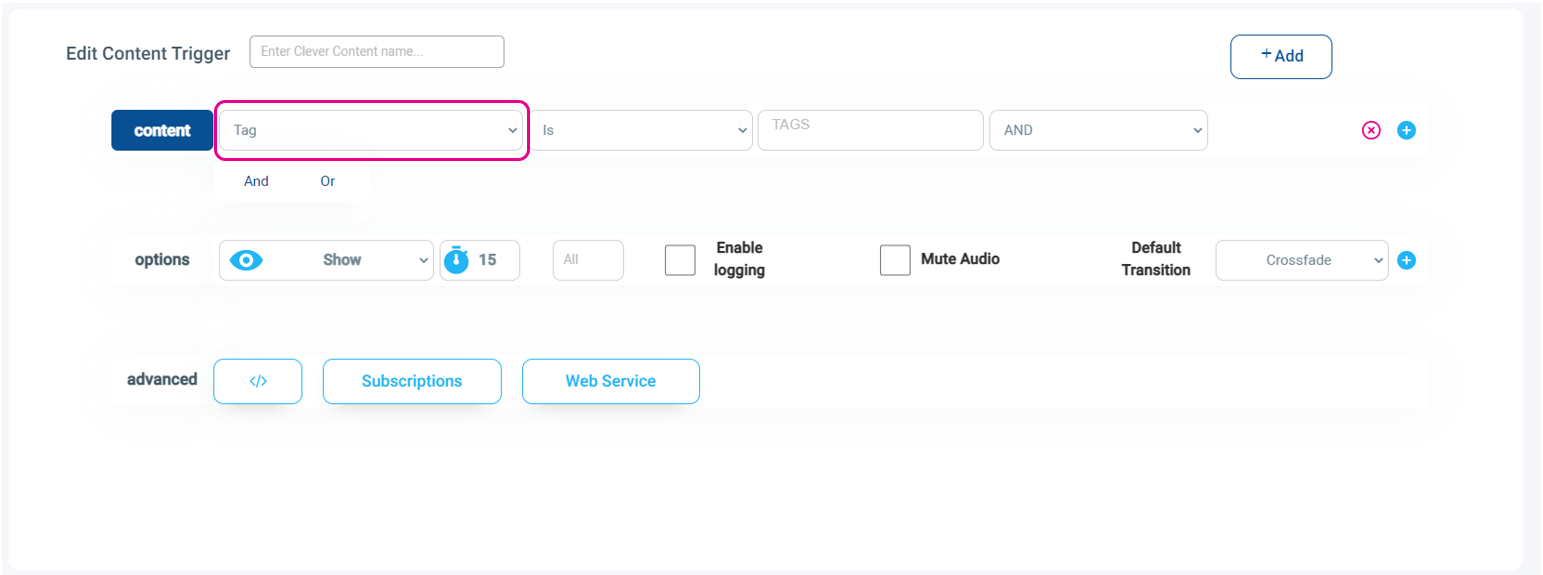
- Add a Trigger Name
- Add the Tag Value that would match the Tag you sent in the previous step
- In Options set the amount of time each item should show (default is 15 seconds)
- Click +Add to save the Trigger(rule)
You can also add this rule to an existing playlist if you wish to incorporate the Launchpad into an existing rotation
You now have a Playlist that draws in the items created from your Launchpad created in the first step
If you need more information on Playlists options review Configuring a Clever Playlist
Build a Layout that used the Playlist Element
Now that you have a Launchpad Template that will allow users to create layouts automatically created with the Tag, and Playlist Rule that pulls those tags together the last building step is to add the Playlist Element to your screen’s Layout in the area you want it to be seen.
In the Builder Tool add a Playlist Element to the design
If you need assistance in creating a new Layout or Message, or Using the Playlist Element see
Layout and Message Builder Elements
How to Use the Playlist Element
This Playlist Element will show the items that have been brought into the Playlist through the tag rules.
Items that are played in the area of a Playlist Element will scale to fill the area without distorting the element
End Users Experience – Creating new Content
Now that the Launchpad Template, Playlist, and Final Screen Layout are built system users who have access to the Launchpad System are able to create new content using the Launchpad.
- Click the Mega Menu
![]() icon and navigate to Content> Launchpad.
icon and navigate to Content> Launchpad. - Click on the Launchpad you want to use
- Click the Pencil for the Ticker, then enter the new message
- or edit other details if this Launchpad is not a simple ticker
- Click Publish Giving the new item a name

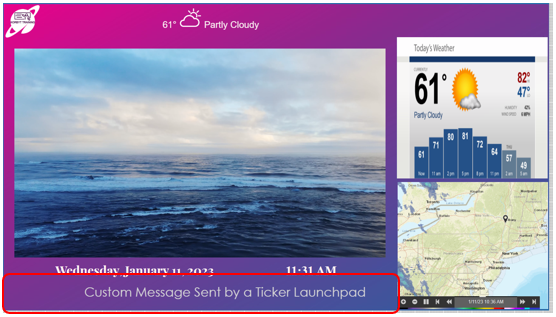
After clicking publish the system saves a new Layout with the new custom ticker text.
The Playlist automatically pulls in the design because it is Tagged with the correct value.
And the message is seen on the screen.
Without validity dates in place, the way to remove the message from the screen would be to Delete the Layout that was created
Settings are available to force a user to add validity dates to control the messages life
Suggestions and Best Practices
Settings that Affect Launchpads
There are Launchpad settings available that can add Validity dates, Force Validity Dates, and set a Max number of days a message will display.
These settings are system wide and will apply to all Launchpads.
Open settings by clicking the Gear Icon, click the Signage heading
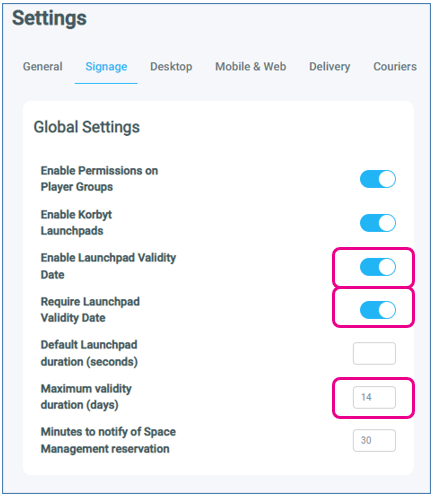
- Turning On Enable Validity Date will add a space for users to set a start and stop date for a Launchpad
- Turning On Require Validity Date will force a user to set a start and stop date
- Putting a value in Maximum Validity Duration(days) will set a maximum time a message is shown on a screen
If you are building a Launchpad for a Ticker Only
Launchpads are built around being full screen, but Ticker Message typically play in a smaller area.
The system will scale the design down to fit the smaller ticker area.
Because of the way these two interact, you will want to build the Launchpad Ticker to be almost full screen, that way when it is shrunken to fit into the smaller ticker area it will be able to be seen.
In the screen images below, you can see a Launchpad design with a ticker element, and the way it translates to the screen
Launchpad With Ticker in the Builder Tool
Taking up a large area of screen, centered

Screen Layout in Builder Tool (Showing the Playlist Element for the Ticker Position)
Bottom of design, Playlist Element for Ticker
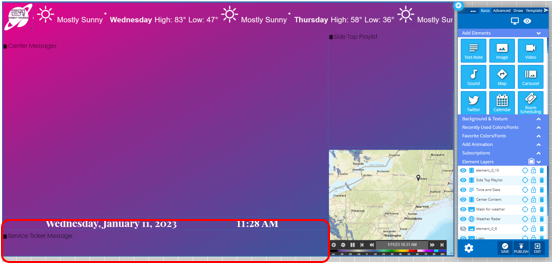
Final Design Playing on Screen
In preview from the list view, showing the message playing that has been sent