Our Knowledge Base Has Moved
The New Page landing page for the Knowledge Base is https://product.korbyt.com/help
The new version of this specific article can be found at: https://product.korbyt.com/help/articles/2667096-creating-and-managing-playlists
Please update any of your bookmarks to the new Knowledge Base
For assistance on using the new Knowledge Base, we have a Welcome to the New Korbyt Knowledge Base guide
The new Korbyt Product Page also has sections for submitting feedback on system improvements, a view of our Roadmap of upcoming enhancements, and a change log of all updates.
A Clever Playlist can contain multiple rules and triggers giving you one playlist to manage what will be seen and only where it is relevant across multiple displays.
Clever Playlists allow you to automate your signage playlists by adding both statically chosen items and items that are added based on Clever dynamic rules. The rules that select the clever content can be based on more options, and can also control when/where content is seen when compared to options in a standard playlist.
NOTE: Clever playlists are not compatible with players that are below software version 2.0. In these cases, you can use a standard playlist. For more information about standard playlists, refer to Configuring Standard Playlists.
The Steps to Create a Clever Playlist will involve
- Create a New Clever Playlist
- Or use the pencil to edit an existing clever playlist
- Add Clever Content Rules that Select What to Show
- Add Controls for When and Where this specific content displays (optional)
- Edit the Show Options like Time on Screen and Order of Items (optional)
- Adjusting the Order of Items (optional)
- Setting a Schedule for the Playlist (optional)
- Selecting Players that will display this Playlist
- Remember to always click Save Playlist in the upper right to save any changes before leaving the playlist screen
A Common item that can drive Clever behavior is an items Tags. If you need guidance see the Tagging in Korbyt article
Creating The Clever Playlist
This section describes how to create, name and configure a Clever Playlist. If you already have a Clever Playlist you can click the pencil to edit it.
- Click the hamburger icon and navigate to Schedule > Playlists.

- Click Add Playlist > Add Clever Playlist.

- You can now Name the playlist by typing in the upper left or you can click Playlist Settings (next to Exit and Save Playlist buttons) and provide the following information:

- Playlist Name: Name of the playlist.
- Description: Details about the playlist that will appear within the CMS.
- Tags: Metadata used to identify your playlist.
- Override to play full video: Ensures that any video within your playlist will play for the entire duration instead of playing for the default duration.
- Enable Playlist Feedback: Allows for automatic playlist recommendations.
- Audio Only Playlist: Indicates that the playlist only contains audio content.
- Click the Lightning Bolt to set rules that will affect the whole playlist – we talk more about rules in the next sections
Adding Clever Content with Rules that Select What to show
This section describes how to add both static and clever content to a Playlist
Add content by doing the following:
Adding Static Content
Content can be selected manually, and then affected by the optional rules that control when it is displayed
- Click the blue Add Content + Button
- From the Manage Content section, select from the existing content across the Images, Videos, Layouts, Messages, and URLs tabs or drag and drop local files from your computer.
- Select the checkbox for the corresponding file.
The number of files selected will display next to the Add button. - Click Add button.
The selected files will display at the top of the Playlist Edit screen.
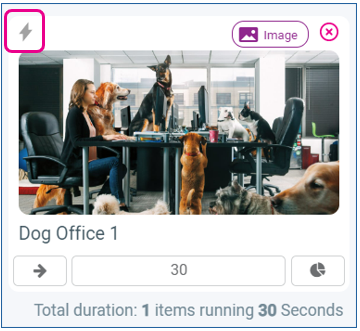
- Optional Click the Lightning Bolt icon to add trigger rules to control When and Where an item is seen
- Optional Click the arrow to select a transition type
- Optional Click the time in the center to adjust the display time for the item
- Optional Click the Pie Chart to add/adjust Playlist Weighting
Adding Clever Content with Rules
Content that is brought into the playlist based on a rule created to trigger it’s inclusion
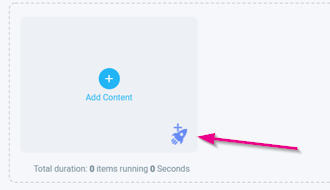
- Click on the Rocket Ship icon on the bottom right of the content box to add your Clever content.
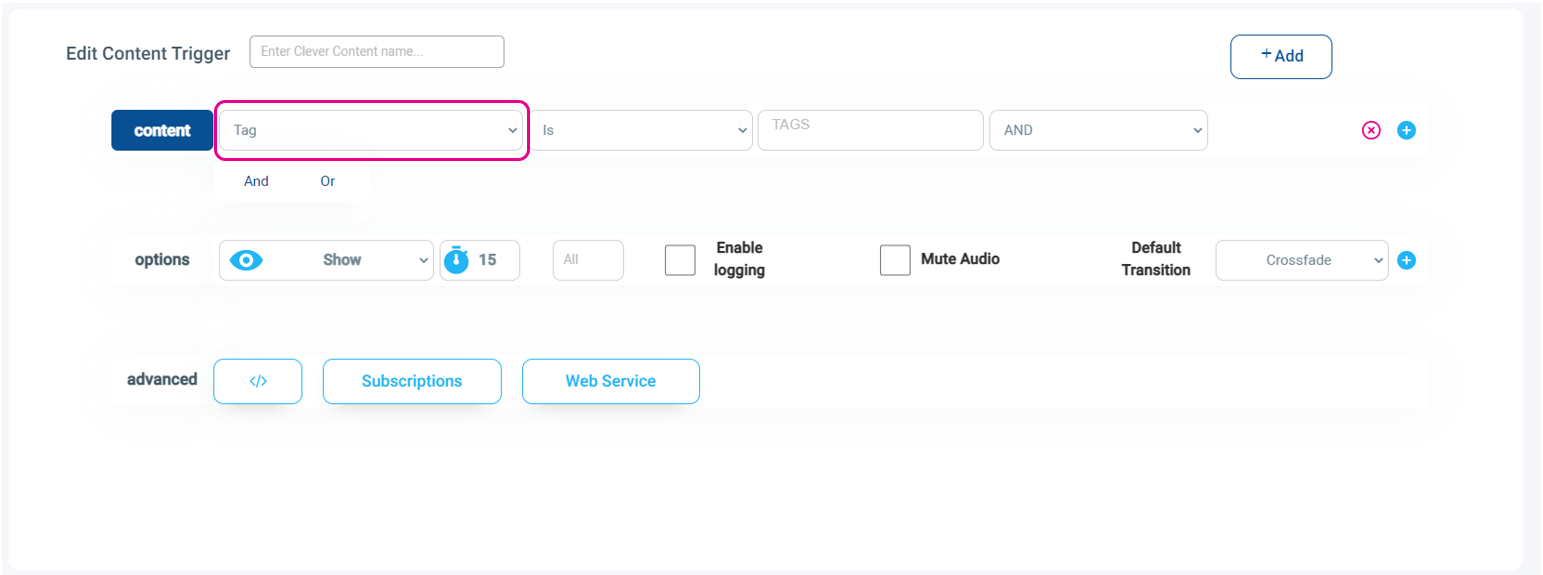
- Add a Trigger Name
- Add Content trigger rules to select what items are shown
Use the Drop Down to select the basis of the rule- Tags = Includes content with the tags that you can add to any content in Korbyt, for more information read Tagging in Korbyt
- Folder = Includes the contents of a specific folder within the Media Manager
- Content Metadata = Includes files with a specific file name, or part of a specific file name
- Static = Manually select items that should be part of the rule
- Optional – Add more Content selection rules by clicking the small blue plus to the right
Any additional rules can only operate on Tags - Optional – Set display Options for time for each item should show, number of items, select logging, Default Transition
- Click the +Add button to save. and a new item will appear in the content list
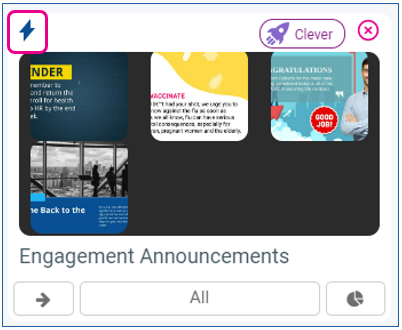
- There will be previews of the the items included from the rule
- If you need to edit the rule after saving, Click on the blue Lighting Bolt icon on the item
- The time shows “All” when the display options were set to show all
- If you set a specific time and number of items the time shown will represent that number of items times the time per item (45 if the rule options select 3 image for 15 seconds each)
Adding Rules that control When and/or Where an Items is Show
In this section we will review optional rules that can control When and Where content is shown by adding more rules
- To add rules to a Trigger for when content shows, click on the blue Content button , with will show the when section
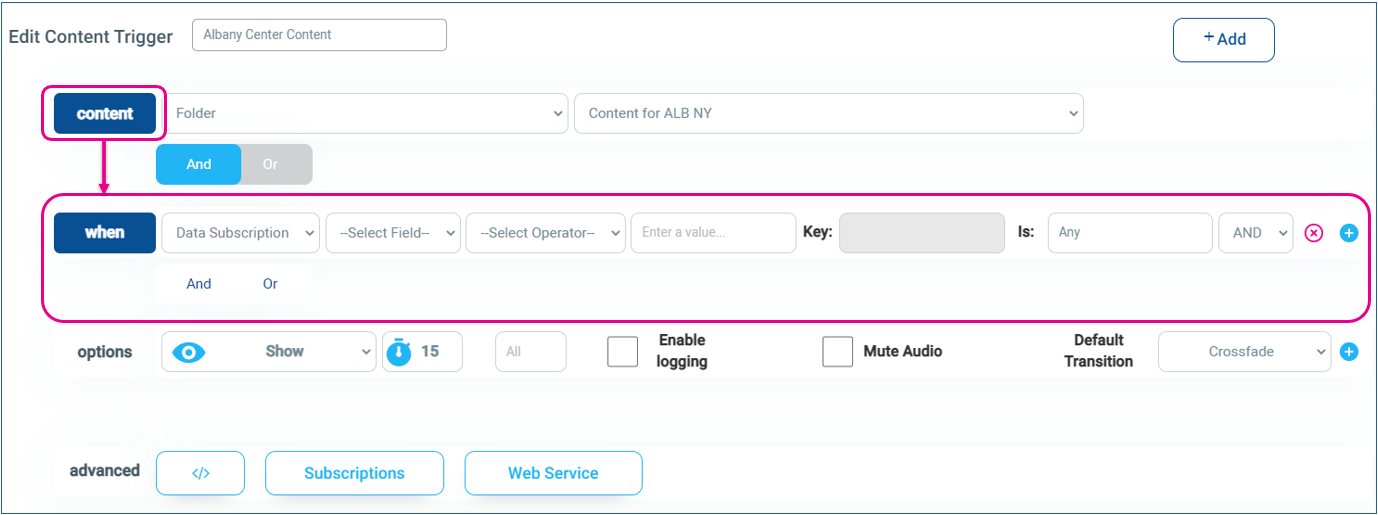
- With this section now exposed use the first drop down to select what the rule will examine
- Data Subscription = Examines a Data Subscription within Korbyt for a value that controls when the item is shown
- Metadata = Examines the Players information such as location, or other assigned value to only show specific content in specific locations
- Webservice = Examines information from a web based API
- Date = Select a Date Range or Days of the Week
- Time = Sets to only show during a specific time of day
- Optional – Use the small plus button to the right to add additional rules or use the And and Or button to add additional rules
- If the rules should show content during specific times of specific days you would layer a Date and Time rule together with the AND function
- Optional – Set display Options for time for each item should show, number of items, select logging, Default Transition
- Click the +Add button to save.
If you need to edit the rule after saving, Click on the blue Lighting Bolt icon on the item
Editing the Display Options
By default the display Options will show all items that are included based on the rule with a default transition of Crossfade. You can change these options

- Show or Hide – The standard version is to use the rules to select what to show, but can be used to hide items
- Display Time per Item – The default is 15
- Number of Items – The default is All, but can be set to a specific number of items to show each time this rule comes up on the playlist. this can be useful if you have a large number of items that are part of the rule
- Enable logging – Logs information about the items shown
- Mute Audio – Will mute any audio element pulled in
- Default Transition – How the new items will transition in
Optional Content Type and Order - If you click the first blue + button you will expose additional controls to select
- Content Type = Image, Video, Layout, Message, or URL. this can be helpful if you are using tags, but want to only have the rule effect specific item types with that tag
- Content Order = Random, Recent to Oldest, Oldest to Recent, A-Z (file name), Z-A (file name)
- Age = the Specific age of the item
Adjusting Order of Items
Now that you have added your items and rules your will have content in the top section that can be managed
Manually Managing Order of Items
The playlist will show its items working from left to right in the order it appears at the top of the playlist. You can drag items to reorder them.
You can also or create duplicate copies of items if you want it to show more than once in each rotation.
If a Clever rule limits where or when content should be shown, it will be skipped by players when it is not valid. 
Content weighting is not supported in conjunction with Clever content because of the nature of the weighting algorithm requires it to know the content of the playlist when it is saved. The Clever Rules allow the playlist content to shift dynamically. That is why the two are not compatible. If you have added Weighting instructions they can be removed by clicking the Pie Chart icon and selecting Delete. If you are using Clever Playlist, but not adding Clever Rules you could use Weighting to randomize content and show some content more than others.
Adding a Schedule to a Playlist
The default schedule for a Playlist is Daily, Everyday.

Clicking the pencil will allow you to edit the schedule to be more limited.
- Date Range = Allows the playlist to only be shown during a specific range of dates
- Advanced = Allows the playlist to be shown during a specific range of dates, days of week, and time of day
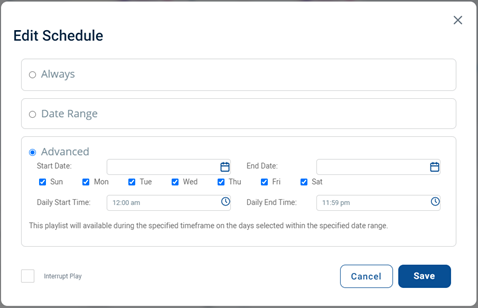
The schedule set here will control when the playlist as a whole will be seen as valid by the player.
Adding Players to the Playlist
If this playlist is meant to be seen directly on a screen you will now add Players and/or Player Groups that the playlist will be programmed
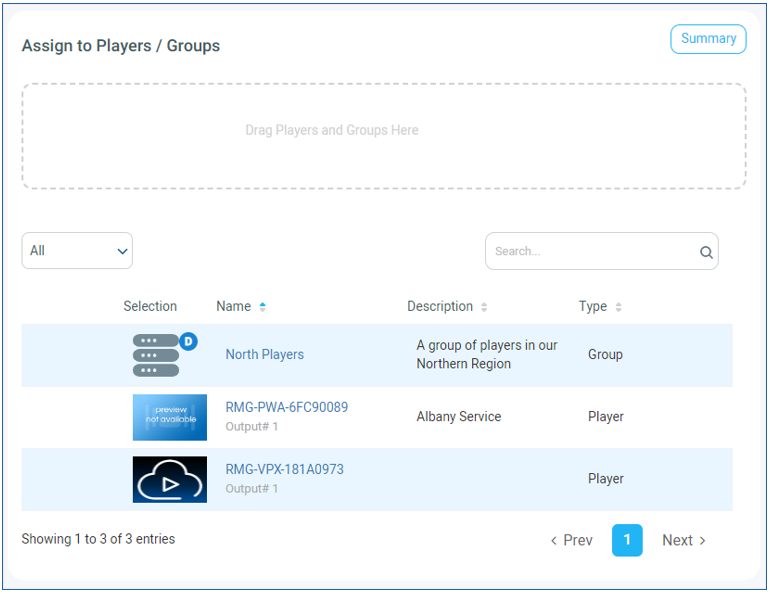
- Drag and drop the appropriate players into the Drag Players and Groups Here field.
Once your player is added, your playlist will start playing at its scheduled time on your active player.
You might also be using this Playlist to control content that shows within a section of a larger Layout. If that is the case you will save the playlist with no players. For more information see How to use a Playlist Element in a Layout
Click Save Playlist in the upper right to save any changes

