Playlists 101
Introduction
In this article we will be looking at playlists and how they are used. A playlist is a list of media that can be scheduled to play in your player in either a sequential or shuffled order. You can add images, videos, layouts, and messages to your playlist in either a static or dynamic context. There is also an option to add a clever playlist which will let you add special rules to control your content triggers. To get a better understanding on how playlists work, lets step through the process on how to create one and the features it includes.
Standard Playlists
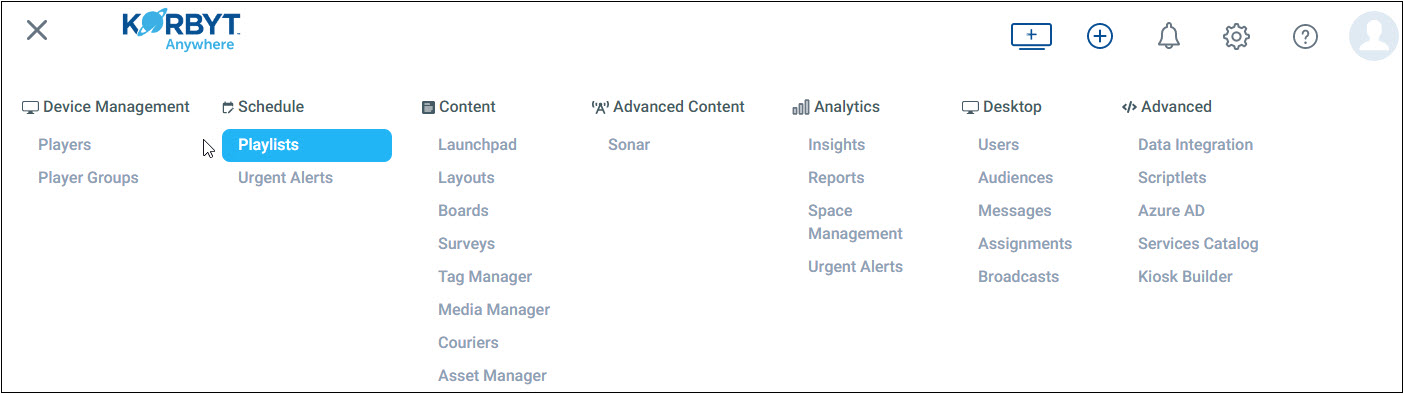
First navigate to the playlists page from the digital signage menu.
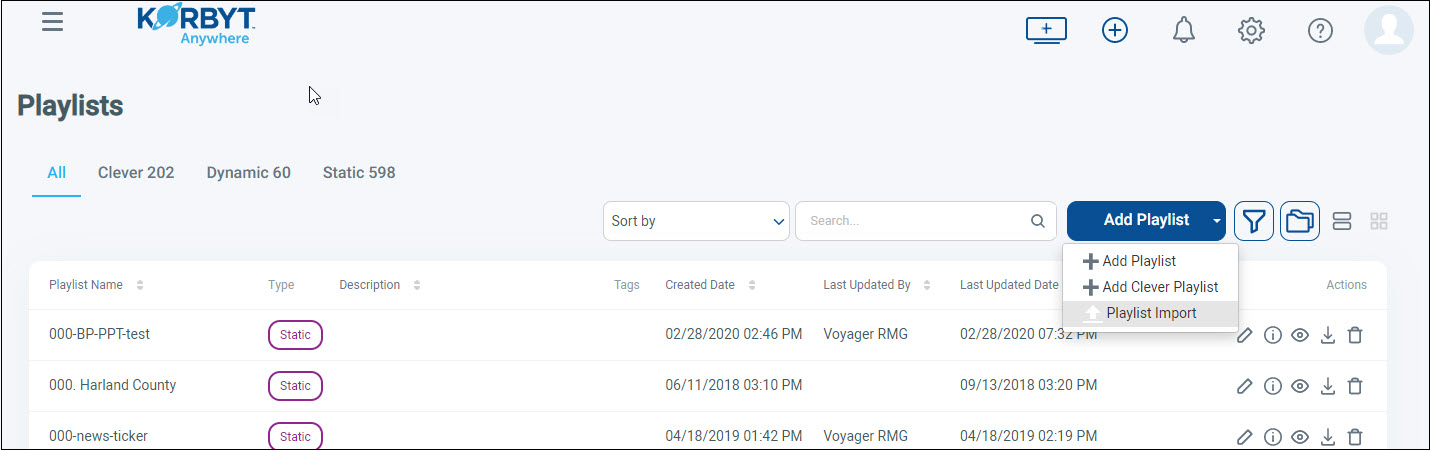
Once we are on the playlists page, click on the Add Playlist button. In the dropdown select the first option Add Playlists. This will be our standard playlist that can be used in all players.
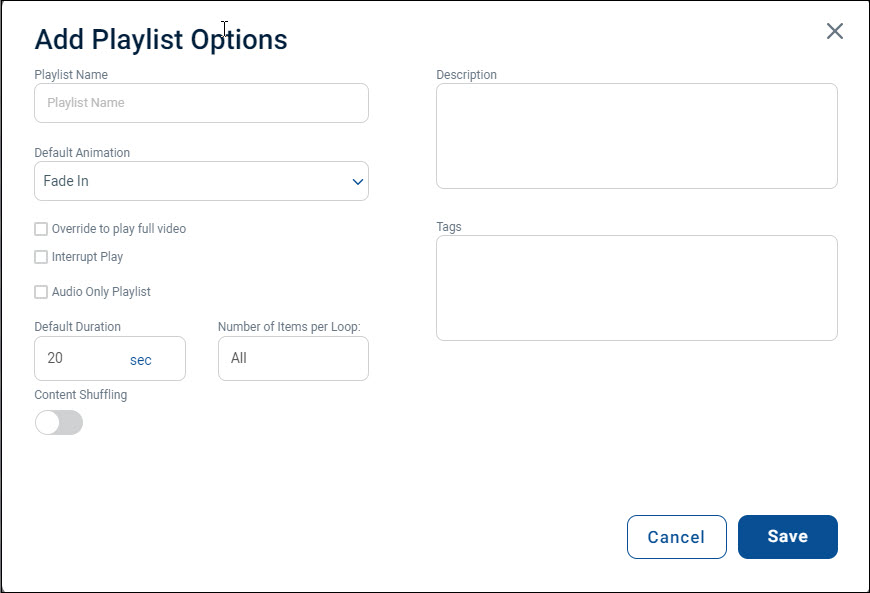
In the add playlist options popup, you will see a few options on how we can set up our playlist.
- Playlist Name: Name of your new playlist
- Description: A description of your playlist used within the CMS.
- Tags: metadata used to identify your playlist.
- Default Animation: This is the is a set of animations that will play for all media that has been assigned to your playlist. After setup for your playlist is done, you can modify your media to have individual animations if you don’t prefer to have a default one set up.
- Default Duration: This is the default time that all media in your playlist will appear before switching to the next set of media. You can set the duration individually after playlist setup
- Number of Items per loop: This is how many media items you want to show in a
- Override to play full video: Enable this option so that any video within your playlist will play for the videos entire duration instead of playing for the default duration.
- Interrupt Play: This option guarantees that your playlist will play at the time it’s scheduled even if another playlist is playing at that time in the assigned player.
- Content Shuffling: Set to off by default, this slider will switch between sequential and shuffled order.
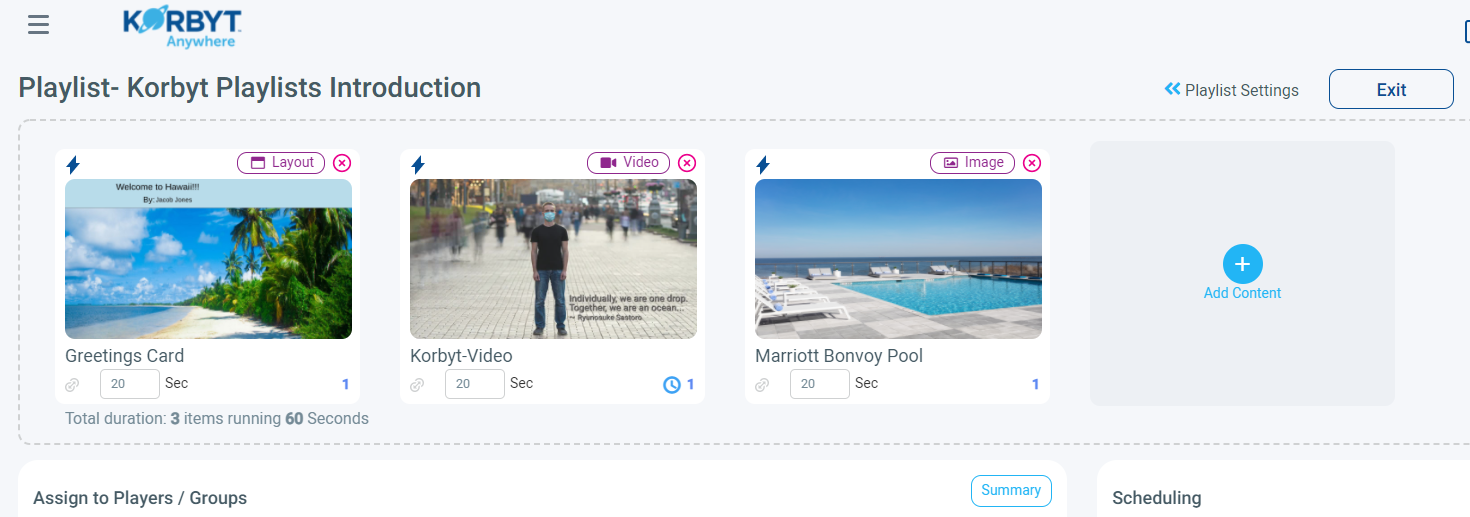
Adding Static Content
After you save your initial settings, you will be taken to the playlists edit page. This is where you will be adding your media, adding your player(s) or player group(s), and setting a schedule.
For a standard playlist, we can add content in either a static or dynamic manner. Static content is media that is added individually to your playlist, and dynamic content is media added to your playlist based on tag rules. A standard playlist can only be either a static or dynamic while a clever playlist can contain both. Let’s create a static playlist by individually selecting media.
Click on the add content button and the media picker will appear.
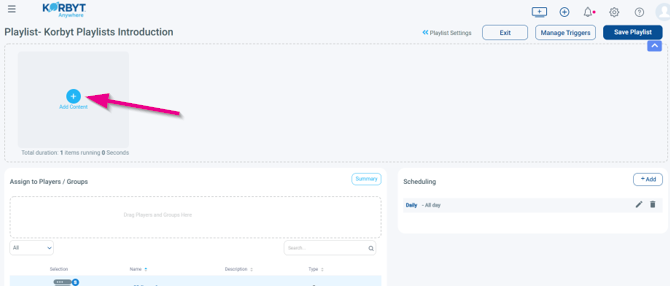
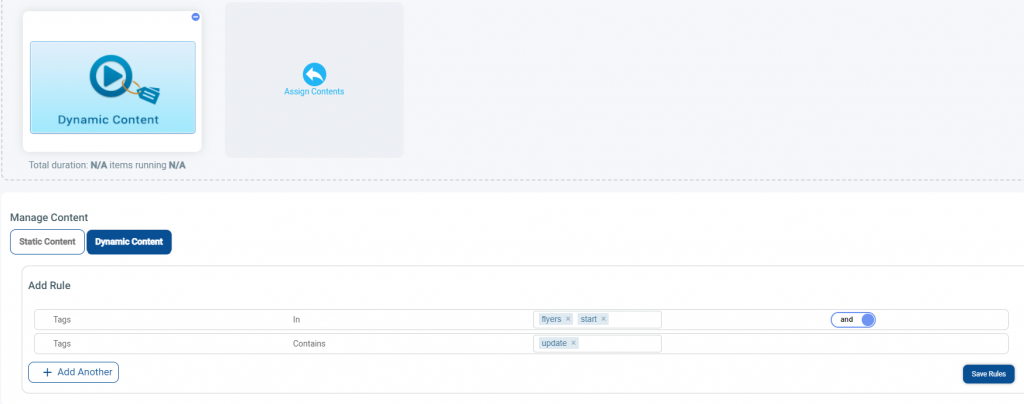
With the media picker open, you can now select the type of media you want to add. Images, videos, layouts, and messages can be selected and added to your playlist. Under Managed Content, you can see two buttons for static content and dynamic content. Static will be set by default where you can select content from the media picker, and dynamic content will bring up your rule builder.
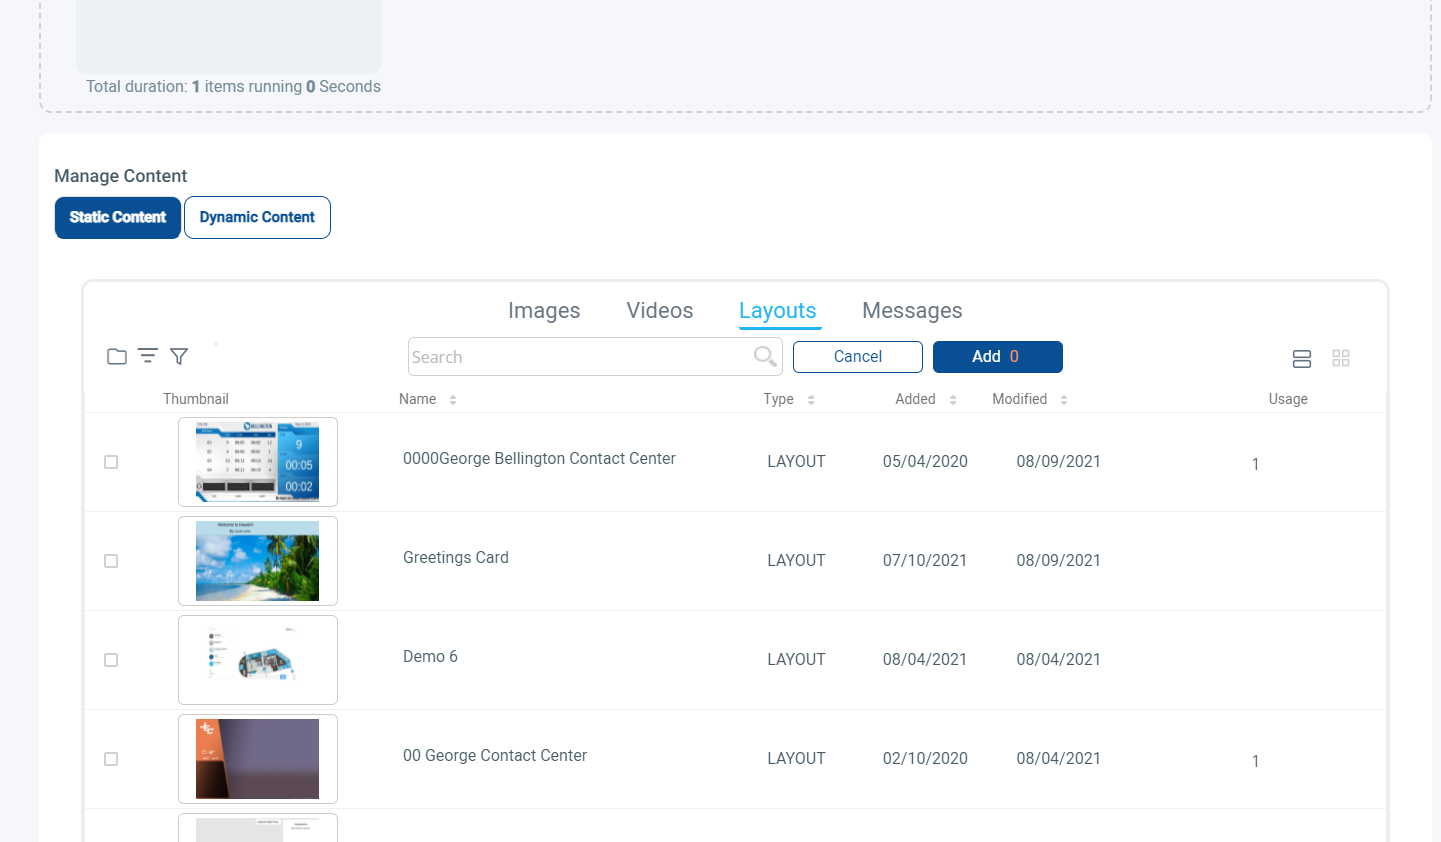
Simply select the content you wish to add, by clicking its associated checkbox. Once finished hit ‘Add’ along the top of the media picker and your content will now show in the content area of playlists.
Adding Dynamic Content
If you selected dynamic content, a rule editor will appear instead of the media picker where you can select media dynamically. The rules for a standard playlist require your media to have tag metadata for your rules to take effect. In the rule builder select your conditions and your criteria before saving a dynamic playlist content. Take a look at the section on Clever Playlists for additional options on dynamic rules.
Managing Triggers
Now that there is content added to our playlist, lets try to add some triggers for your media. A trigger is a rule that controls whether this playlist should appear or not. Click on the manage trigger button.

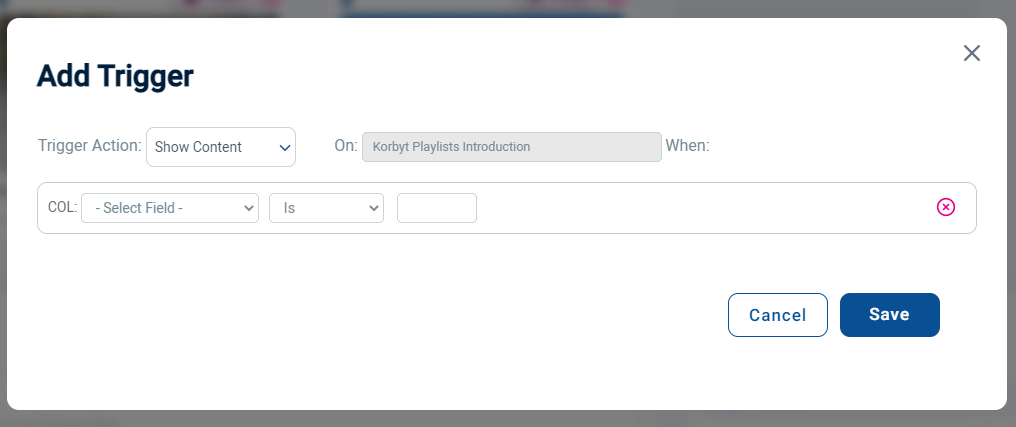
With the Playlist Triggers modal open, we can start adding triggers with the three buttons in the top row. The first button is the add triggers button. This will let you select the rules for your trigger.
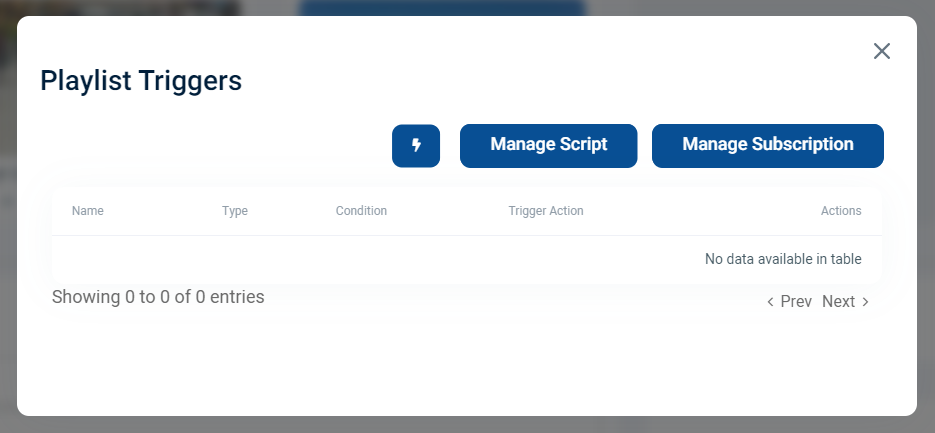
Triggers in this context will either show or hide your playlist based on a rule that requires a column, a condition, and a qualifier. First select whether you want to show or hide content for this rule next to Trigger Action.
Now we can create our rule. The first part is the column which by default is a selection of player metadata. The column is the parameter you will comparing a qualifier against. We can also set up a data subscription and use columns from that as well. Next is our condition which tells us how we want our rule to be set. The last part is a qualifier which will determine what your rule should look for when showing or hiding content. This input can change based on the type of data type your column is set to.
Instead of just using player metadata in our columns, we can use columns from a data subscription to adjust our rules. Select a table from your preferred data subscription and then select the columns you would like to add as possible parameters for your trigger rules. Save your data subscription.

Adding a player or player group to your playlist
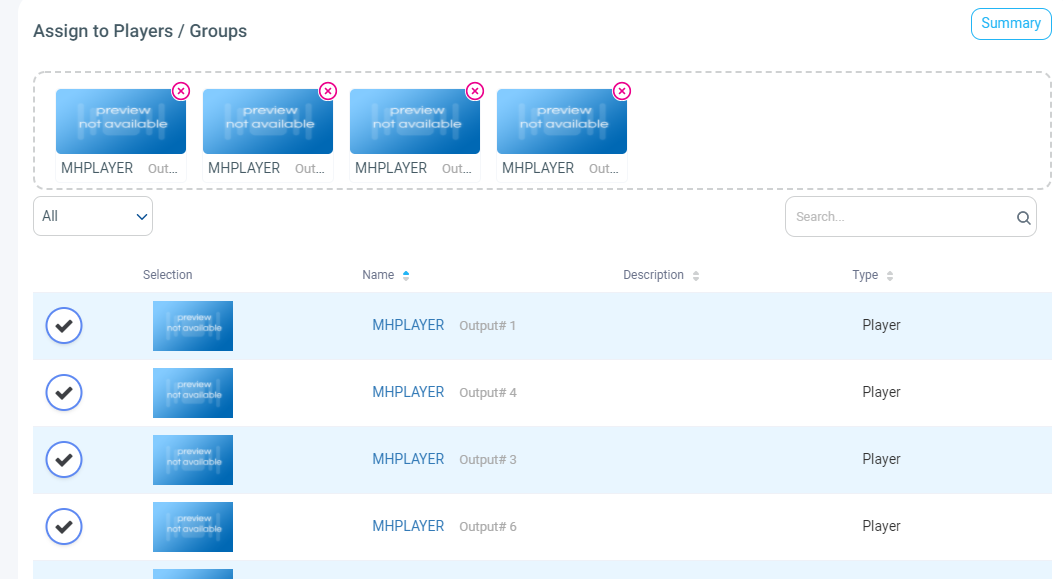
Now that we have our media setup and configured, you can now start adding in some players/player groups you want your playlist to play on. Adding players to your playlists is pretty simple, and once your player is added, your playlist will start playing at its scheduled time on your active player.
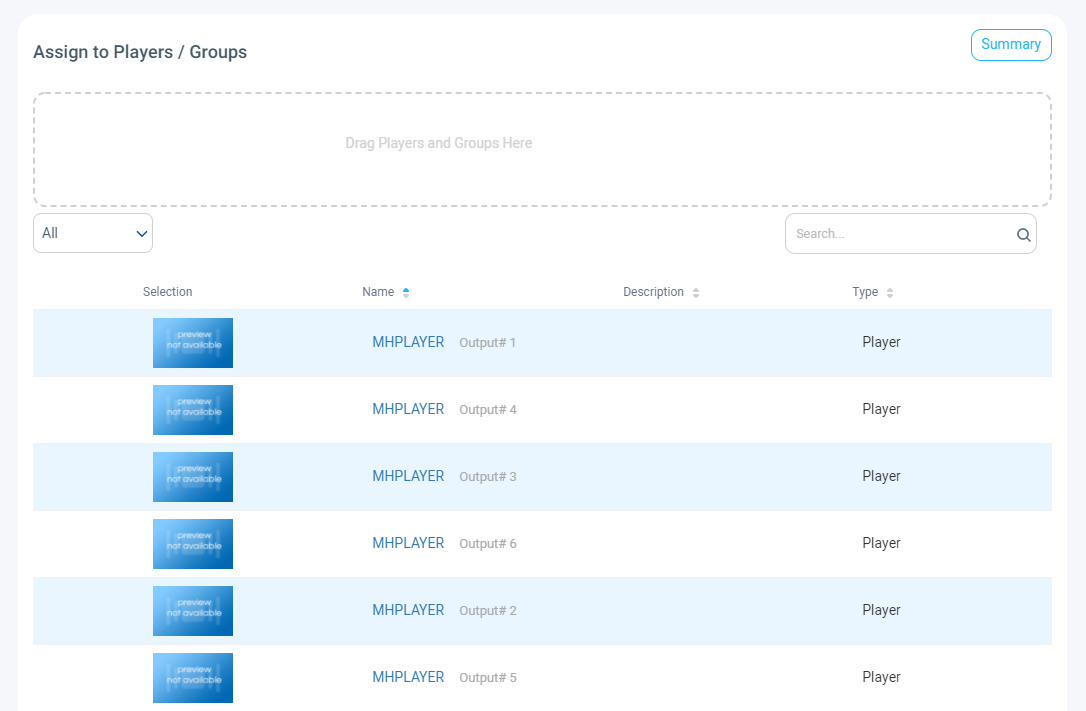
Click on as many players/player groups you want added to your playlist and after you are done with configuring other playlist settings, you can click on save. Now your playlist can start playing on your player(s) and player group(s).
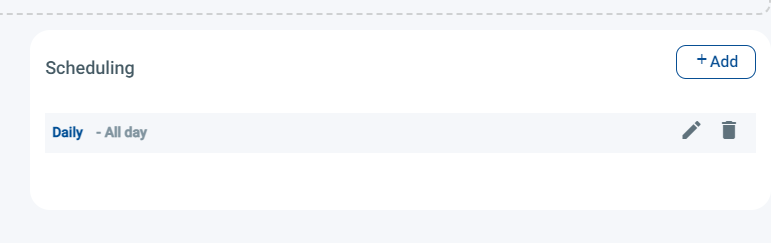
Scheduling your playlist
When you assign a player to your playlist, you can set specific times for when you want your playlist to appear on your player. On the right side of the page, you will a setup for scheduling. Click on the +Add button to add a schedule.
Note: You can have multiple schedules added to your playlist except for always which will be overwritten by other schedules assigned.
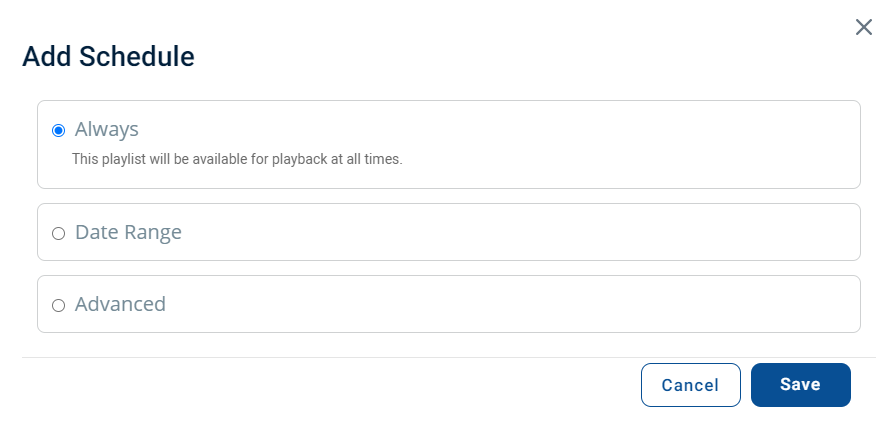
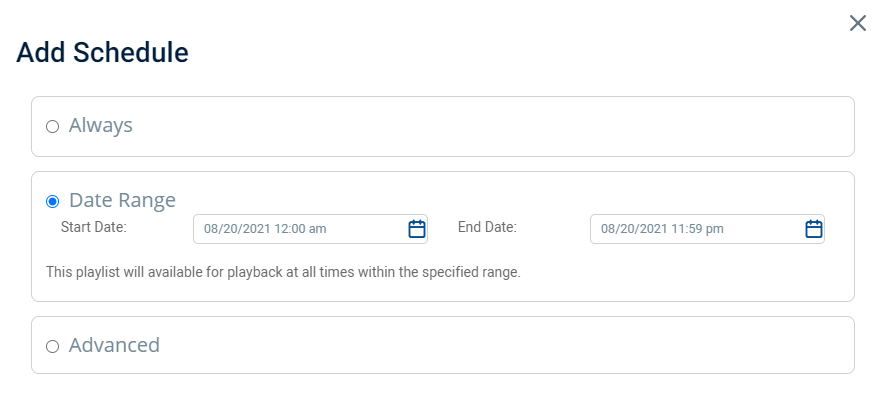
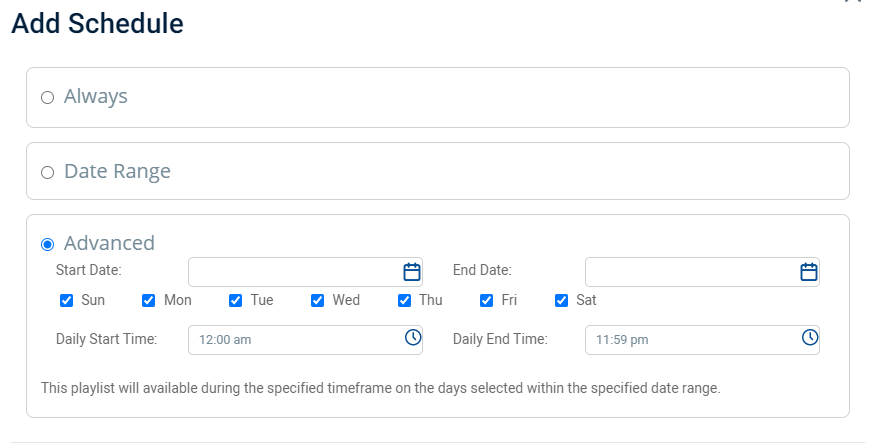
There are 3 options you can use to schedule your playlist:
- Always – Your playlist will play continuously on a player unless overridden by another playlist scheduled on that player.
- Date Range – Your playlists will play continuously from a start date and time to an end date and time.
- Advanced -Your playlists will play from a start date and end date just like the date range option, but you can also set specific days of the week the time of day you want your player to play in.
Clever Playlist
A clever playlist is a playlist with additional capabilities from your standard playlist where you can better control what media appears and how they appear. With a clever playlist you can add static and dynamic content as well as add data subscriptions, scripts, and web services to trigger your individual pieces of content. This individual content can also be triggered based on specific dates. Content can now also be added based on folder location or content metadata. Please note that clever playlists are only available for player versions 2.0 and greater.
Clever Playlists vs Standard Playlists
When choosing between either a standard playlist or clever playlist, it is recommended to use a clever playlist due to the advantage of having more options to arrange and configure media within your playlist. A clever playlist however is not compatible with players that are below version 2.0 and a standard playlist would then be the preferred option.
Adding a Clever Playlist
On the playlist landing page click on Add Playlist and select the Add Clever Playlist from the dropdown.

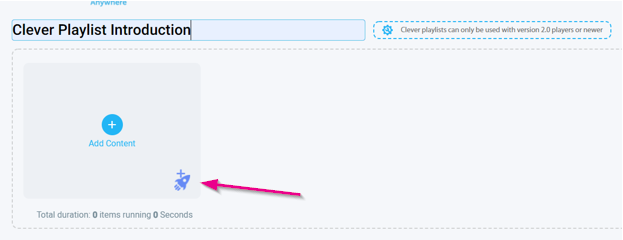
The clever playlist edit page appears almost identical to the standard edit page, but the main difference is how triggers can be handled for your media. We can add both static and dynamic content which can have triggers for both. Click on the rocket ship icon on the bottom right of the content box to add your clever content. You can also add static content first and then apply a trigger to it.
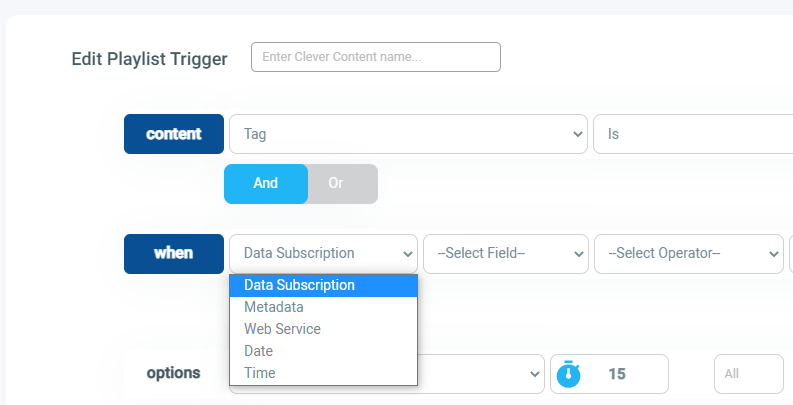
In the clever content trigger section, the ability to add dynamic content rules and trigger rules for content are present. Just like a standard playlist you can set rules based on content tags, content metadata, folder location, and relevant refresh. Click on the ‘content’ button to open additional trigger option.
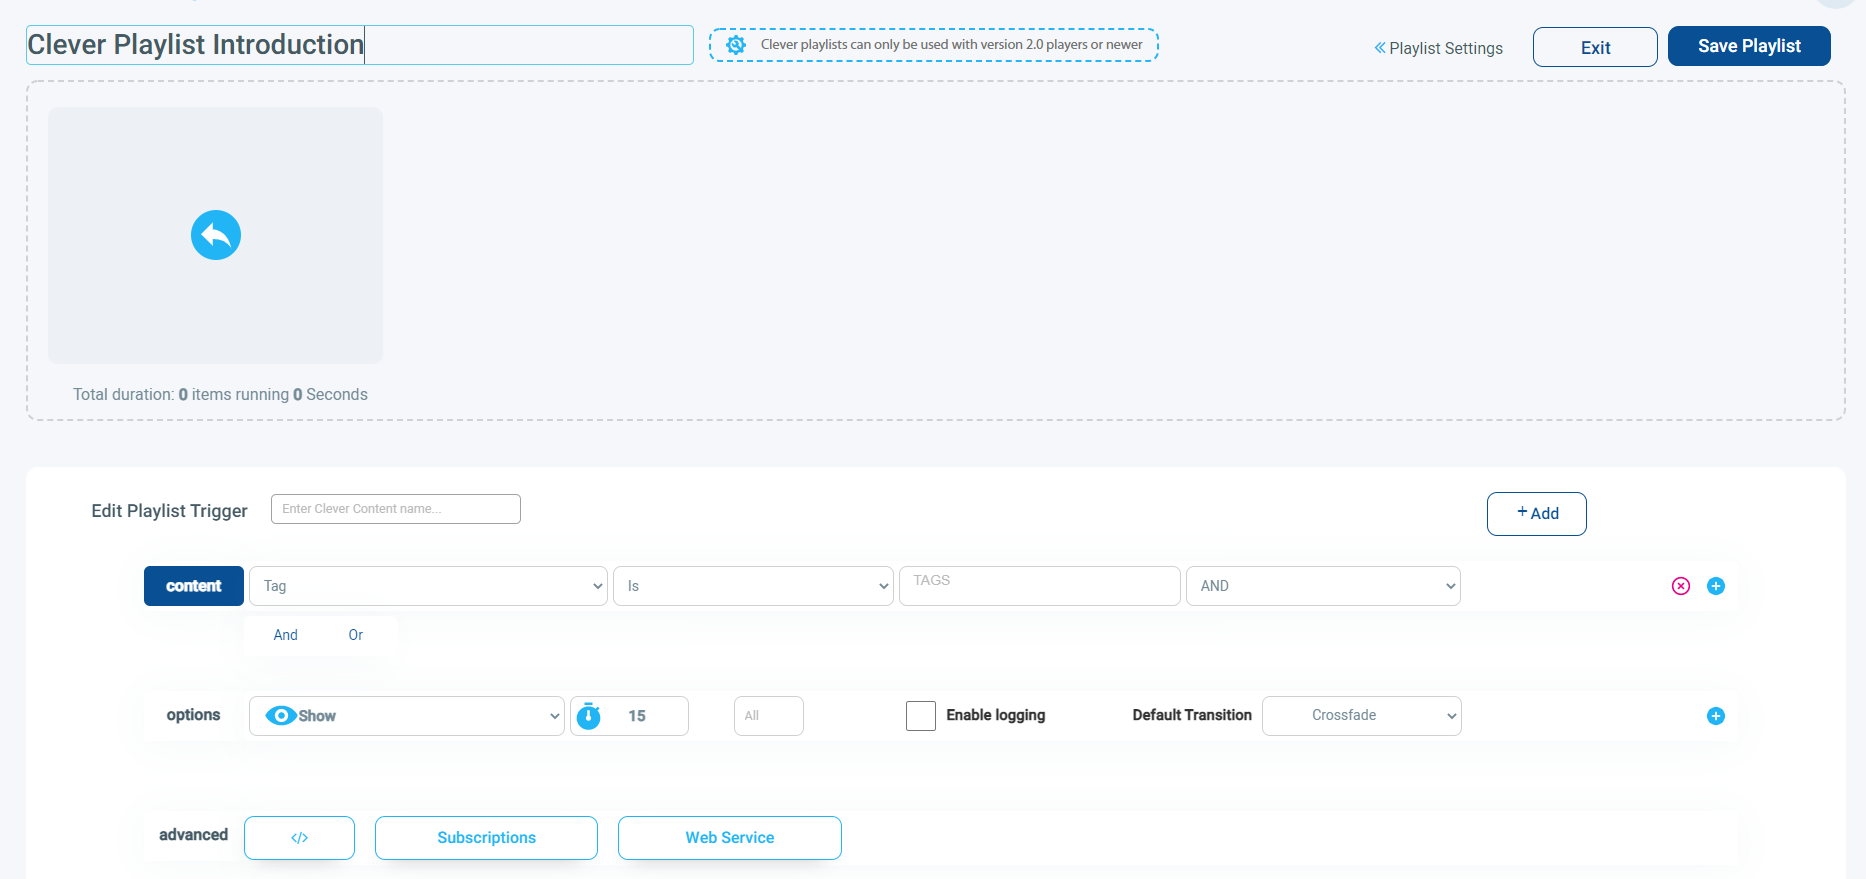
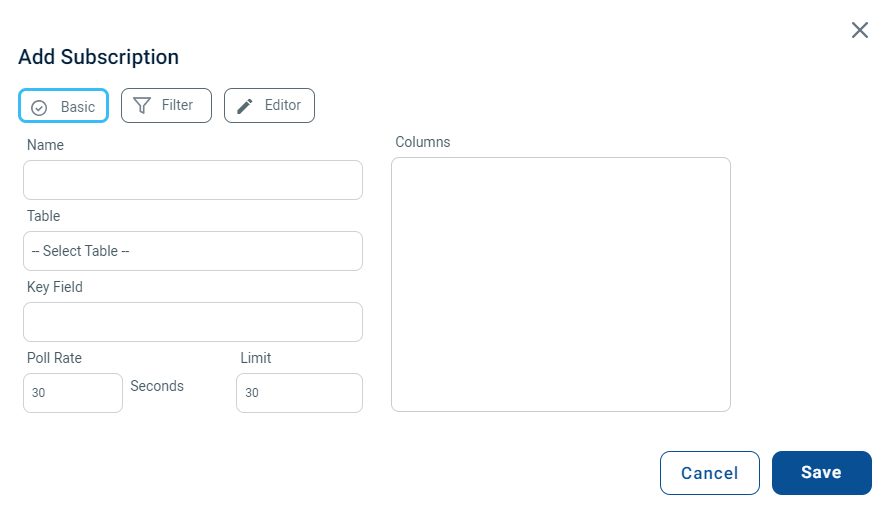
A new row will appear, which will indicate the criteria that can be selected for a trigger to occur. You can select either a data subscription, web service, player metadata, date, or time.
To set up some of these options for showing content, you need to configure your data subscription or web service to then build your content filters off of.

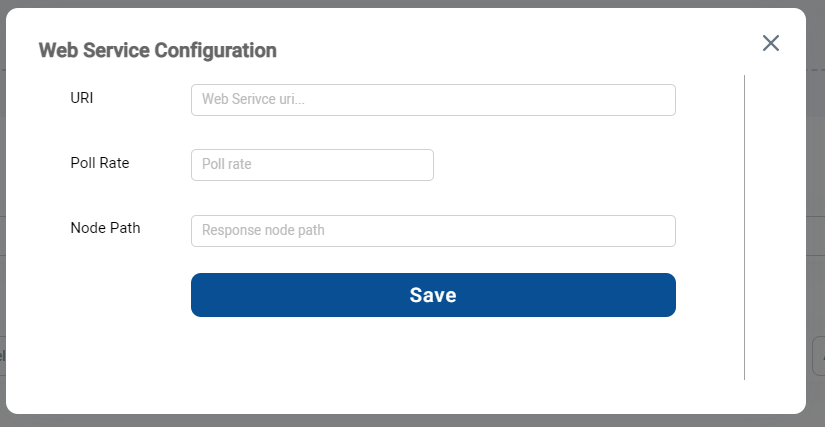
With clever playlists, you can set up a web service trigger that can control when your media will appear. To use this feature, you will need to provide an API endpoint where we can get data from a response. With preferred data we can then set that data when we build a rule. You can also add a poll rate and a node response path in the web service configuration.
Just like a trigger in a standard playlist, you can add data subscriptions in your rules to control how media appears. You will need to have a data adapter setup beforehand so you can select columns from your table. For more on data adapters, please consult the KB article on data adapters.
Within this modal you can build a data subscription that will bring in your relevant data that you want to use for filtering your content.
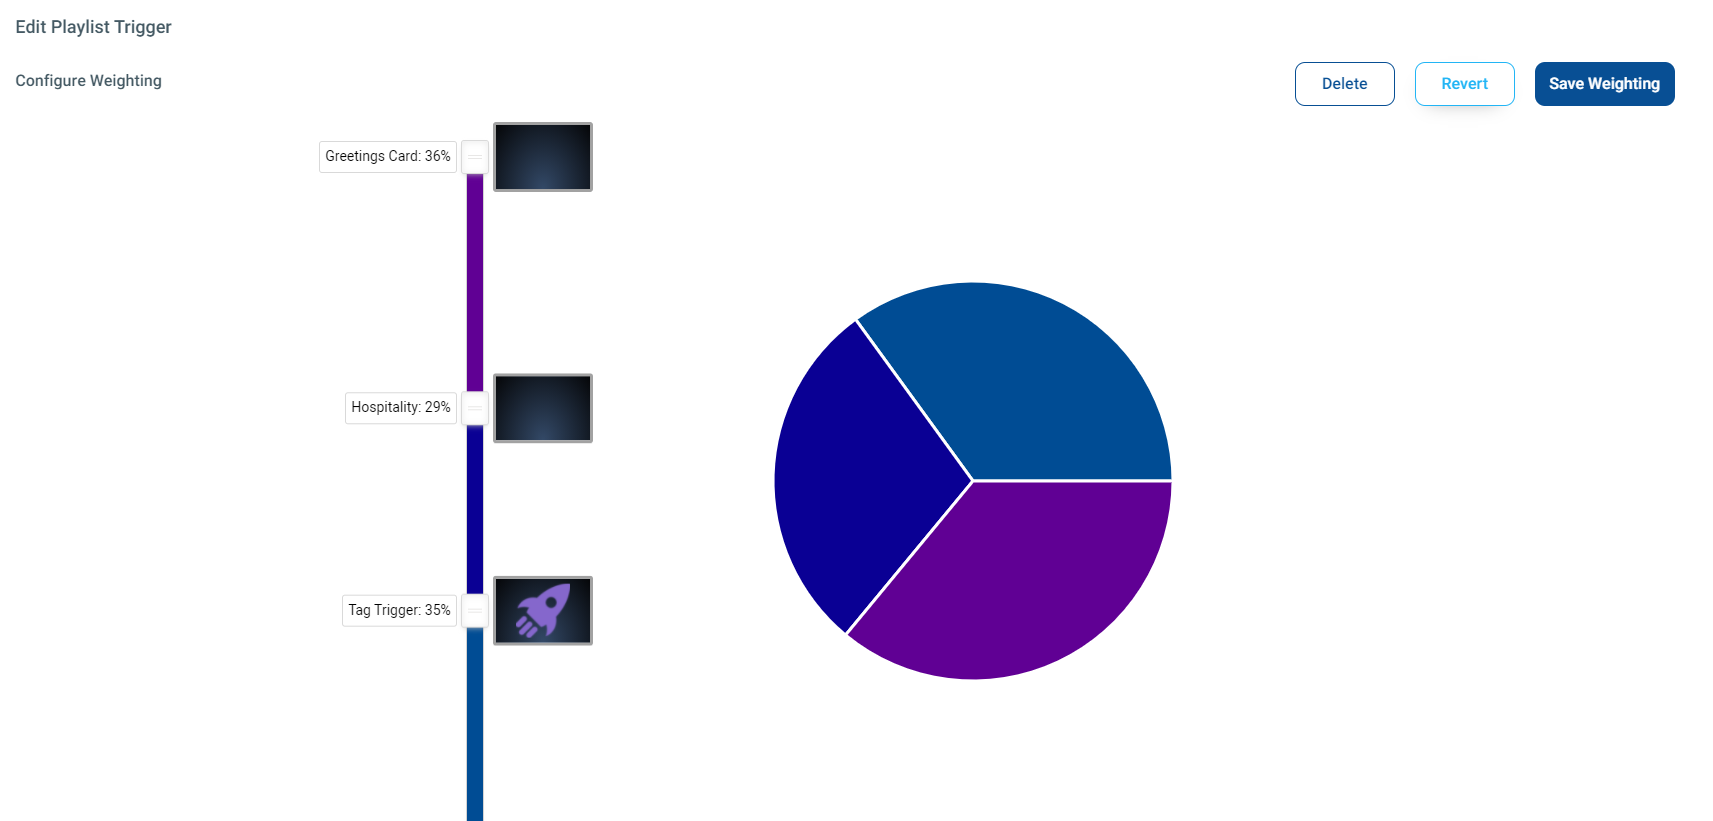
Content Weighting
Content weighting is a clever playlist feature where you can weight how often your media plays when triggered. With a weightage set, your media will play in a randomized order where media with a higher weighting percentage will appear more often than media with a lower weighting percentage.
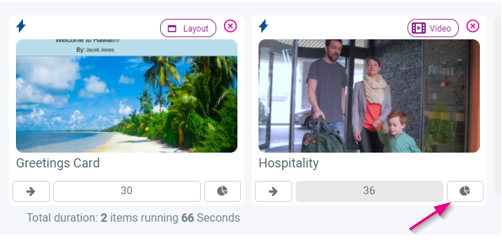
Click on the chart icon in your media to change its weighting.
To configure the weighting of your media, grab a slider and drag it to a desired percentage.
Transitions
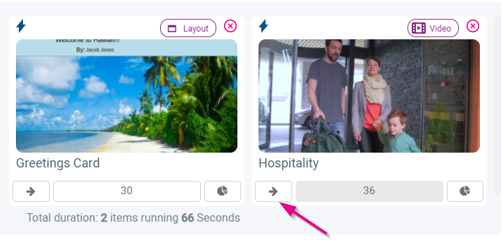
To modify transition for each individual piece of content, select this arrow icon here to show a dropdown of transitions to choose from.
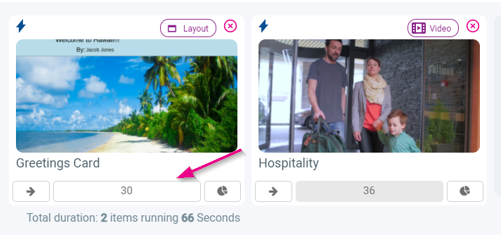
Durations
To modify durations of content, select the center area that shows the seconds of the content duration. Note: if this content is greyed out, then your playlist setting of ‘override to play full video’ is selected.