
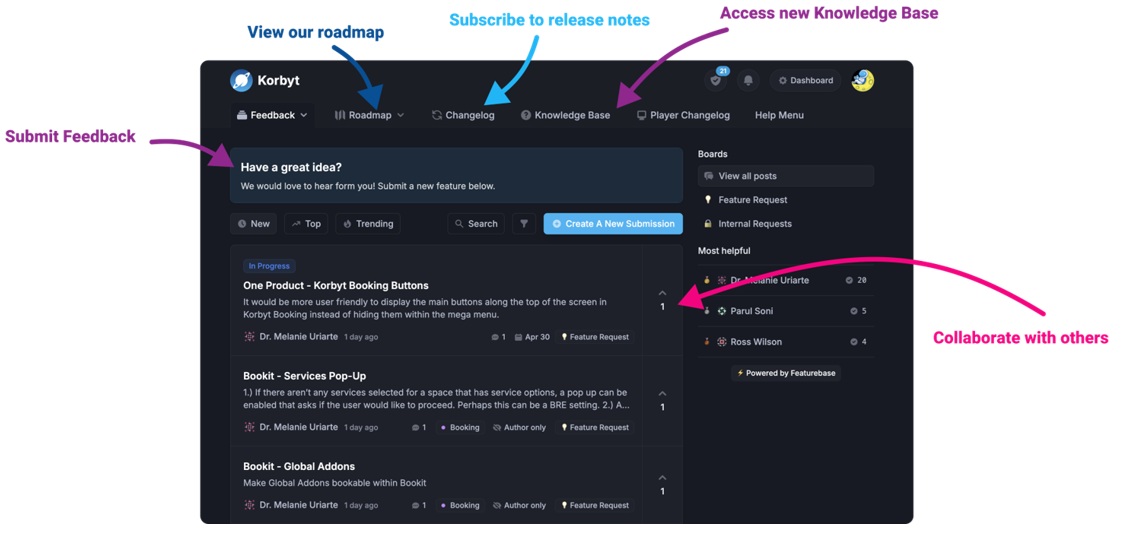
Our Knowledge Base Has Moved
The New Page landing page for the Knowledge Base is https://product.korbyt.com/help
The new version of this specific article can be found at: https://product.korbyt.com/help/articles/7414177-office-365-adapter-outlook-calendar-data
Please update any of your bookmarks to the new Knowledge Base
For assistance on using the new Knowledge Base, we have a Welcome to the New Korbyt Knowledge Base guide
The new Korbyt Product Page also has sections for submitting feedback on system improvements, a view of our Roadmap of upcoming enhancements, and a change log of all updates.
This article provides information related to setting up a data integration between Office 365 Outlook Calendars, Room Resources, and Korbyt.
Korbyt’s Office 365 Calendar Data Adapter uses a standard OAUTH2 token request and response authentication pattern to securely request and display meeting room data.
The integration does not need the customer to create an application in their Azure b/c Korbyt creates a multi-tenant application automatically.
For the integration to function, Korbyt requests access to the following sections of data.
The Korbyt User who is configuring the adapter within Korbyt will also need sufficient rights to these sections within the organization’s Office 365 deployment to approve the data requests:
- Calendars.Read
- Calendars.Read.Shared
- offline_access
This article will review:
Office 365 Settings to Create a Room Resource
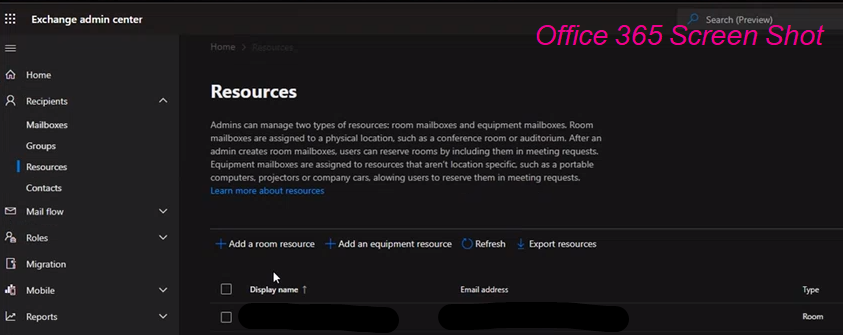
If you need to share a room’s Office365 calendar, the room needs to exist as a Room Resource in Exchange
The below steps review how to create a Room Resources in your Exchange 365 service
- In Exchange Admin Center under Resources, add a room resource.
- Configure your room resource with an email address from your available domains then set the properties and booking delegate settings
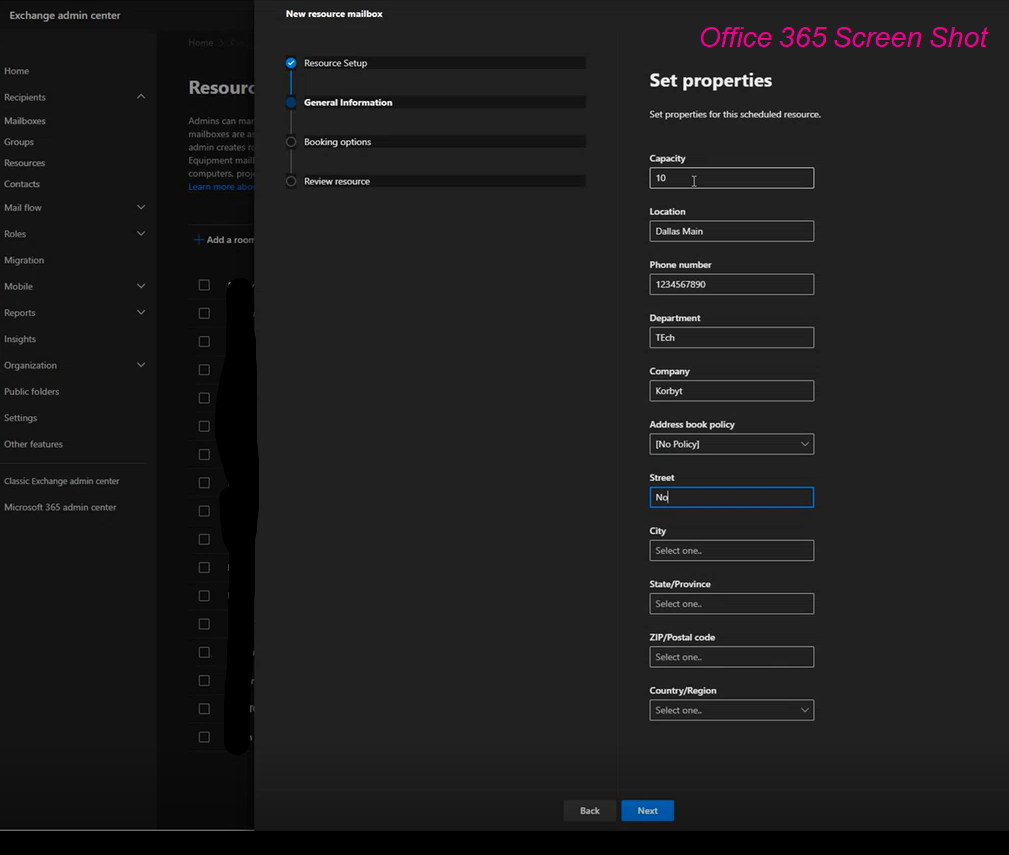
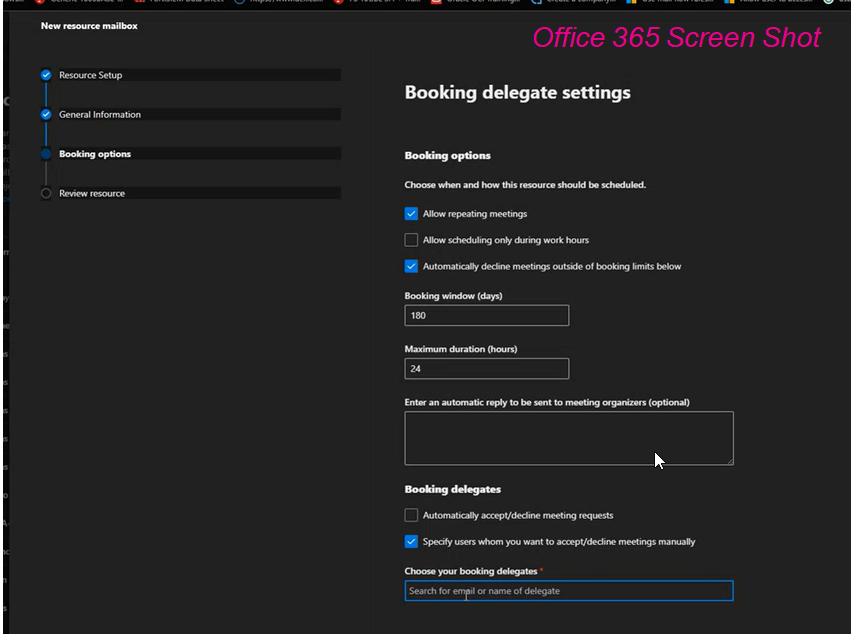
- Be sure to add yourself or another administrator as a delegate on the room resource so you can open and edit the mailbox and calendar once created.
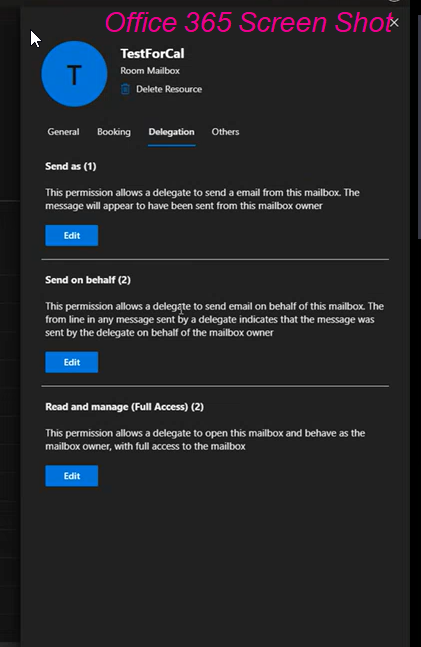
- After the Room Resource is created, go to Office 365 and login to the Room Resource’s mailbox and select the Calendar.
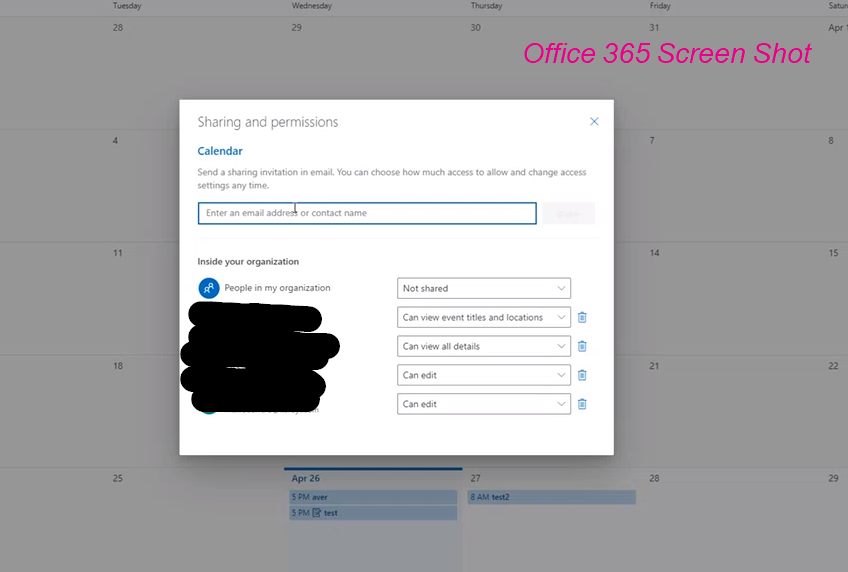
- Then open the Sharing and Permissions section.
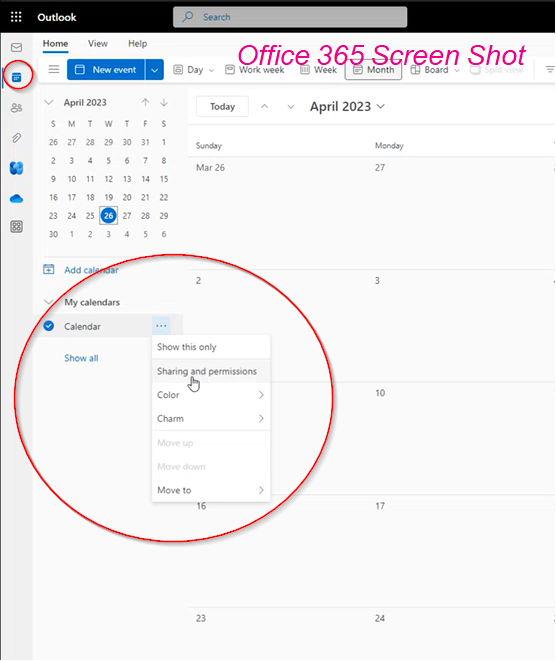
- Add any additional users who need access to the events (including the authenticating Korbyt admin user) or set a global rule for people in your organization.
- Then close the Sharing and permissions window (there is no Save button).
Creating the Office 365 Adapter in Korbyt
- From the Advanced tab select Data Integration
- Under Data Integration click on the Create Adapter button
- Step 1: Adapter Details
a)Enter the Adapter Details like Adapter Name
b)Select the Adapter Type. In this case we will need to select The Adapter Type as “Template”. c)After filling the information, click on the NEXT button to proceed.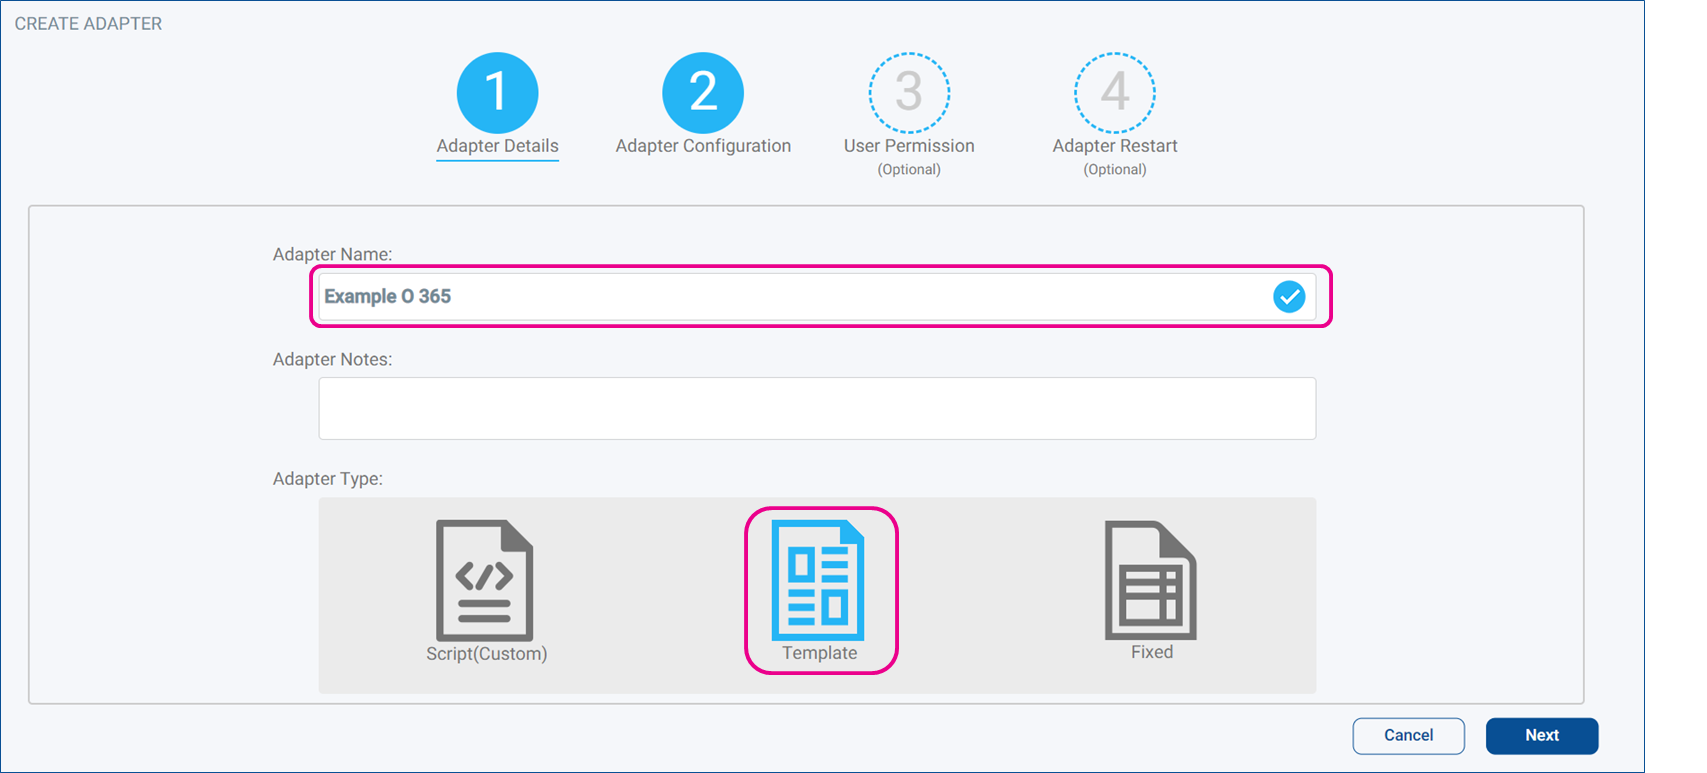
- Step 2: Adapter Configuration
a) Select the Template, for this adapter we will select Office365 Adapter (3.1.2) from the Drop down.
b) Next make sure the Office 365 Authorization is authenticated.
c) Enter the email addresses for the calendar(s) or calendar names being used. If multiple calendars are being used separate them by a semicolon (;).
d) At this point, we can SAVE & CREATE the adapter. The Step 3 – Step 5 are optional.
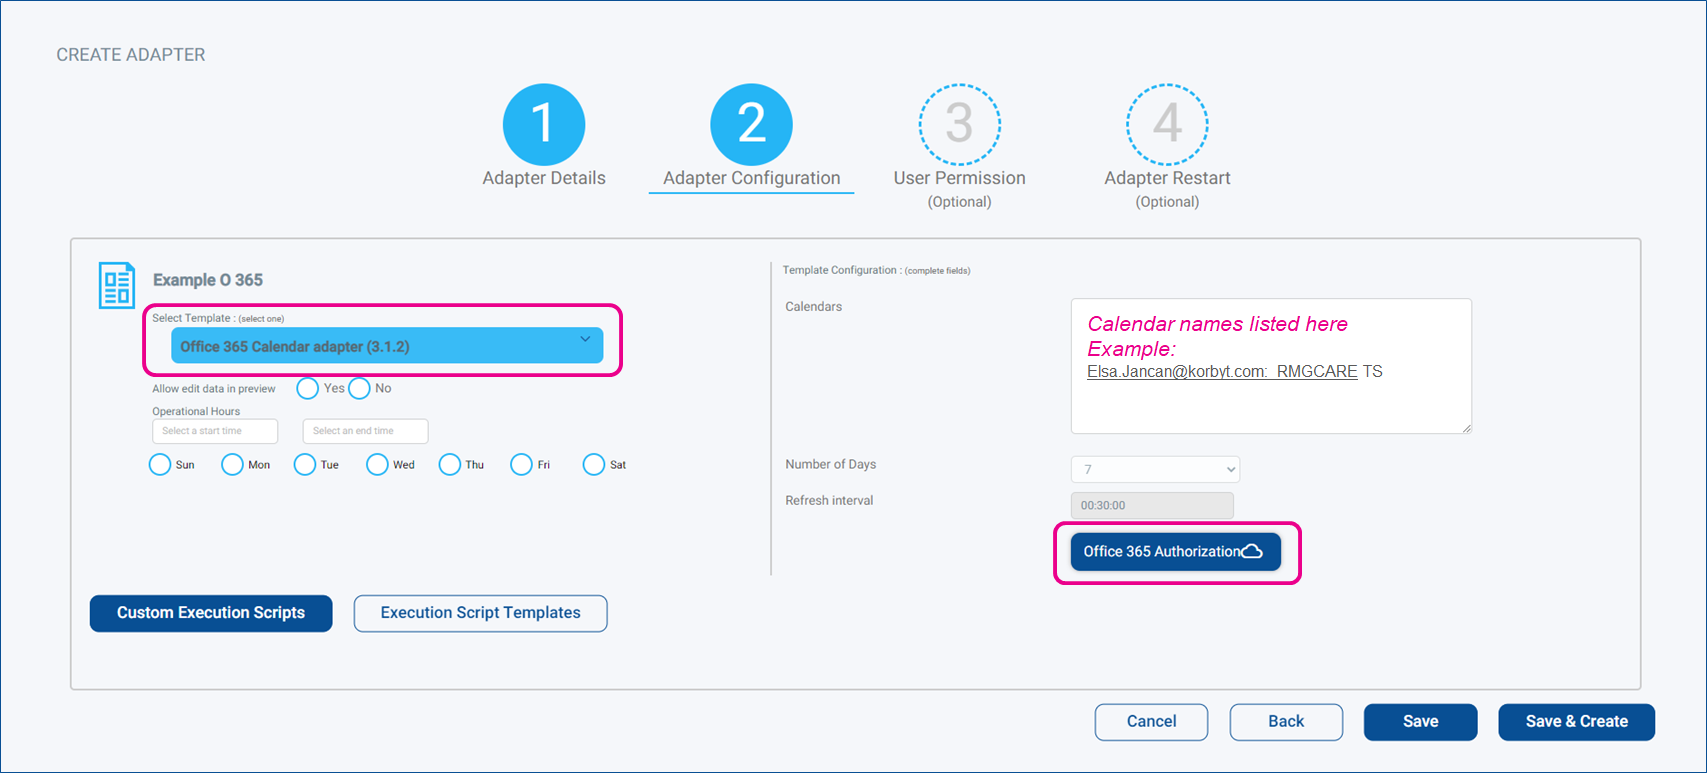
e) Click on SAVE & CREATE button
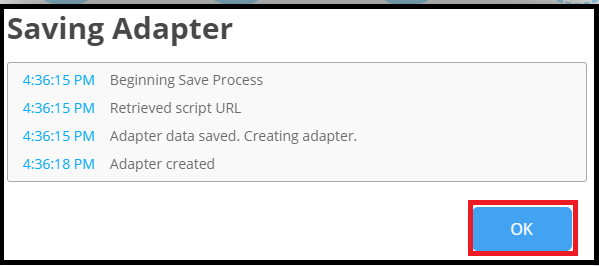
f) Saving Adapter notification should appear
g) Click on the OK button
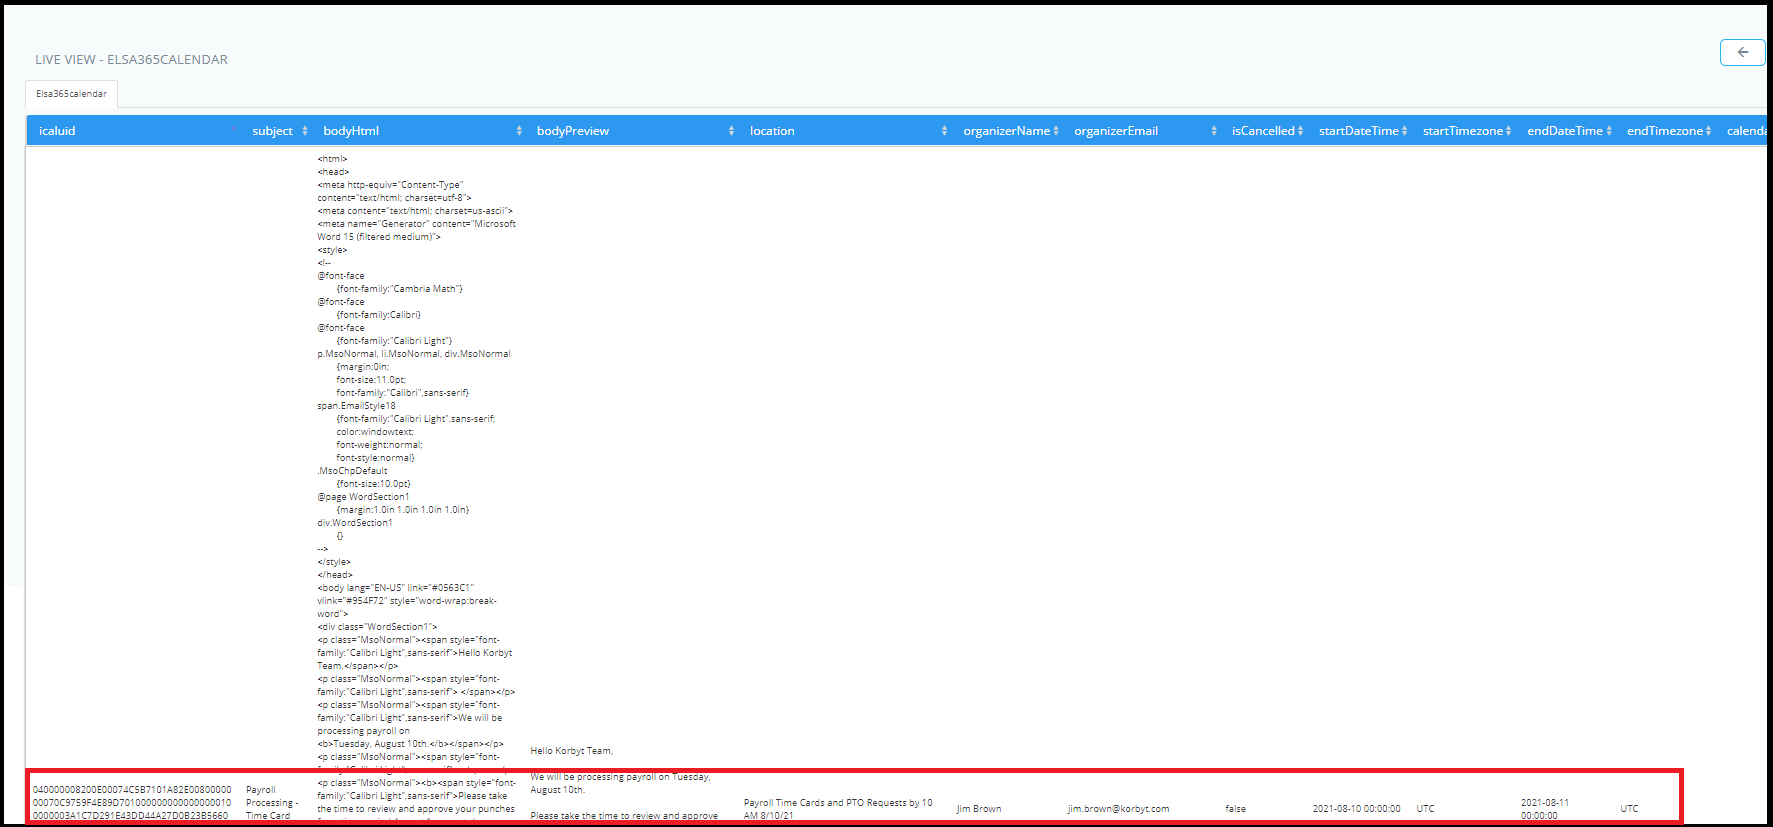
j) Under Data Integration the new Adapter should now display
k) Click one Eye action button to preview the data

l) Below is an example of how the data would look like on the Preview
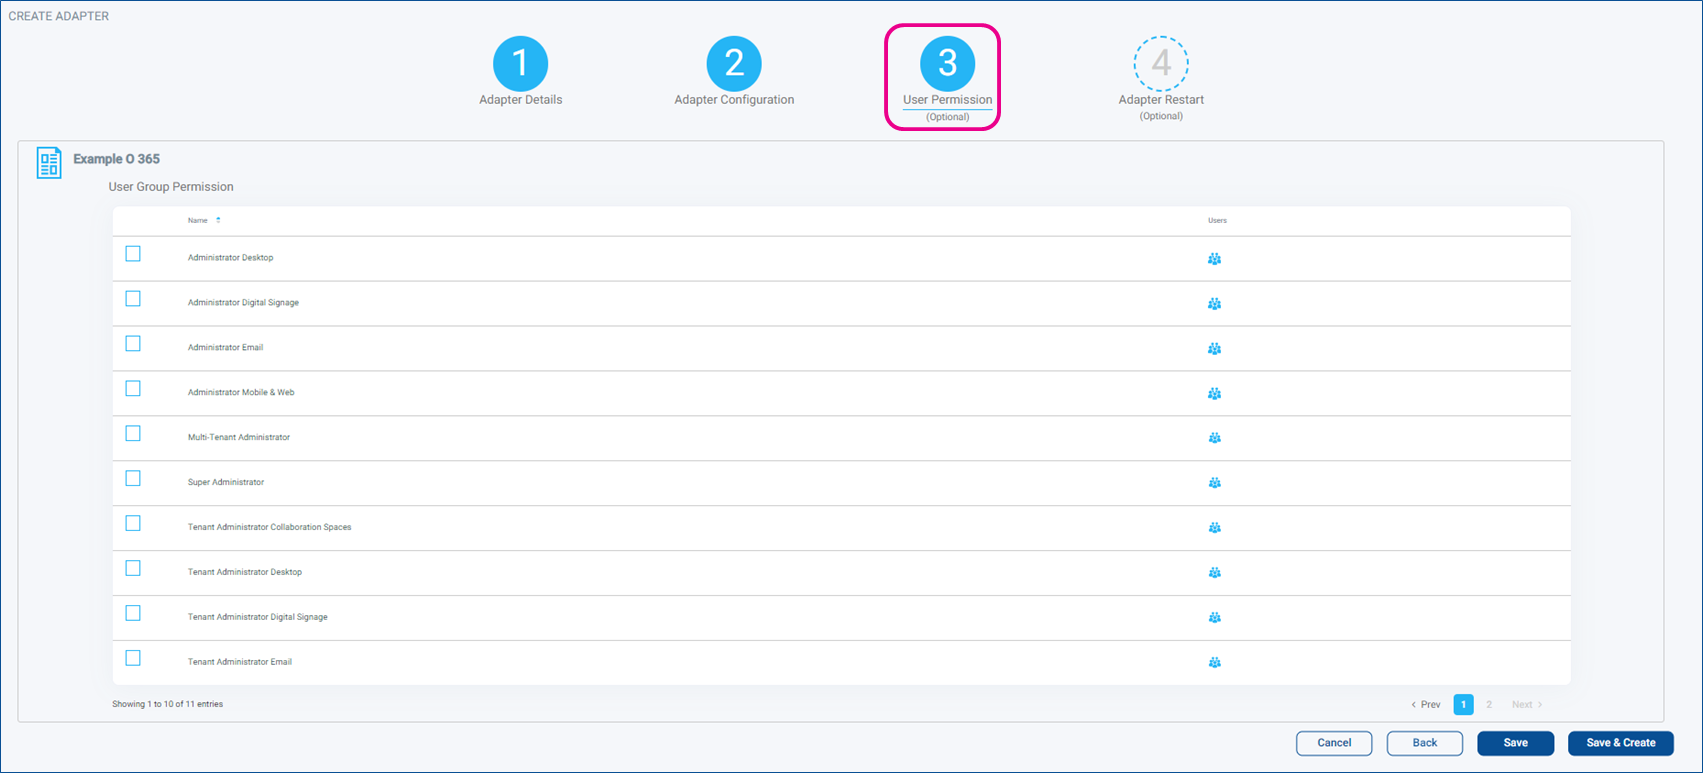
During the creation of the Adapter, the Steps below are optional. - Optional User Permission
a) During this step, user permission can be set
- Optional: Adapter Restart
a) During this step, the Schedule to restart the Adapter can be set:
