
Our Knowledge Base Has Moved
The New Page landing page for the Knowledge Base is https://product.korbyt.com/help
The new version of this specific article can be found at: https://product.korbyt.com/help/articles/3572080-how-to-use-a-webex-element
Please update any of your bookmarks to the new Knowledge Base
For assistance on using the new Knowledge Base, we have a Welcome to the New Korbyt Knowledge Base guide
The new Korbyt Product Page also has sections for submitting feedback on system improvements, a view of our Roadmap of upcoming enhancements, and a change log of all updates.
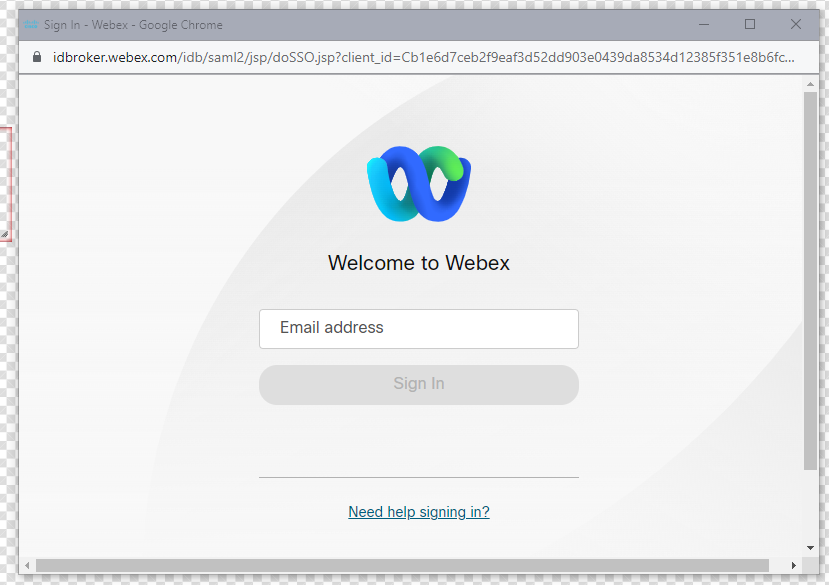
Requires a Webex account that you will log into through a popup connecting to that account.
Creates an element that can be linked to a specific WebEx Meeting so that the meeting can be played through Korbyt

To Use the WebEx Element
- Navitage to Layouts by opening the Mega Menu
 and in the Content column click on Layouts
 - Either create a new layout or edit an existing layout
- Drag the WebEx Element tile to the canvas
- When you drag the WebEx element onto a Layout the system will popup a WebEx sign-in screen
You may need to disable pop-up blockers
If your web browser has your credentials stored, this popup might close on it’s own
- Once logged in you will use the Gear Icon in the upper right corner of the element to open the Edit Element controls
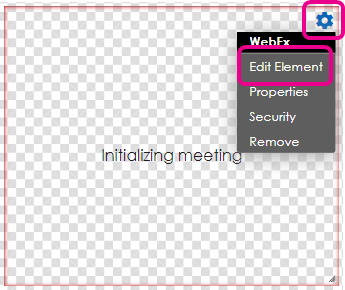
- After Selecting Edit Element you will have a drop-down where you can enter the meeting information
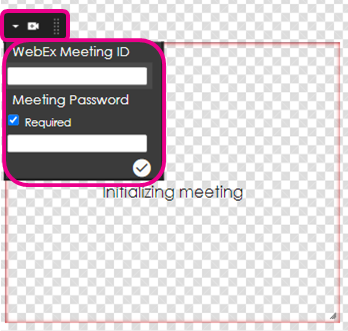
- The WebEx Meeting ID is also sometimes referred to as the Video Address in the WebEx invite information
- You can then resize the Meeting Element to be the area of the screen you wish it to take
- Then Publish your Layout and schedule it to screens with a Playlist