

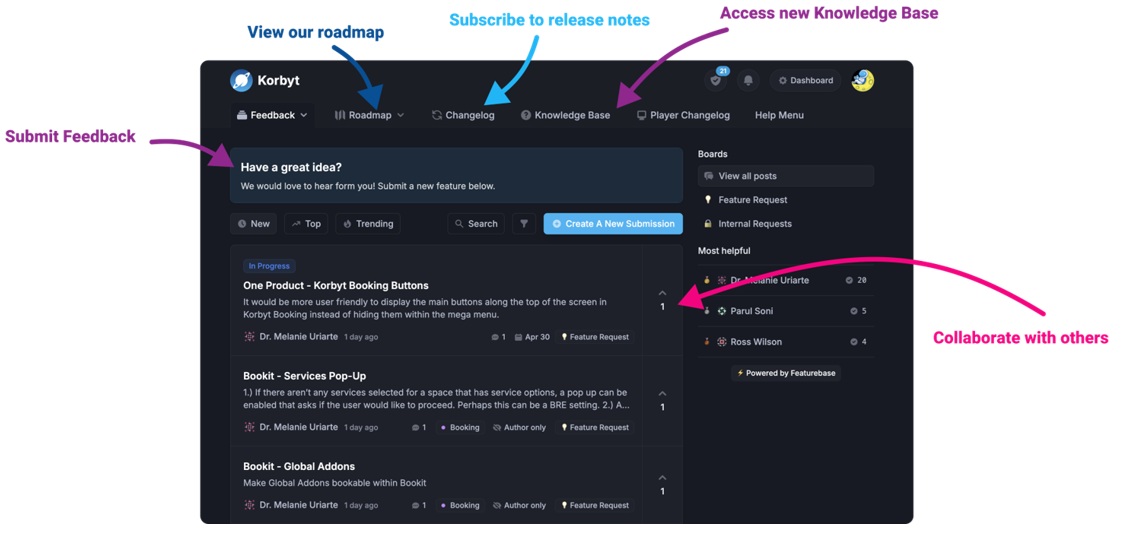
Our Knowledge Base Has Moved
The New Page landing page for the Knowledge Base is https://product.korbyt.com/help
Guides for the Elements can be found at: https://product.korbyt.com/help/articles/6713513-layout-and-message-builder-elements
Please update any of your bookmarks to the new Knowledge Base
For assistance on using the new Knowledge Base, we have a Welcome to the New Korbyt Knowledge Base guide
The new Korbyt Product Page also has sections for submitting feedback on system improvements, a view of our Roadmap of upcoming enhancements, and a change log of all updates.
The Video Element allows you to add either a video file or a video stream from HLS, DASH, UDP or a Live TV Passthrough.
If adding a new video, remember there is a 5 Megabit per second bit rate max on video files
Note: If you wish to use a YouTube video, Twitch stream, or other publicly available video source, you would want to use the YouTube element or External URL element.
Adding a Video Element
When you add a Video Element it will open on a window that will let you select an item from your Media Manager, Pixabay, or Pexels. You can also upload a new image by dragging the file on your computer to the dialog box.
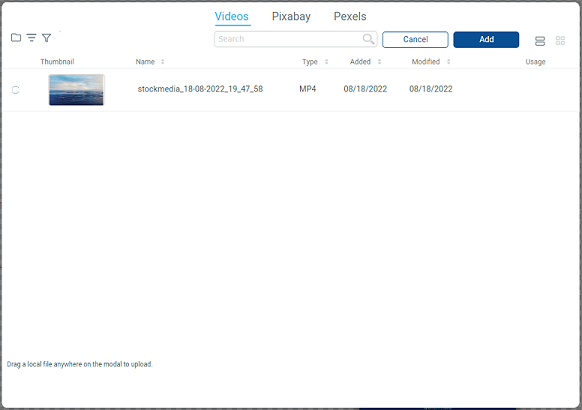
You can also select Cancel if this Video Element is going to be used to bring in Video Streams like HLS, DASH, UDP, or Live TV
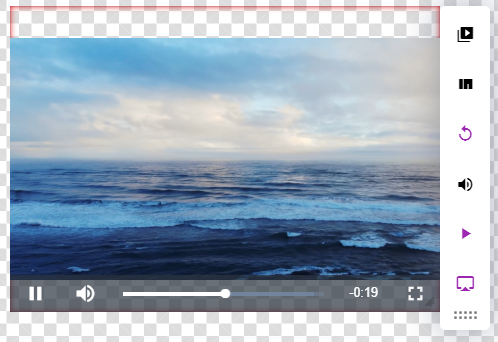
If you select an video file, it will fill the space and begin playing. You can use the Gear Icon in the upper right to open the Edit options
Editing a Video Element
| Edit Icon | Description |
|---|---|
| Media Library/ Video Source allows you to select a new video from the Media Library or select your external Video Source (DASH, HLS, UDP, Live TV)
If your video source is Live TV, the below edit options will not be available. |
|
| Stock Media allows to select a stock image. | |
 |
Loop Toggles if the video loops it’s playback. Purple is Loop On |
 |
Volume allows you to set the relative volume the video will play at. |
 |
Autoplay Toggles if the video will auto play. Purple is Autoplay on and should be the setting for Signage Layouts |
 |
Controls Toggles if the video will show controls at the bottom. Generally you would want the controls visible when making an interactive layout for a kiosk and invisible otherwise. Purple is Controls set to show. |