What is the Anchor tool used for?
The anchor tool is used for aligning two elements precisely. For example, if you have two picture that you would like displayed side by side, it can be difficult to place them directly next to each other without overlap and without making one slightly higher than the other. The Anchor tool allows you to do this perfectly.
The anchor tool is an element property and is available to use for any element within Korbyt Builder. Let’s look at an example of how to use the Anchor tool!
Example: Aligning two Elements Horizontally
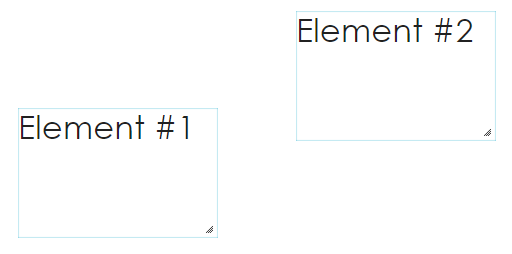
In this example, I have two text elements placed in my layout. I would like them to both be placed level with each other horizontally, but not touching. In the image below, I want to move Element #2 down to be even with Element #1
- First, we will ensure we have one element placed where we want it. Since I want these to be on the same vertical plane (Y-plane) I made sure that Element#1 was placed at the height I wanted from the top of the screen.
- Now hover your mouse over the top right corner of Element #2 and you’ll see a gear with a menu appear.
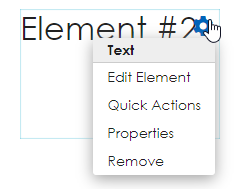
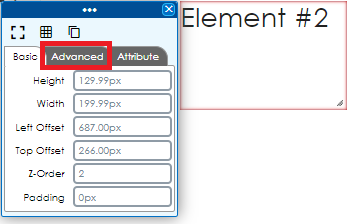
- Now click Properties and a new window will appear on the left side of the element.
- Click the Advanced tab
- Click the Anchor symbol and some new options will appear at the bottom.
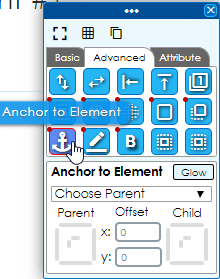
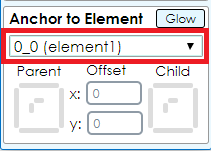
- Now click the Chose Parent drop-down and click the name of the element you want to align with. In this example, I’ll select element1
- Now at the bottom, where the ‘Parent’ and ‘Child’ squares are, click the bottom lines of each square, like this:
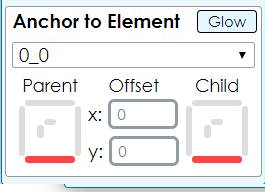
- You’ll see your second element immediately drops to the same level as the first element.
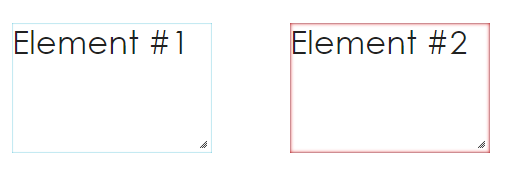
How the Anchor tool options work
Parent and Child outside borders
Now that we’ve looked at an example, you should have a better idea of how to use it, but what were we actually doing when clicking the bottom portions of the Parent and Child?
When we clicked the bottom line of the Parent (element1), we’re saying that’s the side of it we want the Child anchored to. We then had to click the bottom side of the Child (element2) to make element2 drop down the the same level as the bottom line of element1.
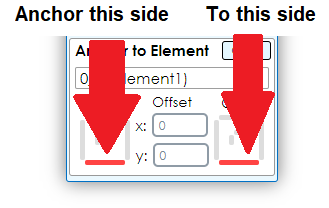
Parent and Child inside lines
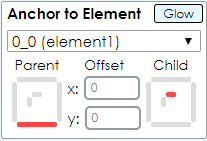
The small lines in the middle of the Parent and Child allow you to anchor your elements to the center of each other, either vertically or horizontally. This allows you to align the elements in a “stair step” or “pyramid” configuration. Going with the above example, if we were to click the top line inside of the child, like this:
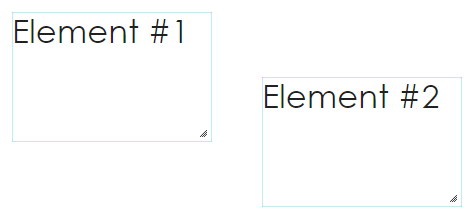
Then it would move element2 down o that the center of it, aligned with the bottom border of element1, like this:
Offset
The Offset options allow you to set elements a fixed distance apart, after aligning them. The x and y options are measured in pixels. So if we took our above example and set the y offset to 10, it would move element2 down 10 pixels:
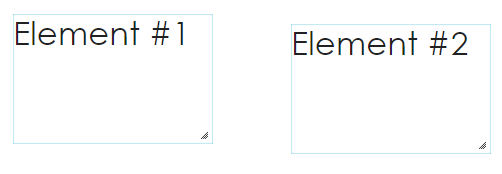
Since the x offset is set to zero, you might wonder why the elements are not directly next to each other. This is because we anchored on a Y axis (up/down) rather than an X axis (left/right) so the x offset does not apply.

