Our Knowledge Base Has Moved
The New Page landing page for the Knowledge Base is https://product.korbyt.com/help
The new version of this specific article can be found at: https://product.korbyt.com/help/articles/9789371-data-triggers-to-have-real-time-data-effect-layout-elements
Please update any of your bookmarks to the new Knowledge Base
For assistance on using the new Knowledge Base, we have a Welcome to the New Korbyt Knowledge Base guide
The new Korbyt Product Page also has sections for submitting feedback on system improvements, a view of our Roadmap of upcoming enhancements, and a change log of all updates.
In the design of a Layout or Message changes to what is seen, or how elements are formatted (background and text color) can be controlled dynamically by the information provided in a Data Integration.
This article focuses on how to establish the Triggers that control these options and presumes that Layout or Message already has a configured Data Subscription.
For help in establishing the data adapter, or the subscription within a layout see Working With Adapters and Data Subscriptions
- Open the Layout or Message in the Builder Tool
- In the Control Panel, Select the Advanced section
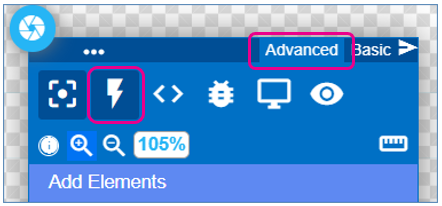
- Then click on the Lightning Bolt Icon
- This will open the Interactivity Consol where you can create Data Triggers (which are driven by the data provided by the subscription)
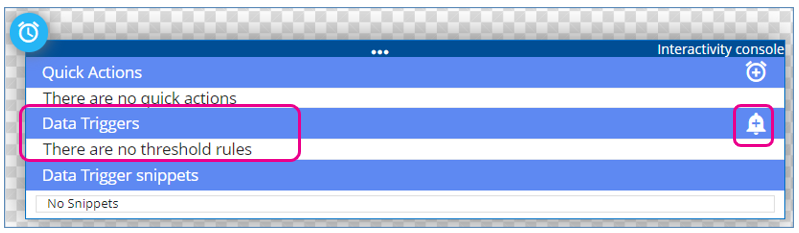
- Any Triggers already created will be listed and can be edited
- To add a new trigger, click on the +Bell icon to the right
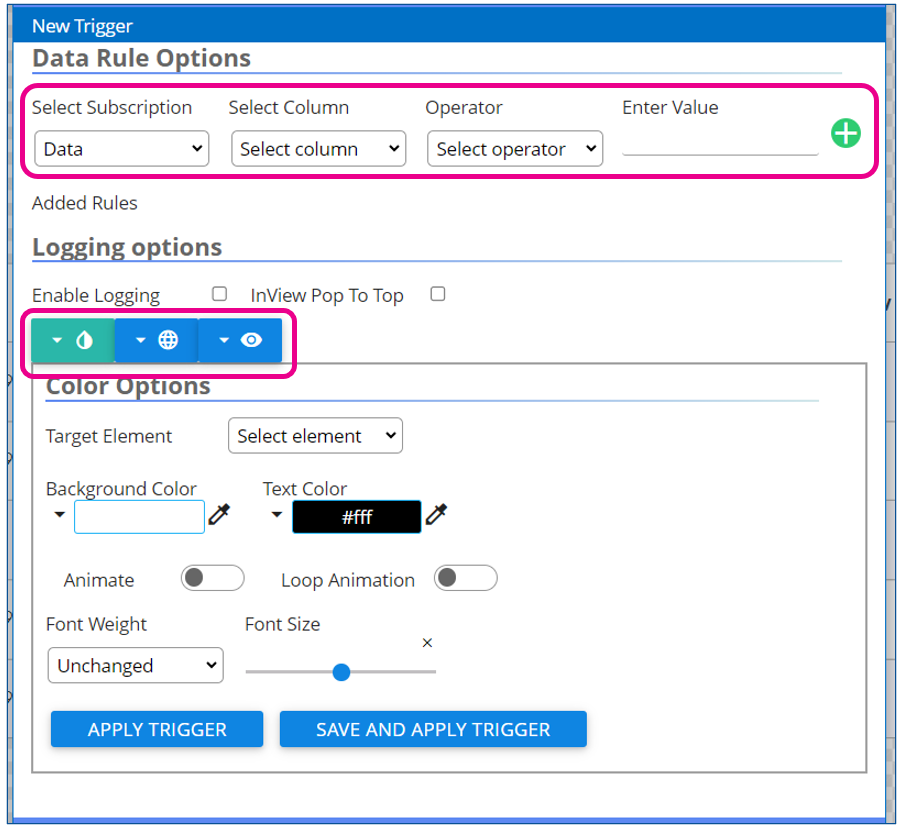
- The first section of the Trigger is the Data Rule
- Selecting the Subscription
- The Specific Column/Data Point to be evaluated
- The Logical operation (equal, not equal, greater than, or Range …)
- The value to be evaluated against
- The Bottom section controls the result
- Color Options (Shown above)
- Target Element – The layout element that will be adjusted based on the data
- If the target element is a data table, it will ask which if any specific column should be targeted
- Background and text color
- Font weight and size
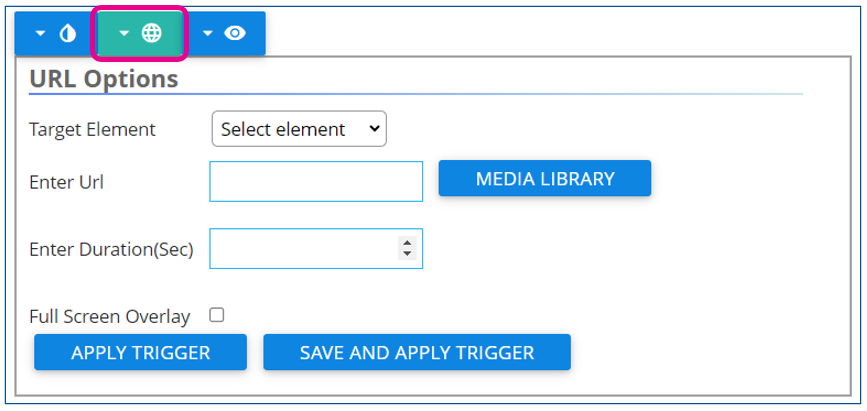
- Target Element – The layout element that will be adjusted based on the data
- URL Options
- Visibility Options
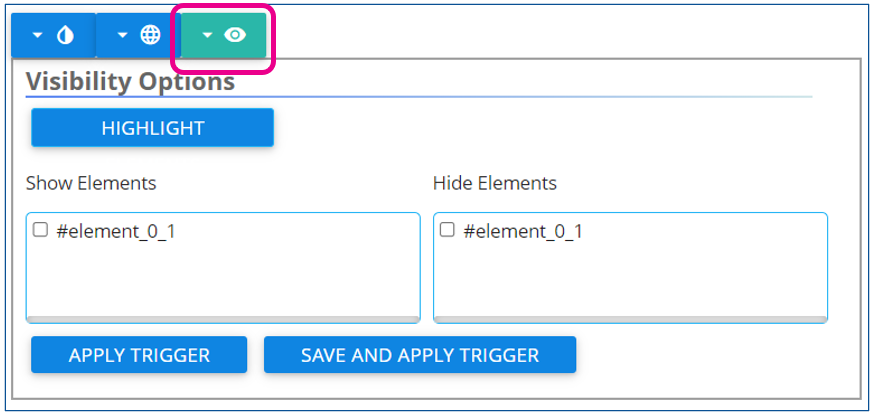
- Selecting which elements should be Shown or Hidden based on the rule being triggered.
- Color Options (Shown above)
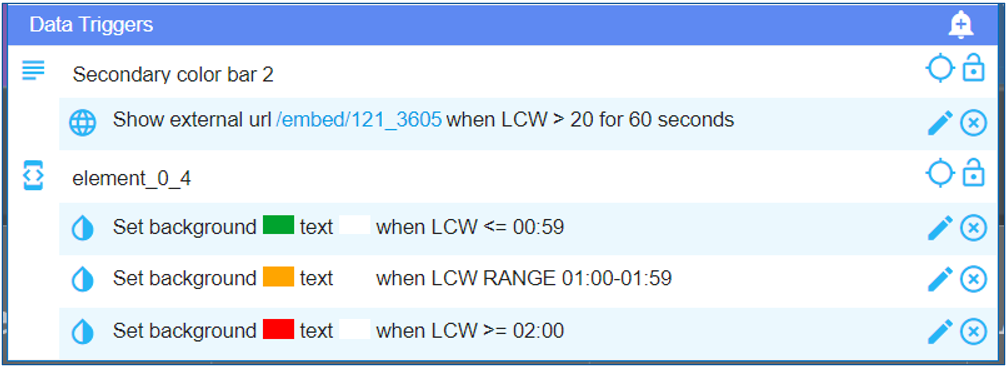
You can have multiple triggers built into a single design, shifting the visual as needed based on the data provided through the subscription.
While in the Builder Tool and activly editing the Layout or Message the triggers will not be activly changing the visual you see.
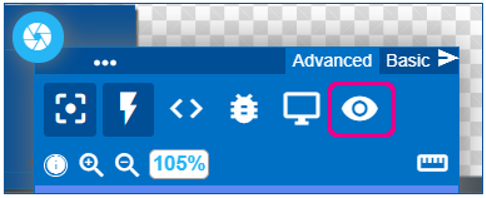
You can preview the result of the triggers by opening the preview window