
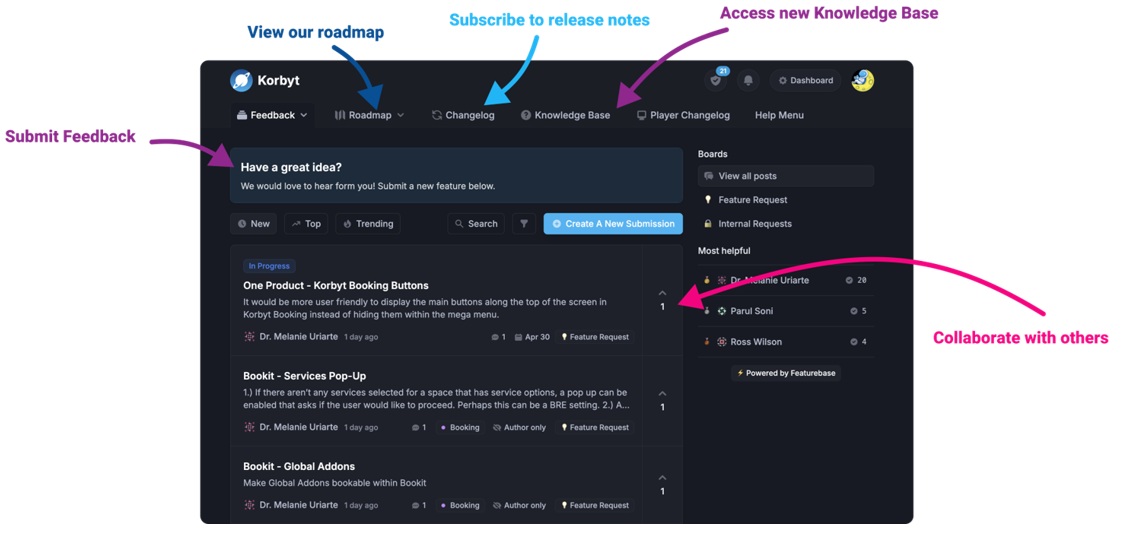
Our Knowledge Base Has Moved
The New Page landing page for the Knowledge Base is https://product.korbyt.com/help
The new version of this specific article can be found at: https://product.korbyt.com/help/articles/1266829-how-to-enable-player-sync-for-brightsigns
Please update any of your bookmarks to the new Knowledge Base
For assistance on using the new Knowledge Base, we have a Welcome to the New Korbyt Knowledge Base guide
The new Korbyt Product Page also has sections for submitting feedback on system improvements, a view of our Roadmap of upcoming enhancements, and a change log of all updates.
After reading this article the user will comfortably be able to enable Player Sync, configure the players and desired content to play on those players.
NOTE: Brightsign players are the only ones that can be synced.
Enable Player Sync
For Player Sync to be an option it has to first be activated within the Tenant’s Settings
- Open the Settings section by clicking on the gear icon
 in the upper right
 - In the Settings section select Signage at the top and then enable Player Sync

- Click save in the upper right to lock in this change
- It may be required to logout of your tenant and then back in (or refresh your web broaswer) to have the Player Sync feature be seen in the Mega Menu
 in the Device Management section
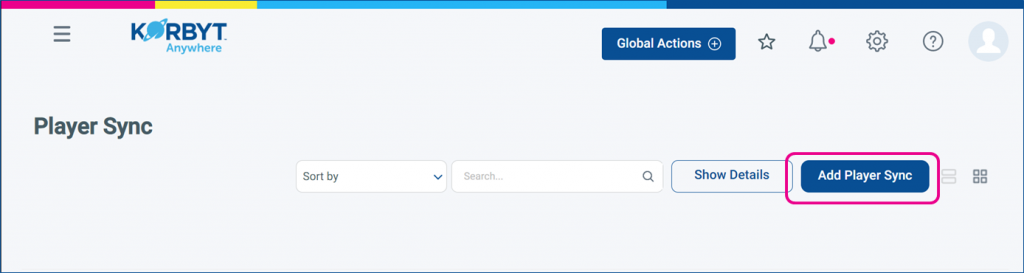
How to Add a Player Sync
With Player Sync enabled you can now create player synchronizations for Brightsign devices
- Open the Mega Menu in the upper left and select Player Sync in the Device Management Section

- In the Player Sync Menu click Add Player Sync to create a new player synchronization
- Enter the Sync Name, Sync Description and make the video wall selection, maximum are three Columns and three Rows, and click Next.

- Below are some samples of the video wall selection options


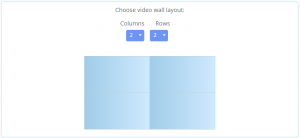
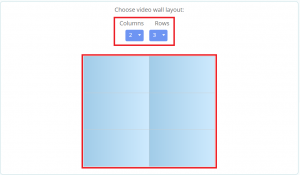

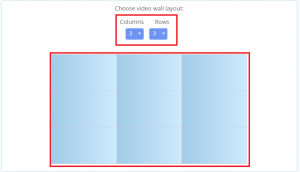
- After making the video wall Selection click Next.
- Assigning the player is the next step. From the available players drag and drop the desired players
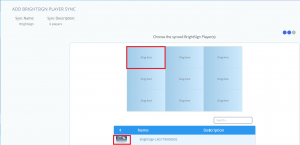
- (NOTE: Brightsign players are the only ones that can be synced).
- When selecting the players, a warning will appear (All content assigned to this player will be removed once it is Synced). Click on Proceed button for the next step or click Cancel to cancel the transaction.

- Click Next to proceed with Next Step.

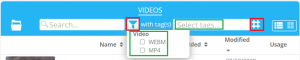
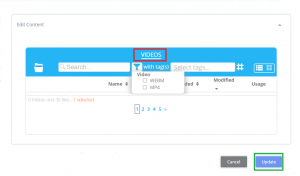
- Selecting Content is the next Step. Videos is the only option available for content to select.
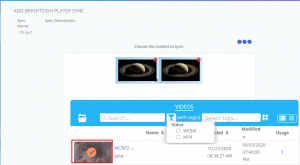
- By clicking on the Video option, the type of video can be selected: WEBM or MP4. User will also have the option to select Tags.
- Click on the Save button to complete creating the player sync
Edit / Delete Player Sync
Once the Player Sync has been created, it can be edited or deleted
- To edit/Delete player Sync click on the Edit or delete button


- Below we will show more details about the edit option. To edit click on the Edit button. The used should be able to Edit Info, Edit Players or Edit Content.

- Click on the down arrow to Edit the Info.
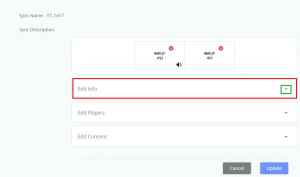
- The window will expand allowing the user to make modifications to the Sync Player info like the Sync Name or Sync Description. Clicking on the up arrow will collapse the window.

- Click on the down arrow to Edit Players.

- The window will expand allowing the user to make modifications to select different players. Clicking on the up arrow will collapse the window.

- Click on the down arrow to Edit Content.

- The window will expand allowing the user to make modifications to select different video for the content to be displayed. Clicking on the up arrow will collapse the window.
- Once done making all the changes click on the update, to complete the edit transaction.