
Our Knowledge Base Has Moved
The New Page landing page for the Knowledge Base is https://product.korbyt.com/help
The new version of this specific article can be found at: https://product.korbyt.com/help/articles/1478365-how-to-create-and-update-a-csv-adapter
Please update any of your bookmarks to the new Knowledge Base
For assistance on using the new Knowledge Base, we have a Welcome to the New Korbyt Knowledge Base guide
The new Korbyt Product Page also has sections for submitting feedback on system improvements, a view of our Roadmap of upcoming enhancements, and a change log of all updates.
This article will review the basics of creating a CSV Data Adapter
Creating the CSV Data File and Importing it to Korbyt
- On your computer create the CSV data file using your application of choice
- Be sure to save the file in CSV format
- Import the CSV File to your Korbyt Media Manager
- This can be done manually
- For help reviewing Manual import steps see – Using the Media Manager – Importing Media
- It can also be imported through a Courier
- For help with couriers see – Setup a Courier Rule
- This can be done manually
Creating the CSV Data Adapter
Once the CSV file is in the Korbyt media library, you can create the adapter.
- If not already in the Integration section, open the Mega Menu, then in the Advanced section click Data Integration
- In the Upper right click Create Adapter
- You will be required to Name your Adapter (description is optional, but can be helpful to other users if the name is not clear)
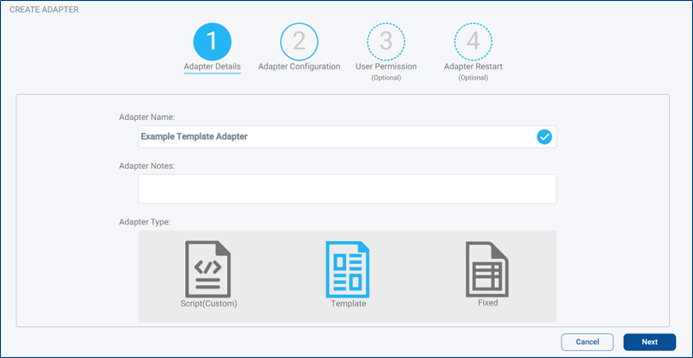
- And click the Template icon in the middle, and click Next
- On the next Screen, Adapter Configuration, you will have a Left and Right Side
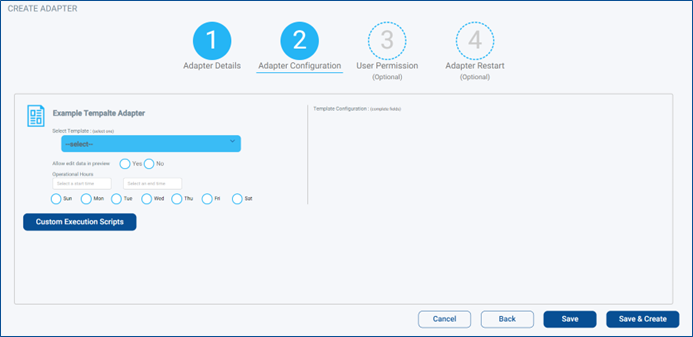
- On the Left Side, use the Drop-Down to Select CSV Adapter, and the view will change
- On the left, you can configure several options
- Allow edit data in preview (yes/no)
- Yes, will allow for manual adjustment of the final data table inside of Korbyt
- If the adapter continues to run, these edits will be overwritten when the adapter updates
- Operational Hours
- The days and times the adapter will run to gather new data from the source
- Customer Execution Scripts
- Adding any required, Pre-Execution Script, Pre-Insert/Update Script, Pre-Delete Script, Post-Execution Script
- Allow edit data in preview (yes/no)
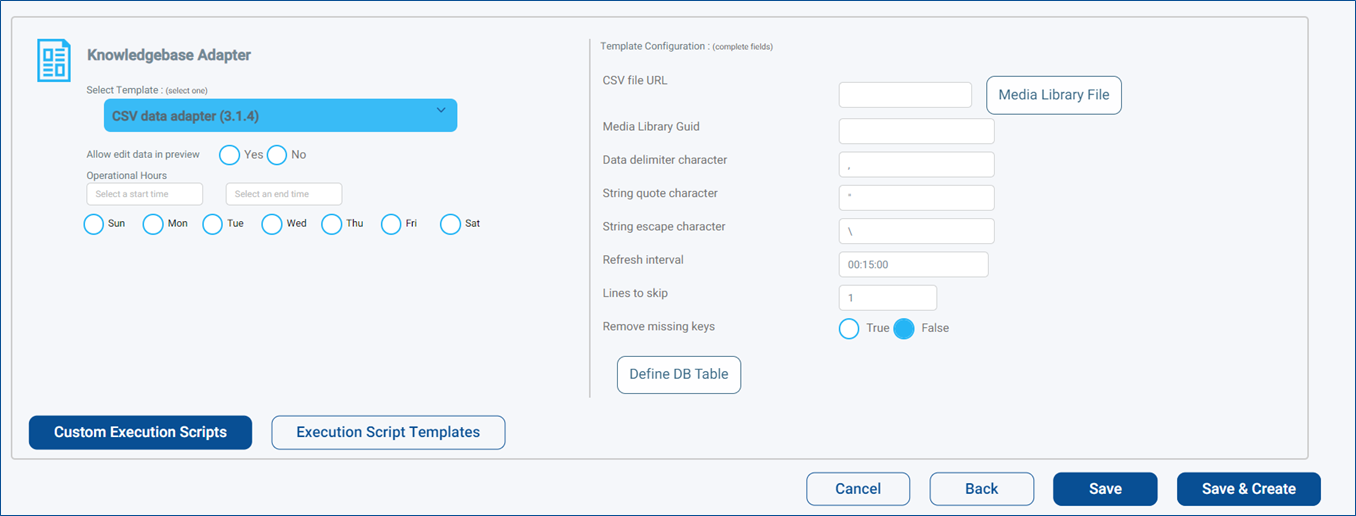
- On the Right you will configure the details of the adapter itself
- Use the Media Library File to select the CSV file that has been uploaded to the Media Manager
- Set the Data delimiter character, String quote character, and String escape character for your data table
- If you do not use customer values, leave them at their defaults
- Refresh interval sets how often the adapter reviews the CSV file for new information
- You will now need to Define the DB Table Columns
- Click Defining the DB Table to create the structure for your database
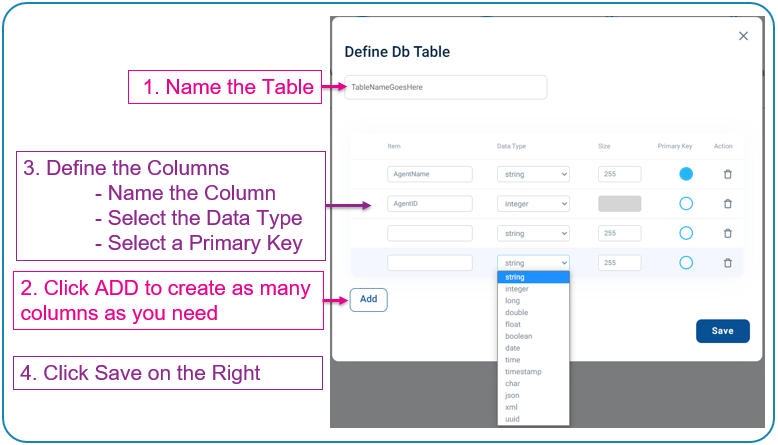
- When you click save you will see that the Define DB Table has gone green
- On the Left Side, use the Drop-Down to Select CSV Adapter, and the view will change
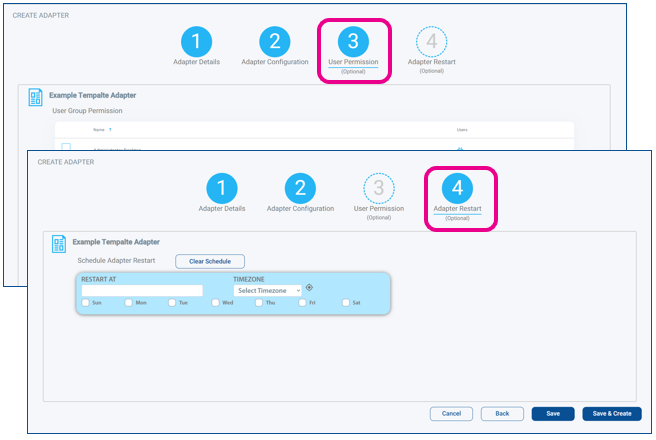
- Optional Steps include Configuring Users Permissions and Adapter Restart by clicking those steps at the top
- Once Configured click Save & Create you will see a dialog box that will tell you the progress of starting up the Adapter
You now have a Data Adapter that periodically scans the CSV File for information and puts that information into a data table
NOTES and Best Practices:
- Uploading Updated Info
- If you need to update the information in the CSV File, when Uploading the new file, make sure to
- Keep the same exact file name as the one already present
- select “overwrite file if it already exists” when importing the new file
- This will allow the adapter to see the new file, but with the same full name the original had
- If the file has a different name, or is the overwrite option is not selected the adapter will continue to look to the original file
- This can be corrected by editing the adapter and selecting the new file from the media manager
- If you need to update the information in the CSV File, when Uploading the new file, make sure to
- Adding New Columns to the Data
- If you need to add new columns to the CSV file you will need to Edit the Adapter and add the new columns to the Defining of the DB Table (see steps above) before importing the new file
- CSV Files Structure
- The CSV File expects Comma Separated values and you should not use other delimitation marker
- As a best practice there should be a unique value for each entry (row) to be able to use as the primary key value
- This could be an employee ID or email, a Queue ID value, or an incremented number so each row is unique in some way the system can see
For More Information see the full Working with Data Adapters Article