
Our Knowledge Base Has Moved
The New Page landing page for the Knowledge Base is https://product.korbyt.com/help
The new version of this specific article can be found at: https://product.korbyt.com/help/articles/3906075-launchpad-options-and-settings
Please update any of your bookmarks to the new Knowledge Base
For assistance on using the new Knowledge Base, we have a Welcome to the New Korbyt Knowledge Base guide
The new Korbyt Product Page also has sections for submitting feedback on system improvements, a view of our Roadmap of upcoming enhancements, and a change log of all updates.
Launchpads allow you to add creative content within a playlist that a player will run for a period of time across various displays. A variety of launchpad templates display on the Content > Launchpads screen that you can customize for your specific needs.
To customize a launchpad template:
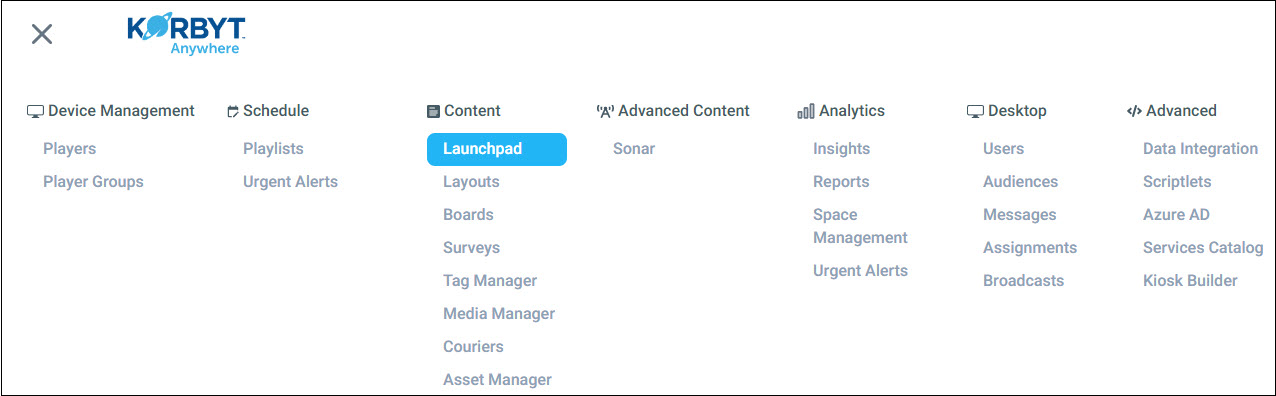
- Click the hamburger icon and navigate to Content > Launchpad.
- Find the launchpad template that you want to customize by searching for it or scrolling through the available launchpad templates.
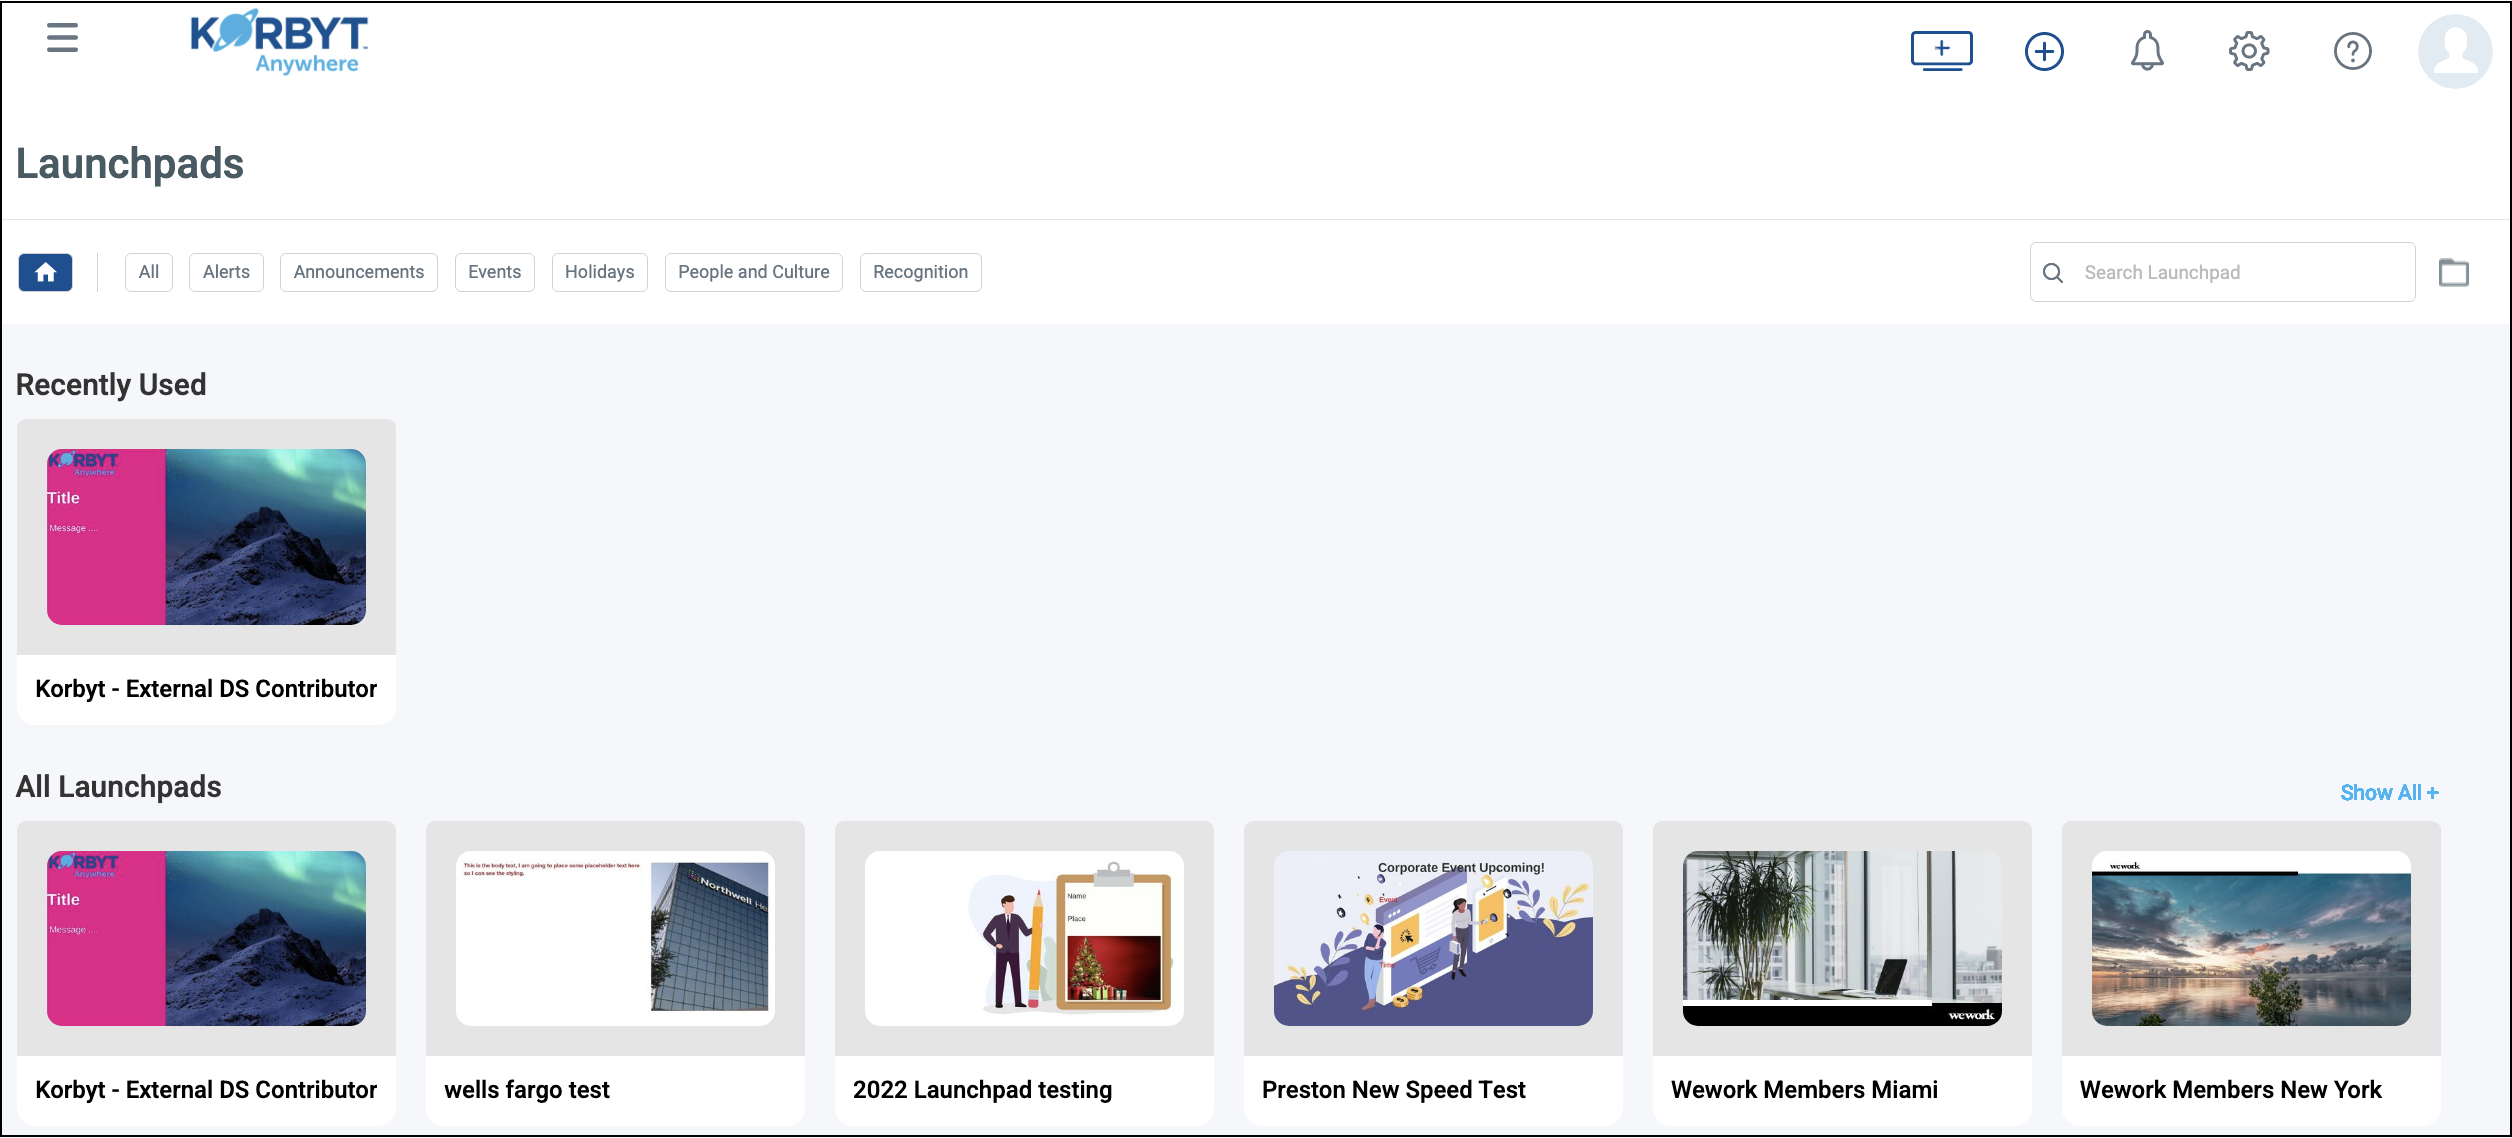
- Click the launchpad template.
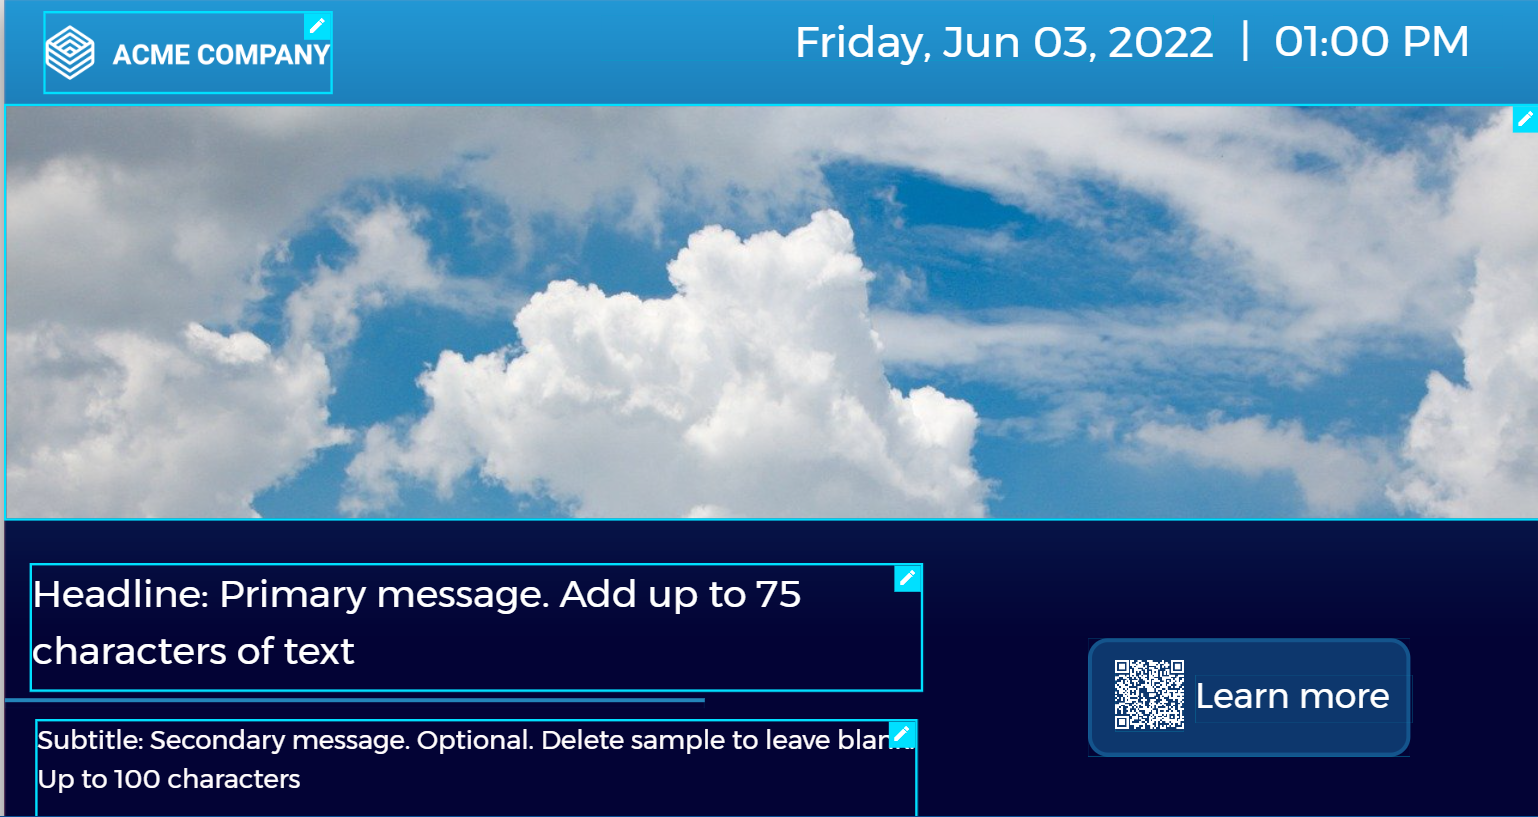
- Update any of the following elements by clicking anywhere within the blue highlighted area for each element:
Element Description Image Add or update the images/logos by selecting the appropriate files from the Media Manager, your local drive, or both. Video Add or update the videos by selecting the appropriate files from the Media Manager, your local drive, or both. Text Add or update the text in the designated text box within the template or in the left pane. QR Code Enter a URL for the QR code to open. NOTE: Depending upon the launchpad template selected, some of the elements may not be available.
- Publish the launchpad to the associated players or player groups:
- Click the Publish button in the upper right of the screen.
A Publish Launchpad wizard appears. Click the tabs or the Next button to proceed to the end of the Publish Launchpad wizard.
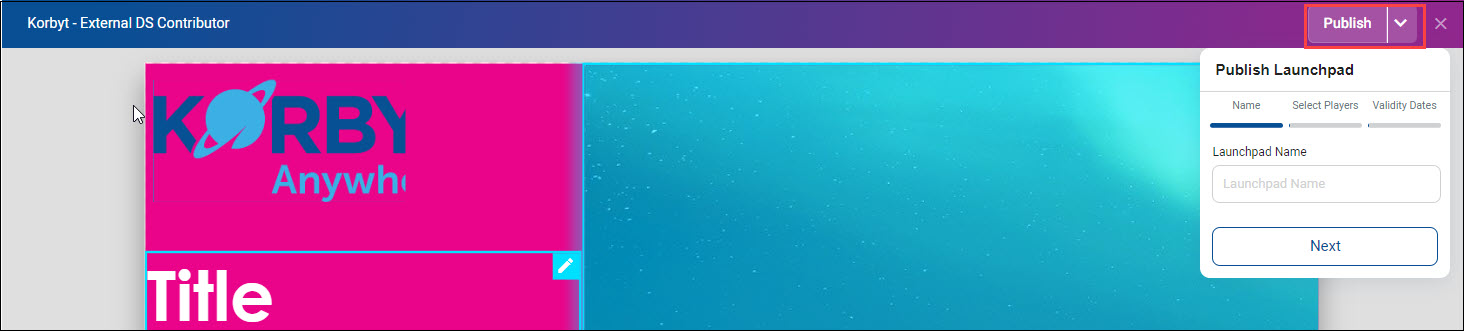
- Enter a name for your custom launchpad.
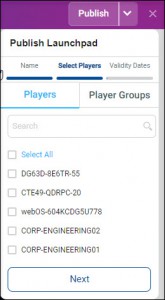
- Add at least one player and/or player group.
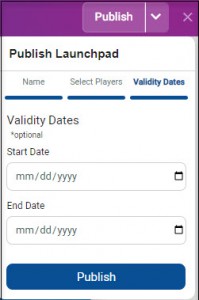
- Enter any additional information if necessary such as validity dates.
NOTE: Before you can set validity dates, the Enable Launchpad Validity Date toggle must be enabled under CMS Settings > Signage > Global Settings. For more information, refer to Using the CMS Settings. - Click the Publish button that appears at the end of the Publish Launchpad wizard.
- Click the Publish button in the upper right of the screen.